Quantcast
Channel: art electronics
Viewing all 160 articles
Browse latest View live

Artist Review: Artisul D13 Pen Digitizer Display Sketch Pad

$
0
0


Artisul D13 is the latest pen digitizer display from the Taiwan-based company UC Logic. A pen digitizer display is a monitor that you can draw on.

The pen digitizer display market space is getting more competitive every year. That's good news for digital artists because competition improves products and also keeps prices competitive.

The Artisul D13 competes with the Wacom 13HD which has been out since 2013 and the Bosto 14WX from 2015.

UC Logic's technology has been used by other companies to manufacture pen digitizer displays for years, so they aren't exactly a newcomer.

The unit I'm reviewing is on loan from UC Logic. I've used it for several weeks on Windows 10, and Mac OS 10.9.5 & 10.10.5.

Packaging


The unit came safely packed. You have to open three boxes to get to the monitor.

There's a big brown box with two smaller boxes inside that contain the monitor and stand respectively. The stand is optional and sold separately.

The things included are

  • Artisul D13 monitor
  • HDMI cable
  • USB cable
  • USB Y-cable
  • Power plugs: double round, double flat and the T.
  • Pen, case and stand
  • 9 replacement nibs
  • Manual

There's no driver disc so you have to download the latest drivers from Artisul's website.

Hardware and design

Build quality is surprisingly good. Everything feels sturdy.


The unit is slim like a tablet. The matte material used for the buttons and the left side feels nice to touch and have firm feedback when you press them.


Other parts are hard textured plastic and the edges are finished off with glossy plastic. On the back are large pieces of rubber to prevent slipping on the table.


There are only HDMI and USB ports on the Artisul D13. If your computer doesn't have HDMI port, you'll have to spend additional money for an adaptor, e.g. DVI to HDMI or mini DisplayPort to HDMI, and I'm not sure how well that will work.


There are two ways to power the display. If your computer has a USB 3 port, it may be enough to power the display without using the power outlet. The second way is to extend the USB cable with the Y-cable to draw power from the power outlet.

Either way. you have to connect the USB cable to the computer so that the stylus can be detected.


The optional stand cost USD $45.95.


The stand is useful to prevent the neck strain from drawing on the monitor that's flat on table. It also helps prop up the screen vertically so that you can view it straight on instead of staring down all the time which is really bad for posture.

The stand is easy to fix on with the quick-release latch. The monitor can then be place on top of it. There are rubber supports on all the important areas to prevent slip. There's no locking mechanism, as such, you can use the stand with any other tablet.


These are some positions of the stand.


This is how it looks like when the cables are connected on the right side. The lighted power switch is further down. Note that there are no buttons for calibration which is done through software.

The screen


The unit I received has a screen protector already pasted on it. The screen protector is just a thin film on the glass. It's matte with some texture that provides more control while drawing. To me, it feels like drawing on a Wacom Intuos or those Huion tablets. This is definitely better than drawing on slippery glossy glass.

The screen resolution is 1920 by 1080. It uses an IPS panel so the viewing angles are decent.

Colours are good but I think they could be better because they might be affected by the screen protector. Also, the colour gamut isn't exactly excellent so that affects the colours as well. Overall, I find the colour reproduction satisfactory for the price.

Colour calibration is required to get the colours to show properly. I find the default to be on the warm side, with a tint of yellow. On Windows, a colour calibration app is provided with the installation of the driver. On Mac OS, you have to calibrate it using System Preferences.

Drivers

Few things to note.

1. Make sure you uninstall other tablet drivers before installing Artisul D13's.

2. Connect the monitor to your computer before you install the drivers. The monitor has to be detected first.

On the Mac, after driver installation, you can find the driver settings inside the Applications folder.

On Windows, the drivers are separated at two locations: Start menu and taskbar. See below:

At the Start menu, you can find the colour calibration app and a digital manual with helpful troubleshooting tips. On the taskbar, there's a small tablet icon that when click, gives you the options to customize the monitor and stylus.


These are the settings you can change with the driver:

  • Functions of the clicks and two shortcut button on the stylus
  • Right-handed and left handed option
  • Functions for the tablet's shortcut buttons and wheel
  • Pressure sensitivity
  • Calibration for parallax


For the monitor's shortcut buttons, they are pre-assigned to specific tools and commands for specific software, namely Photoshop, Illustrator, Clip Studio Paint and Corel Painter.


At the time of this review, Mac users have the ability to customize their own keyboard shortcuts. I was told that functionality will be added in the Windows drivers in the future. Having the ability to customize your own keyboard shortcuts is definitely better than being restricted to the shortcuts provided by the driver.

Pen


The stylus comes in a sturdy case with a magnetic latch. 9 replacement hard tips are provided. The stylus feels a bit light and probably could be slightly heavier. It's not battery powered.

Parallax


The gap between the glass and the LCD screen contributes to some parallax. That picture above is shot with the camera from the left so the parallax looks quite obvious.

Calibrating the stylus' cursor is required to minimize parallax.


The picture above show what it's like from the point of view when drawing. It took me some time to get used to it and after that I don't find it to be a big issue.

Drawing performance


Pressure sensitivity works well and the strokes taper nicely for all the drawing software that I tested with, namely Photoshop, Illustrator, Mischief and Medibang Paint Pro.


These are sketches on Photoshop with the round brush.


These are sketches with the Mischief app.

Glitches

Initially, I faced some glitches but they have all been resolved. I still want to list them here so that they can help others.

Mac glitches
First, there's this thin horizontal line that runs across at the top of the screen. Second, the screen seems to display white pixels static. These two problems are something I would associate with bad cable connection however it does not affect my Windows machine. Turns out it really is a problem with the cable because the replacement cable mailed to me solved the problem instantly.

Windows glitches
The glitches on my Windows machine were caused by the driver but after support staff sent me the latest drivers, everything was resolved.

My original problem was the Artisul D13 does not like to work with other monitors. When I use extended display mode and click on the Artisul, the cursor and apps will disappear. If you're using only the Artisul D13 alone, there's no issue. Anyway, with the new drivers, there should be no problems with extended display mode anymore.

The other issue is with cursor tracking which will be off whenever I'm in some drawing app. To solve that, just go to the display settings and "change the size of text, apps and other items" to 100%, and use the same resolution (1920 by 1080) for both screens.

Warranty and support

A one year warranty is provided for the monitor.

If you have problems, you can also submit a ticket to the support forum. They actually have someone who troubleshoots problems on the forum and is quite responsive.

Conclusion

After solving the initial problems were with the faulty HDMI cable and drivers, I've now used the display for a few days without additional problems.

Overall, in terms of value, it's great for drawing. The pressure sensitivity works well, lines come out as expected, and the overall build quality of the product is good. So yeah, it's worth the money, and it's cheaper than the Cintiq 13HD.

I can't compare the performance against the Cintiq 13HD though since I've not used that before. But if I were to choose between the D13 and 13HD, I'm leaning towards the D13 because of the price difference which to me is quite significant.

One last thing, read the manual first, and also the digital manual after installation. There are useful information to setting up the monitor.

Pros and Cons

+ Good build quality
+ Tactile buttons with good feedback
+ Can be powered by USB 3 port
+ Stand can be used for other tablets
+ Stand can be adjusted to many positions
+ Cheaper than Cintiq 13HD
+ Runs cool, only the bottom right is slightly warm
+ Wireless and battery-less pen
+ 9 replacement nibs provided
+ Rubber at the all the right places to prevent slip
+ Pressure sensitivity works great
+ Strokes taper well and have no jitter
- Windows drivers are at different places: Start menu and taskbar
- Parallax exists, corrected by calibration
- Windows drivers can't customize specific keys or combos (yet)
- Only HDMI port. Perhaps adapters should be provided or as option to purchase

Availability

You can find the Artisul D13 on Artisul's website or if you want to support Parkablogs, you can get it from the following Amazon links below:
Amazon.com | Amazon.ca | Amazon.co.uk | Amazon.de | Amazon.fr | Amazon.it | Amazon.es

Tags: 


Artist Review: Dell U2717D IPS monitor (2560 by 1440)

$
0
0

Thanks to Dell for sending me another monitor to review, this time it's the Dell U2717D monitor. The previous one I reviewed was the Dell UP2716D. You can consider the U2717D the budget IPS panel (at 27-inch) since the premium panel spot is taken by the UP2716D.

This review will be from the perspective of an artist who work for print and digital. I also edit photos and videos, though not professionally.

For me to pick a monitor for graphic design or digital content, I will always choose one that has an IPS panel, matte screen and accurate colour reproduction. The Dell U2717D meets those criteria.

Specifications

Viewing size27-inch
Panel typeIPS
Resolution2560 x 1440 @ 60Hz
Contrast Ratio1000 to 1 (typical)
Brightness350 cd/m2 (typical)
Response Time6ms
Color Support16.7 million colors
Color Gamut99% sRGB
BacklightLED
CoatingAnti-Glare with 3H hardness
AdjustabilityTilt, Swivel, Height Adjust
PortsDP, mDP, HDMI, 4 x USB3

What the monitor comes with

  • Monitor
  • Stand
  • Power Cable (varies by country)
  • mDP-DP Cable
  • USB 3.0 Cable
  • Drivers and Documentation Media (CD)
  • Quick Setup Guide
  • Safety and Regulatory Information
  • Factory Calibration Report

The stand and mount are the latch-on type that's very easy to fix on. If you use a VESA mount, the measurements are 10 by 10cm.

Design of the monitor

Main highlight of the design would be the 7mm bezel that runs across the four sides of the screen. That bezel is about as thick as my Mac OS menu bar. The design is very similar to the UP2716D with the only difference being the UP2716D has a thicker bezel at the bottom.

Other notable features would be how slim it is. It's a LED screen that doesn't use a lot of electricity and hence does not give out much heat.


The ports included are the DisplayPort, HDMI and USB3. I recommend using the DisplayPort so that you can run the native resolution at 2560 by 1440. HDMI cables supposedly can support that resolution, but somehow, my Playstation 3 HDMI cable wasn't able to do that when used with the display.


Two USB 3 ports are by the left side. There's no card reader in this monitor so for photographers, you'll probably find it more convenient to plug in your own card reader permanently to one slot. USB 3 port can transfter 10GB under 2 minutes.


The menus and power physical buttons are below the bottom right. You can see the lit power button but it's not too distracting.

Performance

Dell monitors are supposed to be factory calibrated. Somehow for the set I received, I had to do a bit more calibration to get the colours I want.

After calibration, the colours look good. Although I feel that the UP2716D provides a bit more depth to the colours. However, you really need two monitors side by side to compare to see the difference, or you'll need a professional calibrator to tell.

Resolution at 2560 and 1440 on this 27-inch screen is great for graphic design work. The high resolution enables you to have a lot of working space on the desktop, and if you're layout out pages under A3 in size, you can view those pages at 100%.

I did not try gaming on it since I no longer have console. But I used to play Playstation 3 on my other 5-year old U2711 so this new U2717D has the same frequency, therefore it should not have any problems with console games. For gamers who want a faster refresh rate, Dell has other monitors and they are usually ones with glossy screens.

Backlight bleeding

There is backlight bleeding when the screen filled with black in a dark room.


For my set, the areas affected are top left and right, and bottom right. I compared it, again, to my old U2711 and that workhorse has even less to no backlight bleeding, and after 5 years still continues to amaze me, but it's starting to turn yellow. The UP2716D is still the champion when it comes to quality with no backlight bleeding, in fact you won't even know the screen is turned on.

Backlight bleeding is going to be an issue for those who likes to watch movies in a dark room, and where the movies have black bars top and bottom. If you're using this in an office environment, it's not really a big issue.

IPS glow? Didn't notice any.

Video review

Conclusion

This screen is for those who have a budget and want a quality IPS screen for better colour reproduction, especially those who do any sort of visual graphic work, e.g. photo or video editing, graphic design, digital art.

For those who have more budget, I recommend the UP2716D which to me is the better monitor. Since I belong to this group, this is the monitor I prefer when compared the U2717D. I've to say that I'm very tempted to get the UP3216Q also for the size and 4K resolution.

Availability

You can read more reviews on Amazon links (below), or read the full specifications on Dell's website.

| Amazon.co.uk | Amazon.de | Amazon.fr | Amazon.it | Amazon.es

Tags: 

Artist Review: Best Stylus for Drawing on the iPad

$
0
0

The search for the best stylus has been a frustrating one for me. Over the years, I've bought too many stylus, as you can see in the photo above.

Now that I have all these stylus, I can also tell you which one is the best.

Before you read further, there are some things to take note.

  • Everyone's drawing preference is different. A stylus that I like might not be the one that you like.
  • How well a stylus work also depends on the app support
  • To prevent disappointment, check the list of styluses supported by the app you want to use
  • Check to see if your iPad will support the stylus
  • Many digital stylus have the slow wavvy diagonal lines problem. Some apps correct for that.

I've also reviewed some of the stylus in greater detail. Their links will be provided.

The best stylus for drawing is the Apple Pencil


The Apple Pencil is the best stylus but unfortunately it is currently only compatible with the iPad Pro.

Apple Pencil has nailed the implementation of pressure sensitivity in a stylus. You can use the softest of pressure while drawing and the iPad Pro will be able to pick up the line. In addition, Apple Pencil also supports tilt detection and that works flawlessly too. The design, look and feel also score top marks with me.

I'm not sure how Apple handles palm rejection on the iPad Pro but it is so much better than using third party styluses on smaller iPad.

Hopefully Apple will expand the compatibility to the iPad Air and iPad Mini.

The next best drawing stylus with pressure sensitivity


The Adonit Jot Touch with Pixelpoint and the Wacom Creative Stylus 2. I prefer Adonit Jot Touch simply because I'm starting to have connection problems with Wacom Creative Stylus 2.

Both stylus connect using Bluetooth, have hard tips and two shortcut buttons.

Pressure sensitivity works well and is almost comparable to the Apple Pencil. The small tip allows you to see what you're drawing.

You can see the listed of apps supported by these two styluses at
http://www.adonit.net/jot-ready-apps/
http://www.wacom.com/en-us/products/stylus/intuos-creative-stylus-2

The best drawing stylus without pressure sensitivity


Adonit Jot Pro Fine Point gets my vote. The transparent disc at the tip lets you see what you're drawing and this is easily the most accurate non-pressure sensitive stylus I've used. This is a good stylus for drawing but not as good for writing. This latest edition of the Jot Pro has a cap to protect the disc.

Adonit also has a variation with a built-in ballpoint pen called the Adonit Switch.


Adonit Mark is also a good stylus to consider. The tip is made of some mesh and is more durable than the common rubber tip. It's quite smooth when drawing on the glass surface but not to the extent that it's slippery. This stylus has a nice solid feel and weight.


This is the Wacom Bamboo stylus with rubber tip. I just don't like the feel of the rubber on glass. Get the Adonit Mark instead.

The stylus that's most fun to use


Pencil by FiftyThree is a rubber-tip stylus designed specially for use with the Paper drawing app.

It is only with the Paper app that you can get to use all the features of Pencil, such as the ability to use the side of the tip to create broad strokes, use the back of the stylus as an eraser, and also turn on palm rejection. Palm rejection implementation can be inconsistent with other drawing applications but here with the Paper app and Pencil, it's almost flawless.

If you're using Pencil with other drawing apps, it's no different from other rubber-tip stylus.

Best stylus for writing

I've never found the best stylus for writing actually, but if I really have to pick, I say go with Adonit Dash.


Adonit Dash is a battery powered stylus that somehow doesn't need to connect to Bluetooth in order to work with your iPad. Because of that, it can also work with other brands of tablets.

Highlight of this stylus is the fine hard tip. It's small so it doesn't block what you can see.

Downside is diagonal lines are more wavvy than other digital styluses.

The rest


This is the Wacom Fineline 2. It has pressure sensitivity but if there's already the Wacom Creative Stylus 2, why would you want to get this Fineline 2?


This is the Adonit Jot Script 2. It's a stylus designed for writing. If you can get Jot Dash at a cheaper price, why would you want to get the Jot Script 2?

Conclusion

If you have the iPad Pro, then getting the Apple Pencil is a no brainer.

If you're using a iPad that does not support Apple Pencil, I recommend Adonit Jot Touch with PixelPoint.

Tags: 

Review 2: XP-Pen Artist 22HD Pen Digitizer Monitor

$
0
0

XP-Pen 22HD is a pen digitizer monitor, another one of those Wacom Cintiq competitors to enter the market recently. Competition is fierce. And each year, the products just get better and we have more variety.

XP-Pen is a company started in Japan in 2005 and was only recently incorporated in USA in 2015. They have been producing the technology for making digital tablets since 2005. I've never heard of them until I saw the XP-PEN 22HD which, if I'm not wrong, is one of the earlier products sold under their own brand.

By the way, the unit I have is a review unit sent to me by XP-PEN. Thanks! I've used it for a few weeks and now it's time to share my opinions. In this review, I'll talk about using it on both Mac and Windows.

Packaging

There's nothing too special about the packaging. The monitor was packed safely with thick padding inside a brown box which is inside another bigger box.


This is how the monitor looks like after set up.


The items included are:

  • The display
  • mini-DisplayPort to HDMI adapter
  • USB cable for connecting the display and computer
  • HDMI cable
  • VGA cable
  • 2x stylus pen with stand and 8 replaceable nibs
  • Power cable
  • Charging cable for the pen
  • Manual and driver CD
  • Black glove

Connection ports


The ports on the back of the display are for power, USB, HDMI, VGA and DVI

Important thing to note is while there's a DVI port, there's no DVI cable included.

If you're using a Mac, you can output using mini-DisplayPort and HDMI. A useful mini-DisplayPort to HDMI adaptor is included. For PC users, just make sure your graphics card has either HDMI or DVI ports (with your own DVI cable). Avoid using the VGA cable if you want the best image quality.

Build quality and design and specifications

This is an IPS panel running 1920 by 1080 resolution. Colour reproduction is good. I did not need to calibrate the colours out of the box. Viewing angles are good too with very minimal or indiscernible colour shift when you move your head around.

The screen is quite glossy so if you have light coming from your back, you're going to see reflections.

Design of this monitor, the front especially, reminds me of Apple Cinema Display because of the rounded corners, black bezel and glossy screen above the actual LED screen. Other than that, the rest of the monitor is uses those hard plastic. Overall design is actually quite similar to the Ugee 2150 and Huion GT 220 with minor differences.

Menu buttons are all at the bottom right. There are basic adjustments for the brightness, contrast, gamma and colour settings. The power indicator light is in a small "tunnel" and you can only see it when you look straight which is great because it won't be distracting.


One thing I don't like about the monitor is the cables come out from the bottom. The cables prevent you from tilting the monitor all the way down. If you put the monitor all the way down, the stand is going to lift off the surface because of the cables beneath. Having said that, at the lowest position where it's not affected by the cables, it's still a good comfortable angle to draw from.


This would be the lowest position you can get without the cables interfering with the stand.


The position is still comfortable to draw on. I'm just afraid of the damage that the cables might sustain when you move the monitor up and down constantly. The cables are generic cables so they should not be too expensive to replace, but it would have been better if the design had taken into account of the cables beneath. Small issue overall.

Pen

The pen supports 2048 levels of pressure sensitivity. There's no tilt sensitivity. Almost 70% of the pen is the rubber grip. It has a nice light weight and doesn't slip. The side has two buttons that you can customize by there's no eraser.

It's a battery powered pen so you need to charge it with the charging cable provided when the power is low. You can still use the pen while charging.

Drivers

I've used the monitor on both Windows and Mac. Drivers are installed and work fine the first time. That's great!


The drivers don't have a lot of features. Things you can adjust would be the pressure sensitivity of the pen, pen buttons and parallax calibration.


This are the Windows dialog boxes for settings. As you can see, part of the dialog boxes are cropped off and there's no way for me to resize them. Strange.

On Windows, to find the driver settings, look at your taskbar. It could be a small tablet icon hidden in an icon group. On Mac, you can find it in the Applications folder.

There's some parallax error as the glass is above the LED screen. Most pen digitizer displays have parallax error and it's compensated by the driver. How you do that is to click on 5 points that are shown on the screen and the driver will auto-correct the cursor so that it will appear to be directly beneath the pen nib. It works well. There will still be some slight misalignment because you'll always be moving your head around. In actual practice when drawing, it's not a big issue.

Drawing performance

Let me list the apps that working fine for me.

App compatibility

Windows
Photoshop CS6 - Works fine
Medibang Paint - Works fine
Sketchbook Pro - Works fine
Bamboo Paper - Works fine
Mischief - After a while the software freezes
Paint Tool Sai - I don't have the license so I can't test it

Mac
Photoshop CS6 - Works fine
Medibang Paint - Works fine
Mischief - Works fine


These are strokes from Photoshop CS5 (Mac). Pressure sensitivity works well. Strokes are smooth without jitter and they taper well. The lines come out exactly the way you want them to be depending on the pressure you apply.


This was drawn with Photoshop on Mac. There's something wrong with her leg. Don't look there. LOL.


It works well on Medibang Paint (Mac) as shown above.

Overall drawing experience is great except for the apps that have problems, specifically Mischief on Windows which freezes after a while. Mischief for Mac is fine.


These are strokes from Photoshop on Windows.

The hard pen tip works well on the screen. It's not too slippery compared to hard tips on the Surface Pro 4 or iPads for example. In rare occasions, the tip will make a squeaking sound. Again, not something unexpected because it happens with hard tips drawing on glass. It's a minor issue because it happens rarely. The alternative to remove that is to apply a matte screen protector but that will affect the sharpness of the screen. I like the way the pen nib and glass works now.

Monitor does get warm at the bottom. Not sure how I would describe it but it's like those laptop-type of warm.

Multi-monitor setup

As for multi-monitor setup, it's best to use both screens at the same resolution of 1920 by 1080.

There's nothing much to say about the mirror mode. But when you're in extended mode, note that you can extend your mouse cursor over to the other monitor because, well, your pen doesn't work on your other monitor, so you still have to use your mouse.

So it depends on how you want to arrange your setup.

I'm mostly using this as the main monitor.

If you're using dual screens, you can place the 22HD by the side and use it as a drawing screen. That way, with your main screen, you can move your mouse around anywhere even onto the extended desktop. That's just a suggestion. Anyway, this screen is good enough to be used as a main screen because the colour reproduction is good and image is sharp, oh, and it's large enough too.

Conclusion

The XP Pen 22HD is a good product in the sense that it's performs predictably. The strokes come out the way I expect them to be and so far there hasn't been any driver glitches, with the exception of the Mischief app on Windows. But overall, I'm quite satisfied at how it works.

The price point is undoubtedly very attractive. It's less than half the price of a Wacom Cintiq 22HD. I'm not sure if the Cintiq 22HD can reasonably justify that huge price difference. Even though I did not buy the XP Pen 22HD with my own money, it's pretty clear that this is still quite worth the money. I personally don't think there isn't anyone who's not tempted at the attractive price for this sort of functionality.

I'm not a fan of any particular brand, but just someone who when using a product wants it to work as advertised. And in this case, it works well.

If you're using this display, I would love to hear about your experience too, and you can help other artists.

Pros
+ Good built quality
+ IPS panel with good colour reproduction and viewing angles
+ 2 pens include
+ Spare nibs included
+ 2048 levels of pressure sensitivity works well
+ Input for DVI and HDMI, and has adaptor for mini-DisplayPort to HDMI
+ Works well with most Windows and Mac graphics app, except Mischief (Windows)

Cons
- Glossy screen prone to reflections, depends on your working environment
- No shortcut buttons on the monitor itself
- Gets warm at lower right after a while
- Wires behind prevent the display for going to it's lowest possible position
- Parallax that's compensated by software settings

Availability

You can find the XP Pen 22HD and more reviews on Amazon. The reviews are generally favourable.

Amazon.com | Amazon.ca | Amazon.co.uk | Amazon.de | Amazon.fr | Amazon.it | Amazon.es | Amazon.co.jp

Tags: 

Review: Wacom Express Key Remote for Windows Tablet, Cintiq & Intuos Pro

$
0
0

I borrowed this Wacom Express Key Remote from a friend to give you this detailed review. He bought it on Amazon for USD $99. Is it worth it? Let's find out.


Wacom Express Key Remote (WEKR) first appeared with the Wacom Cintiq 27QHD as a device for shortcut buttons. Wacom has now released the Express Key Remote separately.

Who is it for?

This is a handy device for artists who use Windows tablets (e.g. Surface Pros) and want an external device to access shortcuts, menus and commands.

If you have the Surface Pro 3 or 4 with their Type Covers, you know that having your drawing hand over the keyboard makes it awkward to use keyboard shortcuts. You can detach the keyboard which makes it more convenient to draw but you lose access to the convenient keyboard shortcuts. The alternative is to get a wireless keyboard like the bluetooth Logitech K810 or Microsoft Foldable Keyboard. Now we have another alternative, the Wacom Express Key Remote, something that's more compact that the keyboards.

It probably makes more sense to get WEKR if you're a tablet user as compared a pen digitizer display user, such as those from Artisul, XP-PEN or Ugee. Because you might already have the table space for a keyboard. However, the extra software functionality might be useful enough for you to consider getting one.

This review is from someone who prefers using keyboard shortcuts. I'm telling you my bias upfront because as you read on, I'll mostly recommend you to use your current keyboard if you have one. And if you have a keyboard, then there's not much point in getting the WEKR. I prefer carrying a bluetooth keyboard then sacrificing the variety of keyboard shortcuts available for a much more compact device like WEKR. With WEKR, you're limited by the settings, but fear not as it's very customisable.

WEKR in my opinion is good for digital artists who use shortcuts a lot, but that much that you need a real keyboard. And you don't type that much so the onscreen keyboard is enough for your needs.

Compatibility

WEKR is compatible with Mac and Windows. Unfortunately, there aren't any Mac tablets, only iOS ones. If you do want to use WEKR, your iPad, and Mac desktop software, you do have the option of using the Astropad app. But if you can do that, I'm pretty sure you already have a keyboard.

Cintiq drivers are required for WEKR to work. It's advertised to work with Cintiqs and Intuos Pro, but I find that it works fine with Intuos non-Pro as well (I'm using the Intuos Draw). By working fine, I mean you get all the features of the stylus such as pressure sensitivity and you can change settings for physical buttons on the tablet and stylus. Basically, you just have to uninstall your old Wacom tablet drivers and install the Cintiq drivers.

How about if you use other brands of pen digitizer displays like Artisul, XP Pen, Ugee? I've tested WEKR on the XP-PEN 22HD and it works fine on both Windows and Mac. There are no driver conflicts. I can't speak for other brands of pen displays though so do your research before buying.

WEKR communicates wirelessly with a USB receiver so you will need a USB port on your tablet. And if you only have one USB port and want to use other USB devices, you'll probably need to get a USB hub.

Build Quality

The WEKR is well built, sturdy and feels solid. It's pricey but it's made to reflect that price.

There are 17 shortcut buttons on the remote. Buttons are firm and give an audible clicking sound when pressed. And each button is designed with little details so you know which button you're pressing even if you're not looking at them. For example, some buttons have a small dot or horizontal bar raised up, others have indents, and others are separated by separators. Overall, the design is well thought out.

The back is covered with rubber so it does slip easily. As it's made for the Cintiq 27QHD, there are magnets behind the rubber base so that they can stick to the screen. WEKR can also be used as an expensive fridge magnet.


It's battery powered with a non-replaceable battery that you can charge with micro-USB cables, e.g. those cables used to charge Android phones.


To switch it on and off, slide the bottom switch and you'll see a blue indicator light come on and fade away. It will auto sleep if you don't use it for a period of time. When you see the orange light come on, it's time to recharge. I've not had the time to recharge it since my first charge. But generally speaking, if you compare to wireless keyboards, those things last for weeks before requiring a charge, so I'm pretty sure WEKR will last longer.

If you look at the photo above, you can see that the finishing of the surface is quite beautiful and smooth.


At the top where the ring is, there are indicator lights that tell you which mode you're in. By mode, I mean you can be in a mode for changing brush sizes, zoom/scroll or rotation.

The ring is too sensitive for changing brush sizes. The brush size number jumps too easily. Scroll a bit with the wheel in the appropriate direction and the brush will become either too big or small too quickly. If you just want to increase the brush size by say a few points, it's easier to just use a mouse and drag the slider or type in a number. If you want to change your brush size quickly, then the ring is helpful.

There's some lag when changing brush sizes. You may have stopped scrolling the wheel, but the brush size cursor will still be moving. I'm using a powerful and fast Mac (quad-core 3.7Ghz with 16GB RAM + 4GB graphics RAM) so I don't know where that lag comes from.

For rotation and zooming, the lag is not as bad. Note that rotation function only works for software that support that functionality.

Usability

Overall, when you click on a button, things happen instantly. The only exception is the slight lag that happens when you use the ring for changing brush sizes.


Shown above are the default settings. You get that settings screen overlay telling you which button does what with a single click on the WEKR (or you can reassign that button).

Note that some commands are context based. E.g. If you don't have a touch Cintiq, then you don't need to use one button to turn on/off touch.


The buttons on WEKR are very customisable, you can set them to keystrokes (my favourite), zoom, pre-set functions, mouse clicks, OS commands (such as Dashboard, Launchpad all those things on Mac OS), Precision Mode, Settings and menus.


That's the default Wacom Screen Keys with shortcut buttons to some settings and commands. You can only click on these floating menu overlays with your stylus or mouse. I tried my finger on SP4 and it doesn't work.


If you find that 17 physical shortcut buttons are too few, you can create addition shortcuts with menus. Shown above is one of many pre-defined shortcut menus. This particular one is for Photoshop.


If you use other software, then it may be convenient to create specific menus for different software because not all software use similar keyboard shortcuts as Photoshop. I find it helpful to create one for Illustrator and Medibang Paint Pro which I use more frequently. If you do photo editing a lot, you can even create a menu for Lightroom.

These menu shortcuts are more useful for tablet users because you'll save a lot of time by not having to go deep into software menus to access that certain command that you use frequently.


This is the radial menu, another pre-defined menu from Wacom. You can change the buttons to do different things. See that wrench icon? Click on that and you can access the settings to change stuff. You can access the settings dialog box easily because there are many wrench icons from menus and even from other overlays, you'll find that some link back to settings.

Conclusion

Overall, it performs well as a remote with shortcut buttons. It's responsive with the only downside being the slight lag with the ring for changing brush sizes.

It's a convenient device for tablet artists who don't want to bring a keyboard and prefer a more compact device that can still act as a shortcut device. If you need such a device, go for it. It performs as expected and in a very satisfactory manner.

4.5 out of 5 stars.

Pros and cons
+ Works on Mac and Windows
+ Works on Cintiqs, Intuos Pro and Intuos non-Pro
+ Works with all software because it's independent of the software you use.
+ Well built and very compact
+ Buttons are very customisable
+ Battery lasts long
+ Micro-USB charging
+ Auto-sleep function to conserve battery life and switches on instantly
- Not bluetooth so it requires a USB port for the wireless receiver.
- Ring is too sensitive and has lag when changing brush sizes

The price is higher than a Logitech K810 keyboard. If you need a compact device, then the Wacom Express Key Remote is still the more obvious choice. If you don't mine lugging around a portable keyboard, the K810 is fantastic.

Availability

You can check out more reviews from these Amazon direct links below:
Amazon.com | Amazon.co.uk | Amazon.de | Amazon.fr | Amazon.it | Amazon.es | Amazon.co.jp

Unfortunately, its price much higher in European countries.

Tags: 

Best 27-inch monitor for designers & photographers

$
0
0

Here's another list of monitor comparison, this time at 27-inch, for graphic designers, photographers and digital artists. The other lists are for high-end monitors (with no budget constraint) and budget monitors under USD $300.

I prefer the form factor of 27-inch monitors. They are not too big or small. I personally use the old Dell U2711 for years and this list below are monitors that I've researched for my upcoming upgrade. All links below are to Amazon so you can check out reviews there.

Unless otherwise mentioned, all monitors mentioned will have the following features:

  • 2560 by 1440 resolution
  • Full adjustment for height, rotation and tilt
  • IPS panel with good colour reproduction and viewing angles
  • Matte screens so that reflections won't be distractions

There are monitors out there that support 4K resolution (3840 x 2160) but this resolution is currently not widely supported by software. E.g. Software that aren't updated for high resolution screens will appear to have fuzzy interface when scaled up, or the interface will not scale and hence appear tiny and almost unusable. This might force you to spend more money to update your software, such as when upgrading from the one-time payment Adobe CS to monthly payments of Adobe CC.

In short, personally I do not recommend getting 27-inch 4K monitors for work purposes. User interface will be too small. If you really need 4K, I recommend the Dell UP3216Q.

A note on colour gamut

Specifications usually list colour gamut support for Adobe RGB, sRGB and other systems.

Adobe RGB was introduced by Adobe to include most colours on CMYK printers. That's like 100 million colours.

sRGB is the colour space introduced by Microsoft and HP in 1996. Most monitors can display 100% sRGB, and this is similar to REC709 colour space. That's almost 16 million colours.

DCI P3 is just another color space, more used by digital cinema projectors. It has wider colour space than sRGB but smaller than Adobe RGB.

In short, from the widest gamut, we have Adobe RGB, sRGB and DCI P3. With the range in mind, if you're working for print, then it's good to have 100% Adobe RGB. If your work is just going to be reproduced for screen, then it will be ideal to have 100% sRGB and DCI P3. As mentioned earlier, most monitors already support quite a wide range for sRGB, so if you want to a top notch screen, look out for Adobe RGB. To read up more, visit https://www.noteloop.com/kit/display/color-space/

sRGB is often listed. Other colour spaces, especially if they are not favourable, are not listed by manufacturers. Adobe RGB is a selling point so they are usually listed for high-end monitors.

Dell UP2716D

The Dell UP2716D is in my opinion the best monitor for creative professionals currently. I've actually written a detailed review for it already so I'm not going to repeat that here.

The main highlight is the colour gamut support: 100% Adobe RGB, sRGB, REC709, 98% DCI-P3.

Colour reproduction is excellent. I detected no backlight bleeding even when the screen is filled to CMYK black (4C black). IPS glow is also indiscernible. Overall, it's top notch and hence it's also the highest priced monitor on this list.

If you want it cheaper, you can get the smaller UP2516D which is 2-inches smaller while retaining all other specifications.

Ports supported:

  • DisplayPort
  • mini-DisplayPort
  • 2 x HDMI (MHL)
  • 4 x USB3 with one charging port
  • 2 x USB3 upstream

Overall, it's a well designed monitor. I love the thin bezel and together with the LED screen, it helps to minimize space used on the table.

This monitor is targeted at professionals who work in print production, video and photography. For anyone who needs colour accuracy, this is the monitor to get.

Dell UltraSharp U2715H

The Dell U2715H is actually my second recommendation if you don't have the budget for the high-end UP2716D. I would recommend the U2715H over the newer replacement model U2717D because of the price. U2717D may be the newer monitor but it doesn't offer any significantly better features than the U2715H.

U2715H's colour supports 91 % (CIE1976), sRGB 99% ( average Delta E of.

The ports supported:

  • 2 HDMI(MHL) connector
  • 1 Mini DisplayPort
  • 1 DisplayPort (version 1.2)
  • 1 DisplayPort out (MST)
  • 1 Audio Line out (connect your speakers)
  • 5 USB 3.0 ports - Downstream (4 at the back, 1 with battery charging)
  • 1 USB 3.0 port - Upstream

BenQ’s GW2765HT

This monitor supports 100% sRGB, 80% NTSC, 79.1% Adobe RGB. So that means this monitor is for those into video and photography. Design of the screen also does not look as appealing compared to Dell's options. The one good thing is the price is very competitive.

Connectors support: D-sub / DVI-DL / DP / HDMI / Headphone jack / Audio-in

ASUS PB278Q

ASUS PB278Q is another budget option that's quite similar to the BenQ screen. It supports 100% sRGB.

Connectors support: HDMI 1.4, D-Sub, DisplayPort 1.2, Dual-link DVI-D

NEC Monitor PA272W

This is also a monitor aimed at print professionals. This supports 99.3% Adobe RGB.

Ports support: DisplayPort, Mini DisplayPort, HDMI, DVI-D Dual Link, USB hub (2 up/ 3 down)

The downside is the price, significantly more than Dell. On the upside, you get 4 years of warranty. NEC monitors are often sold bundled with colour calibrators.

Eizo ColorEdge CG277

This monitor supports 99% Adobe RGB, DCI-P3: 93%. Just like the NEC, it's expensive but it comes with 5 years warranty included.

Ports support: DVI-D 24 pin (with HDCP), DisplayPort (with HDCP), HDMI (with HDCP, Deep Color).

Major downside is the USB 2 ports.

HDCP by the way is High-bandwidth Digital Content Protection (HDCP), a form of digital copy protection developed by Intel Corporation to prevent copying of digital audio and video content as it travels across connections. Some video content actually requires you to play them over HDCP. This applies to those who want to watch HDCP content.

Conclusion

For designers working for print, go for 100% Adobe RGB screens if possible. The monitor with the best price value ratio is the Dell UP2716D. If you're more discerning, then the NEC PA272W and Eizo ColorEdge CG277 may be suitable for you. Personally, I don't know if they are worth a few hundreds more than the Dell monitor.

For other creative professionals, digital artists, those working with video and photos, a 100% sRGB screen will suffice. Again, the monitor with the best price value ratio is the Dell U2715H. If you really have to get the latest, then the Dell U2717D. Other options are the BenQ’s GW2765HT and ASUS PB278Q.

Availability

You can compare the prices on Amazon.

Tags: 

Artist Review: Microsoft Universal Foldable Keyboard

$
0
0

The Microsoft Universal Foldable Keyboard in one of the most compact Bluetooth keyboards around.

I bought this secondhand to test it with the Surface Pro 4 to see if it's good enough to replace the Type Cover. With the Type Cover, when I'm drawing, I won't be able to access the keyboard shortcuts and draw at the same time because my drawing hand is over the keyboard.

Let's go through the different features of the keyboard.

Design


This is an extremely compact and portable design. When it's folded, it's almost the size of a CD case. It's also very lightweight.


The material used for the cover is matte and feels nice to touch. The keys have good travel distance and nice to type with. The only catch is you'll need sometime to get used to the layout of the keys because there's this gutter in the middle.

When the keyboard is closed, there's a magnet that hold the two sides together. It also auto shuts down when closed, and automatically powers on when opened up. It's very convenient.


Battery life is great. It can last for months without charging. And it charges via a micro-USB port at the top right. It's the same port used by most Android phones for charging. When the keyboard is running low on power, a red indicator light will come on.

Keyboard layout

Function buttons
Labels for the function buttons aren't printed on the top row of buttons.

Switching between devices


There are two shortcut function buttons for switching between devices. Note that this Bluetooth keyboard supports Android, iOS and Windows so there are keys that reflect different operating system, for example the CMD button for Mac and Home button for Windows. Switching between devices is very easy. You just press the button and it switches instantly. The downside is you can only assign to two devices.

Only one Control button
There's only one Control button on the left. This is not really a problem for typing. However, it's a big problem for using keyboard shortcuts because Control is the most used button in combination for keyboard shortcuts. This means it's almost impossible to do one-hand keyboard shortcuts with buttons on the right side of the keyboard. For example, if you want to Control+P, you have to use two hands.

So essentially, if you want to use keyboard shortcuts for drawing apps such as Photoshop or others, just avoid this keyboard.


Since the keyboard supports different OS, important buttons from each OS are printed on the usual modifier buttons.

Arrow buttons are small

It does take a while to get use to using those tiny arrow buttons, especially the Up and Down buttons which are half the usual size.

There are other keyboards with such small arrow buttons. However, it's more of a problem here because these buttons are too close to other buttons. For me, there's a tendency to hit other buttons when I'm pressing the Up button.

Conclusion

This keyboard is the most compact solution that's actually quite comfortable when used for typing. It does take a bit more time to get used to it because of the huge gap in the middle but after getting used that, typing is pretty speedy. The keyboard layout is certainly a compromise for portability, but overall it's well implemented. I really miss the right Control button because I can't use any keyboard shortcuts from the right side of the keyboard with one hand.

I like that it turns off automatically when closed and you can quickly throw it into a bag. The exterior is tough and feels quite durable. The keyboard is also designed to repel water.

Overall, I would recommend this to anyone who wants a truly portable keyboard that provides a comfortable typing experience compared to using on-screen keyboards or typing with thumbs.

I feel that this keyboard is too pricey though, especially when compared to other portable Bluetooth keyboards. However, many other keyboard doesn't have similar form factor so it's difficult to compare.

The other keyboard that I really like, if you don't mind the extra bulk, is the Logitech K810 Bluetooth Keyboard. The buttons are well spaced out and all the important keys are included. I've already bought the K810 so I'll be putting the foldable keyboard on sale.

Availability

Check out more reviews for the Microsoft Universal Keyboard on Amazon at
Amazon.com | Amazon.ca | Amazon.co.uk | Amazon.de | Amazon.fr | Amazon.it | Amazon.es | Amazon.co.jp

Tags: 

Artist Review: Logitech K811 Bluetooth Keyboard for Mac and iOS devices

$
0
0

I've used many Bluetooth keyboards for Mac and none are as good as the Logitech K811. This keyboard is excellent.

I've the old aluminum wireless Apple keyboard and Logitech K760 solar keyboard. Both have problems with occasional disconnection with my Mac that's just less than an arm's length away from the keyboard. Maybe the disconnection is caused by interference of cables or something I don't know.

The Logitech K811 has been working well for me for a few months now and I absolutely love it.


The keys are well spaced out and really nice to type on. Layout of the keys are pretty standard so there's no need to relearn a new layout. Typing on this keyboard is just a breeze. Oh, there's backlight for the keys. Nice!


There are several shortcut buttons that are quite handy too. For example, there are 3 Bluetooth function buttons that lets you switch between devices, such as your Mac, iPad or iPhone. Most of the function buttons are for media, such as for adjusting volume, playback, etc. To get the standard function buttons, you have to press the FN button or just change the settings in System Preference.


Battery life is decent but could be better. It lasts for weeks with a single charge. I wished that it could last for months though. When battery power runs low, a red indicator light will appear. You can charge it with the micro-USB cable that is provided.

Another thing I like is there's some sort of sensor that detects motion (or something). When I move my hand over the keyboard, it turns on automatically. Because it switches on early, it can sync early. It's a wonderful feature.

I don't have anything bad to say about this keyboard. Build quality is great and it's comfortable to type on. That's that a good keyboard should do.

I highly recommend this.


By the way, there's also a Windows version of this keyboard and the model number is K810. It's equally as good of course.

Conclusion

Check out more reviews for the Logitech K811 and K810 on Amazon through the direct product links below:
811 for Mac:
Amazon.com | Amazon.ca | Amazon.co.uk | Amazon.de | Amazon.fr | Amazon.it | Amazon.es | Amazon.co.jp

K810 for Windows:
Amazon.com | Amazon.ca | Amazon.co.uk | Amazon.de | Amazon.fr | Amazon.it | Amazon.es | Amazon.co.jp

Tags: 


Artist Review: Acer Switch Alpha 12 (2016)

$
0
0

The Acer Alpha Switch 12 was released in mid 2016 into a market that's already crowded with tablets and 2-in-1s. I was interested in this tablet for two reasons. First, it's comes with a pressure sensitive stylus. Second, it is significantly cheaper and comes with almost the same specifications as the Surface Pro 4.

My review will be from an artist perspective, someone who wants to draw and use a tablet like a digital sketchbook.


To give you the bottom line upfront, hardware is fine, all the issues come down, again, to the Windows tablet platform.

Specifications

Let's look at the specifications.

  • Processor: Intel i3-6100U (dual 2.3Ghz), i5-6200U (dual 2.3 - 2.8Ghz), i7-6500U (dual 2.5 - 3.1Ghz)
  • RAM: 4 - 8GB
  • Storage: 128GB - 512GB
  • Screen: 12" QHD (2160 x 1440) 3:2 IPS
  • Graphics: Intel HD Graphics 520
  • Weight: 910g, or 1.25kg with keyboard
  • Ports: Full size USB 3 and USB Type C
  • Extra storage: microSD card slot
  • Price: USD $599 - $1049

The unit I bought is the mid-range model with Intel i5-6200U with 8GB RAM and 256GB storage. Official retail price is USD $749. Mine's a secondhand unit so it's cheaper. Equivalent SP4 currently cost USD $1050 without the $100 Type Cover). The price advantage is significantly in Acer's favor.


The included microSD slot is great.

There are two things going for the Acer Alpha Switch that's not available on the SP4.

Alpha Switch uses liquid cooling instead of fans. This guarantees silent operation however I do find the back to be warmer than the SP4. It's not a big issue unless you're one who touches the back often. However, the screen feels warm too, so it can be felt when drawing. I'm not sure about your threshold for heat but it's not like super hot. May or may not be a deal breaker.


Keyboard is included. The keyboard has a stylus holder that comes in the form of a sleeve pasted onto the back of the keyboard. Unfortunately, the stylus holder looks and feels weak. I've already torn off the sleeve by accident. If you take out your Alpha Switch from the bag and the pen gets hooked onto something, it's easy to tear off the sleeve. It's a nice feature but the implementation is bad.


The keyboard is well built, mainly because they copied the SP4 Type cover down to the matte material used. It attaches to the bottom of the tablet using strong magnets that snap into place. Typing is comfortable for a detachable keyboard. There's backlight too. Downside is the trackpad is small.


Depending on which model you buy, the Acer Active Stylus Pen may or may not be included. If not, that's an extra $40.

Screen

The screen resolution is 2160 by 1440, 16:9 ratio. That's lower than SP4's 2736 x 1824 resolution, and that's a good thing. SP4 suffers the problem of having tiny user interface from older graphics software, such as those from Adobe CS5 & CS6. I'm happy to say that 2160 by 1440 resolution is satisfactory for use with all the graphics software I've tested. User interface of the OS, Adobe software is small but not frustratingly small. In short, 2160 x 1440 is extremely usable.

As for the sRGB gamut range. That's a bit tricky to determine. I've read reviews online and websites are claiming different results. There are 81%, 89%, 96% and even 101%. Who are you going to believe? To make things worse, Acer themselves do not release the sRGB gamut information.

Anyway, for the price I paid, I'm not expecting a high end IPS screen. From my naked eye, the screen looks bright and colours are vibrant. That's good enough for me. I'll not be checking physical colour proofs against this tablet screen. If you're looking for a tablet with precise colour accuracy, then you need to spend more money on other options. If you just want a budget digital sketchpad, the screen quality is more than satisfactory.

One downside of the screen is, I can't seem to turn off the auto-brightness feature. I mean I've already turned that off in Windows settings, but whenever I open a graphic software and a white canvas is being presented to me, I can see the screen slowly brightening up. I'm not sure if that's a feature or a bug. Anyway, it does not become super bright, it just becomes slightly brighter as if the tablet thinks that you would work better on a brighter screen. Weird.


If you want to use an external monitor, you can do so via the USB Type C port with a USB Type C to HDMI adapter. The tablet is powerful enough to drive a 2560x1440 external screen and itself. It's best to plug into a power source as this drains the battery. I don't have a 4K screen to test it with.

Stand


The stand behind the screen is U-shape. At the bottom is a rubber grip that prevents it from slipping and it works great. You can use the stand in any position but you only get the advantage of the rubber grip with the tablet in 45 degrees to vertical position.

The only downside is, to deploy the stand, you have to fiddle with the small recessed slot to pull the stand out. Not a big issue.

Battery life

The battery probably last 5-6 hours when doing normal stuff like web surfing or checking emails. Reduce another hour or two when you're using graphics software such as Photoshop. There's no quick charge for the battery but charging time is not that bad.

The battery life is not too different from the competing Windows tablets, SP4 included.

Stylus


The stylus feels well built with a nice weight. It uses one AAAA battery. The pen is not always powered on so you need to click one of the two side buttons which will turn it on instantly.

The tip feels a bit like a felt tip so there's additional friction provided when drawing on glass. It's not a hard tip on glass that will give you the sound of the solid tapping sound. There's no information on whether the nib can be replaced with it gets worn out.

Accuracy is spot on with the cursor always underneath the tip. Latency is good. Hover distance is a bit short though, 0.5cm, but it's not too different from competition.

The stylus supports 256 levels of pressure sensitivity with technology from Synaptics.

Drawing performance

The stylus still suffers from that slow diagonal line jitter problem. It's not new. Most Windows tablets and iPad non-Pros suffer from this problem. It's the most annoying problem for digital artists working on tablets. If you draw moderately fast to fast, you won't see this problem.

It affects all the drawing software I've tested (see below) with the exception of ArtRage Touch. For some reason ArtRage Touch actually corrects for that jitter and produces smooth lines!

Below's the list of applications that I've tried. 'Fine' means it works but there's jitter problem. 'Excellent' means it works without any issues.

To get pressure sensitivity to work in Photoshop, you need to install Microsoft Wintab drivers. Photoshop also suffers from the jitter problem but you can use a plugin called Lazy Nezumi Pro to counter that problem. With Lazy Nezumi Pro enabled, you can get smooth strokes. However, I do find that the software would sometimes behave weirdly, the most common problem being the inability to switch to other tools after pressing their tool button.


Strokes in Photoshop with Wintab installed.


Strokes in Photoshop with Lazy Nezumi Pro plugin in action.

Then there's the problem with Wintab as well. With Wintab on, when I use Mischief, I would get stray strokes. Then I have to use a hack to turn of Wintab whenever I use Mischief, and turn it on again before I use Photoshop.


Anyway, all these problems that sound like software problems are common problems faced by Windows tablets. It's not a hardware thing or Acer's fault. It's just that Windows isn't built that well as a tablet platform. Each time I see these issue come up, again and again, I can only sigh.

Another issue is it's quite difficult to achieve the thinnest of strokes. The 256 levels of pressure sensitivity may be responsible for this. Compared to the SP4, the SP4 pen requires slight pressure on screen to draw a thin line. With the same amount of pressure applied on the Acer screen, the line is much thicker. And there's no way to adjust the pressure sensitivity curve. So the only way to get the thinnest line is to adjust the brush size, of course.

The screen supports multi-touch so for software that supports the feature, you can zoom, rotate or pan.

Conclusion

General performance of Acer Switch Alpha is snappy. I've not experienced any slowdowns. Startup is quick and apps all launch quickly. If you're buying it as a general purpose tablet, I think it's quite worth the money.

As a tablet for drawing, it's not as good as the Surface Pro 4 mainly because the 256 levels of pressure sensitivity on the Acer do feel limited. Both still suffers from the pen jitter problem with selected graphics software so there's no advantage to either side.

Also be careful when you install other tablet drivers, e.g. Wacom or Huion. They may conflict with Window's already wonky stylus support.

Pros
+ Sturdy build quality but does not look as good compared to competition
+ Has fullsize USB 3 and USB Type C ports
+ USB Type C can be used with an adaptor to connect to an external screen
+ Has microSD slot for additional storage expansion (128GB limit)
+ Nice weight for its size but too heavy for handheld drawing
+ Built in stand with many positions
+ Rubber grip with built in stand
+ Surface Pen feels good to draw on the screen
+ 2160 by 1440 resolution is optimal for 12 inch screen
+ Screen has good viewing angles and colours
+ A larger screen feels better to draw on, e.g. more canvas space
+ Able to install desktop and tablet apps
+ Snappy performance
+ Silent operation from liquid cooled system
+ Lots of different configurations available, but no 1TB storage option
+ Good stereo speakers

Cons
- Pressure sensitivity of 256 not as good as competition
- It's difficult to achieve light strokes
- Battery life could be better
- Stylus may or may not be included
- Stylus buttons have limited customization
- Tablet gets warm easily. Liquid cooled not as effective compared to fans.
- Installation of Wintab drivers required for use with Photoshop and Paint Tool Sai
- Windows support for stylus is wonky

Availability

You can find the Acer Switch Alpha 12 and more reviews on the Amazon product links below:
Amazon.com | Amazon.ca | Amazon.co.uk | Amazon.de | Amazon.fr | Amazon.it | Amazon.es | Amazon.co.jp

Tags: 

Things to Know about Wacom's New MobileStudio Pro 13 & 16-inch

$
0
0

Wacom has just released a new line of tablet PCs called MobileStudio Pro. You can probably call them the iPad Pro or Surface Pro 4 alternatives or competitors. It looks like Wacom has chosen not to continue with the Cintiq Companions after just two generations. While the names may differ, MobileStudio Pro in essence will take over Cintiq Companion as Wacom's offering of a mobile drawing device. From the specifications I've seen, the new tablets have address many common complaints digital artists have faced on with the Cintiq Companion.

There are going to be two sizes: 13.3-inch and 15.6-inch. There are many configurations and below are the respective pricing:

13.3-inch MobileStudio Pro:

  • i5 chip, 4GB RAM, 64GB storage: £1,399 / €1,599.90 / US $1,499.95
  • i5 chip, 8GB RAM, 128GB storage: £1,649 / €1,899.90 / US $1,799.95
  • i7 chip, 8GB RAM, 256GB storage: £1,799 / €1,999.90 / US $1,999.95
  • i7 chip, 16GB RAM, 512GB storage: £2,299 / €2,699.90 / US $2,499.95

15.6-inch MobileStudio Pro:

  • i5 chip, 8GB RAM, 256GB storage: £2,199 / €2,599.90 / US$2,399.95
  • i7 chip, 16GB RAM, 512GB storage: £2,749 / €3,199.90 / US$2,999.95

As usual, UK and Europe prices are much higher. Just for comparison purposes, a Surface Pro 4 with 8GB RAM 256GB SSD is now selling around USD $1,050. An Apple Pro 256GB model cost $1,000 without the $100 Apple Pencil. Pricing of the MobileStudio Pro is right at the top among Surface Pro 4 alternatives.

Let's take a look at some key features.

High resolution screens


MobileStudio Pro 13 and 16 supports resolutions of WQHD (2560 x 1440) and UHD (3840 x 2160) respectively. Using such high resolutions on such small screens means that if you're using old graphics software such as Adobe CS6 and older, user interface elements such as buttons, menus are going to be too tiny to be used. This is the most common problem faced by digital artists and designers who buy into tablets or laptops that feature such high resolution screens. Sure you can change the settings to work with a lower resolution, but I am not sure if your work will look pixelated on screen.

Wacom says they are using a new etched glass surface to give you that pen and paper feeling.

Impressive Adobe RGB gamut support

MobileStudio Pro 13 and 16's screen gamut are at 96% and 94% Adobe RGB. This is really impressive and a welcome for artists and designers who work primarily for print (CMYK) output. Now you don't need a spare monitor just for checking colours.

Storage and RAM

The MobileStudio Pros support 4-16GB RAM and 64-512GB SSD storage. Booting, opening and saving files are going to be fast. There is also the option of expanding storage yourself with the included SD card slot (good move), but I guess that's more for photographers.

Graphics card

This is where it gets interesting. The 13.3-inch model uses Intel Iris Graphics 550. The 15.6-inch model uses either the Nvidia Quadro M600M 2GB or the M1000M 4GB workstation grade graphics card. Nvidia Quadro are the graphics cards recommended by 3ds Max and Maya. So now, these tablets are good enough to run powerful 3D software.

Weight

The small one weighs 1.42kg while the larger one is 2.2kg

Pressure and tilt sensitivity

The new Wacom Pro Pen 2 now supports up to 8192 levels of pressure sensitivity! I am not sure how different it will be in terms of performance when compare to 2048 levels of pressure sensitivity. But wow. Tilt range and levels still remain at 60 degrees and 60.


The pen has an eraser at the back. Carrying case for the pen is included.

Shortcuts

There are 6 physical ExpressKeys and a Touch Ring. There will also be onscreen controls, radial menu and precision mode, all these are features available in their other products. It is a touch screen so it supports figure gestures too.

3 USB-C ports

If you need the rectangular USB port, you will need to buy an adapter. To connect to an external monitor, you do it through the USB-C port too, and you need an adapter as well. The Apple Macbook 3-in-1 adapter is fine, but too bad you cannot charge the battery with it.

Cameras

There is a back 8MP camera and front 5MP camera. The back camera is a Intel® RealSense™ R200 3D scanning camera.

Battery life

Battery life is rated to be 6 hours. For processor intensive tasks, that is going to draw the battery significantly, especially things like video editing or 3D rendering.

It runs on Windows 10

One of the main problems with Surface Pro 4 and the alternatives is the compatibility of the Wintab driver and graphic software. That compatiblity issue often affects whether or not there is pressure sensitivity support. I hope Wacom has included all the drivers nececessary because finding drivers and workaround is the tedious part of using Windows tablets as digital sketchpads.

Many such tablets that come with stylus suffer from the slow-diagonal-wavy-lines problem. The only tablet that does not have this problem is the iPad Pro with Apple Pencil. This problem and the Wintab driver problem is why we can't get the perfect Windows tablet for digital artists.

You have the option of Windows 10 Home or Professional depending on the model you choose.

Wacom Link

This is an adapter that lets you attach MobileStudio Pro to a PC or Mac and use it like a Cintiq.

Other things to note


The 3-position mobile stand is not included. There is no keyboard folio but Wacom do offer an optional wireless Bluetooth keyboard. It might be cheaper to get the wireless Logitech keyboard instead.

Release date is expected to be in November 2016.

Conclusion

The new MobileStudio Pro may be pricey but Wacom has certainly included lots of features to make it feel worthy of your money. Actual performance should be a huge step-up from Cintiq Companion 2 because of the better specifications.

For more information, visit these links below
http://www.wacom.com/en-us/products/pen-computers/wacom-mobilestudio-pro...

Tags: 

Artist Review: Wacom Bamboo Slate for Drawing or Note Taking

$
0
0

One year ago, Wacom came up with the Bamboo Spark, a device that can digitally record what you write on a normal notepad with the included Wacom ballpoint pen. This year, they have released a new model called the Bamboo Slate. The functionality of Bamboo Spark and Bamboo Slate is essentially the same.

The target users for this sort of device would be those who take a lot of notes and want a quick way to turn them into digital notes. The paramount question you should ask yourself before buying is whether you have time to scan. The second question is whether you prefer taking notes with actual pen and paper vs a stylus on tablet. I'll address these issues and more in this review.


For some reason, Amazon shipped my purchase without the typical brown cardboard boxes, opting to paste the delivery information all over the box's packaging. I wonder if they do that for USA customers too, and whether if it's going to be a problem when the item has to be returned.

The different models

The Bamboo Slate comes in three version, there's the Small Slate (A5), Large Slate (A4) and the Large Folio.

The Slates are basically clipboard style without the clip. They come with a slot where you can insert a notepad.


The folio is like a folder with cover, extra slots and a large side pocket for you to put stuff. It probably cannot fit the iPad Pro because that's larger than A4 size. For anything smaller, you can slot it into the large side pocket.

What's included


The items included are the device itself, a ballpoint pen, extra pen refill, the refill remover and micro-USB cable for charging.


The ballpoint pen uses those 6.7cm ballpoint refills.


The particular model of the ballpoint refill is ISO 12757-2 (MiniStar D). I tried a Zebra refill of same shape and size but it does not work for some reason. The Zebra refill has a silver coloured metallic body.


To replace the ballpoint refill. One just has to pull it out. It's slippery so the clip has to be pressed hard.


The pen clip is nice. Overall, the pen looks better compared to the one from Bamboo Spark.


The cross section is not exactly circular but triangular with bevel edges.

I've a problem with the pen. To get the ballpoint out, you twist the pen's back. When I'm using the pen, sometimes the side of my index finger knuckle area will accidentally twist the pen's back causing the ballpoint to retract. It has happened several times. So when holding, I have to make a conscious effort to hold the pen in a way to avoid contact with the pen's back.

Build quality


Overall build quality is great. The back of the Slate is cloth with the orange letters BAMBOO sewed on. I'm not a fan of cloth surface because they get dirty easily and it's diffcult to clean. I use cloth bound sketchbooks and they have the same problems.


On the front, the material use is some sort of faux leather with grid of tiny crosses. It's nice to touch and it goes around the edges of the Bamboo Slate.


That's the microUSB port. It's the same port used by most Android phones.


At the top left corner is a recessed area for slotting the pen clip.


The A5 sized dotted notepad comes with 40 perforated pages. The device is said to support notepads up to 8mm thick (approximately 80 pages). I've tried really thick notepads and not all strokes can be captured. So when getting new notepads, get one under 80 pages.


Here for example, I've used my own notepad that's attached with big clips. With notepads that have hard cardboard backing, you can just slide in the cardboard into the horizontal orange slot on the Bamboo Slate.

So how you actually use this thing?


Before you can use it, you need to pair it with your mobile device, either Android or iOS. And you need to download the Inkspace app from the app store.

Pairing of the Bamboo Slate and your mobile device is done inside Inkspace. There aren't a lot of buttons in Inkspace app so it's easy to find out where to get into the pairing process. Next is to press and hold the round button on the Bamboo Slate to get a blue light which will indicate that it's in the pairing process. Bluetooth is needed. Pairing process is quite fast and after it's done, the indicator light turns green.

Usage is straightforward and I've experienced no issues. Write when there's green light, and the light will turn blue indicating there's content, press button to save and the light turns green. Flip a page. Repeat.

Below are six features of the Bamboo Slate and Inkspace as marketed by Wacom:
1) Organize, edit, and share your notes on your iOS or Android Bluetooth enabled devices
You can send your files from Bamboo Slate to your computer, and do whatever you want with it.

2) Enhance notes and sketches by adding strokes, color or highlights with editable digital ink
This requires you to have software that enables you to do all those things.

3) Use live mode to collaborate and share notes and ideas with others.
This is interesting. In Live Mode, when you draw on paper, the strokes will appear simultaneously on the Inkscape app on your mobile device.

4) Export notes as JPG, PNG, PDF or SVG file formats.
When you export as a PDF file from the Inkscape app, the strokes are in vector format, basically outlined paths. You can open the file in Adobe Illustrator to work on it further.


You only get vector PDF if you export from Inkscape app, not when you export the file from Wacom cloud.


Strange thing is, there are two layers of same content. So in Illustrator, I have to use the Pathfinder to flatten the duplicates by combining the top and bottom layers.

JPG and PNG files are 1748 by 2551 resolution, or 14.8 by 21.6cm at 300dpi. PNG has transparency.

5) Sync to existing cloud services: Inkspace, Dropbox, Evernote, and OneNote.
This allows you to download your files from your favourite apps.

6) Store up to 100 pages on your Bamboo Slate and sync later when reconnected.
You don't have to sync immediately whenever you write something. If you forget to bring your mobile device out, you can still store the pages inside Bamboo Slate, and sync to Inkscape when you're able to later.

For drawing purposes

It's quite accurate.


Here's the original scan.


And here's what was captured and overlayed onto the the original scan. I've changed the colour to green so that you can differentiate it from the scan (in black).


Bamboo Slate actually detects pressure. When you press hard, you get thicker strokes. When pressure is light, strokes are thinner.

Inkspace Plus

Inkspace is the basic version of the app. There's Inkspace Plus with additional features that Wacom's trying to promote. That's a monthly subscription service that cost, currently, at USD $3 per month. These are the features:

  • Convert handwriting to rich text
  • Search your handwritten notes
  • Export in scalable vector file format (SVG)
  • Store up to 50 GB of data (60,000+ pages of notes)

Conclusion

The Bamboo Slate is just the Bamboo Spark with a different look. Functionality is the same. Bambook Spark is cheaper so it might be more worth the money, but they are only available in folio style. It's good to have clipboard style too because there might be people who don't want the folio or extra bulk.

As mentioned earlier, I feel that this device is for people who takes lots of notes and don't have time to scan. If you need that functionality, then should serve your need. It works without flaws.

For drawing purposes, personally for me, I have time to scan my work, so I don't see myself using the Bamboo Slate much. While the ability to digitize and export vector strokes is good, I can do that by like the Live Trace feature inside Adobe Illustrator.

Overall rating: 4.5 out of 5 stars.

Here are the pros and cons at a glance
+ Captures strokes rather accurately
+ Good build quality
+ Feels durable
+ Simple to use
+ Pairing the device with iOS or Android is easy and fast
+ Supports syncing to backup your work
+ Works with Evernote, Dropbox, Wacom Cloud
+ Can save your pages into multi-page PDFs
+ Battery life is good
+ It can sync in the background when your mobile device is in standby mode
- When saving the page, the 'downloading' dialog box does not appear instantly and makes you wonder if it's really working
- Ballpoint refill is short compared to standard ballpoint refill
- You cannot use other pens, e.g. fountain pens

Availability

If you want to get Bamboo Slate, visit these Amazon product links below:
Amazon.com | Amazon.ca | Amazon.co.uk | Amazon.de | Amazon.fr | Amazon.it | Amazon.es | Amazon.co.jp

If you want to get Bamboo Spark, visit these Amazon product links below:
Amazon.com | Amazon.ca | Amazon.co.uk | Amazon.de | Amazon.fr | Amazon.it | Amazon.es | Amazon.co.jp

Tags: 

Laptops with 100% Adobe RGB for Graphic Designers & Digital Artists

$
0
0

Do you work with print? Are you looking for the laptop with best screen for photo editing? Is colour accuracy critical to your workflow?

If you answer yes to any of the question above, then you need a laptop with a screen that supports close to 100% Adobe RGB.

Why do you need 100% Adobe RGB? Well, it's because it covers the whole CMYK gamut. 100% sRGB merely intersects the CMYK gamut and hence won't be able to produce all the colours in the CMYK colour space. With a screen that supports 100% Adobe RGB, you get to see accurate colours on screen, colours that can be used to match printed proofs.

WARNING ABOUT 4K RESOLUTION SCREENS: Using such high resolution screen could mean incompatibility with older graphics software. What I mean is, user interface may be too small. E.g. Adobe CS5 and CS6 has tiny buttons and menus on such high resolution screens that it's frustrating to use, and may likely force you to spend money to upgrade to newer software.

Below are some laptops currently available that supports 85-100% Adobe RGB. This isn't a list for the budget constrained because colour critical laptops are not cheap. We're talking about workstation grade laptops.

Dell XPS 15 (2016)

Dell XPS has both style and substance. They look great and packs lots of power. In terms of physical design, they are quite similar to the Dell Precision. Main difference to the Dell Precision workstation laptops is the Dell Precision has more configurable options.

Note that Dell XPS has two options for screens. There's the 1080P matte option and the 4K glossy screen. The 4K screen supports 100% Adobe RGB.

Best configured model:

  • Intel i7 Quad Core 3.5 GHz
  • 16GB RAM
  • 256GB SSD
  • 15.6-inch 4K glossy touch-screen
  • 100% Adobe RGB support
  • NVIDIA GeForce GTX 960M 2GB
  • Ports: USB 3, Thunderbolt 3, HDMI, SD card slot
  • 6-cell (84Wh) battery
  • Weight: 2kg

I've used the Dell XPS 15 9550 model extensively before and it impressed me very much. Here's my review.

Dell Precision (2016)

Dell Precision are workstation laptops that lets you customize almost every part. For example, you can configure a laptop to run Xeon processor or Quadro workstation graphics card.

I've use the Dell Precision 5510 and it's seriously a fantastic laptop for work purposes. Solid, well built and fast.

Best configured model

  • Xeon E3-1505M v5 (Quad Core 2.80GHz)
  • 32GB RAM
  • 2 storage drives
  • 15.6-inch 4K glossy touch-screen
  • 100% Adobe RGB support
  • Nvidia Quadro M1000M 2GB
  • Ports: USB 3, Thunderbolt 3, HDMI, SD card slot
  • 6-cell (81Wh) battery
  • Weight: 2kg

There are limited configurations that all start with quad-core. So it's quite a pricey tablet even with the base model.

HP Zbook Studio (Nov 2015)

Competing directly with Dell Precision workstations are the HP ZBooks. There are many ZBook models but the one most suitable for graphic designers is the HP ZBook Studio G3 with 15.6-inch 4K screen supports up to 85% Adobe RGB. The HP workstation laptop is also very configurable.

Best configured model:

  • Intel Xeon E3-1545M quad-core 2.9GHz
  • 15.6-inch 4K matte screen
  • 85% Adobe RGB
  • 32GB RAM
  • Two storage drives
  • NVIDIA Quadro M1000M 4GB
  • 6 Cell Li-Polymer Battery 90Wh
  • Ports: USB 3, Thunderbolt 3, HDMI, SD card slot
  • Weight: 2.08kg

Lenovo P50 (Early 2016)

Lenovo P50 is another solid workstation laptop that competes with Dell Precision and HP ZBook Studio. All these three laptops offer extensive configurations.

Highlight of this laptop is the 15.6 inch 4K matte screen. It's rare to find 4K screens that are matte. It supports up to 85% Adobe RGB though.

Best configured model:

  • Intel Xeon E3-1535M quad-core 2.9GHz
  • 15.6-inch 4K matte screen
  • 85% Adobe RGB
  • 64GB RAM
  • Two storage drives
  • NVIDIA Quadro M2000M 4GB
  • Ports: USB 3, Thunderbolt 3, HDMI, SD card slot
  • 6-cell (90Wh) battery
  • Weight: 2.55kg

Razer Blade Stealth (Late 2016)

Razer Blade Stealth is only on this list because it has a 4K screen that supports 100% Adobe RGB. However, we're looking at a 12.5-inch screen which I feel is quite small personally.

The graphics card is Intel® HD Graphics 520. The selling point is its ability to the connected via Thunderbolt 3 to the Razer Core which can house a powerful graphics card of your choice.

If you need a portable workstation that you can eventually plug into an external monitor to work at home or office, Razer Blade Stealth is a good choice.

Best configured model:

  • Intel® Core™ i7-6500U dual 2.5Ghz
  • 12.5-inch 4K glossy touch-screen
  • 100% Adobe RGB
  • 8GB RAM
  • 512GB SSD
  • Intel® HD Graphics 520 with optional RAZER CORE
  • Battery 45Wh
  • Ports: USB 3, Thunderbolt 3, HDMI
  • Weight: 1.25kg

Vaio Z Canvas (Dec 2015)

The Vaio Z Canvas base model uses a Intel Core i7-4770HQ quad-core 2.2Ghz with Iris™ Pro Graphics 5200 which has more processing power than SP4's dual-core. It's also priced quite competitively because it comes with a bundled keyboard.

The screen is small though, at 12.3 inches and supports 2560 by 1704 resolution. However, it supports 95% Adobe RGB.

Best configured model:

  • Intel® Core™ i7-4770HQ quad-core 2.2Ghz
  • 12.3-inch 2560 by 1704 glossy touch-screen
  • 95% Adobe RGB
  • 16GB RAM
  • 1TB SSD
  • Iris™ Pro Graphics 5200
  • Battery 63Wh
  • Ports: USB 3, mini DisplayPort, HDMI, SD card slot
  • Weight: 1.21kg

Conclusion

Personally, I would go with either Dell Precision for the 100% Adobe RGB or the HP ZBook Studio with matte screen 85% Adobe RGB.

Which model you choose will depend on what compromise you're willing to make. If you're in print production where colour accuracy is critical, go for the 100% Adobe RGB laptops.

Before you buy, make sure your graphics software is able to support 4K resolution. This will save you frustration down the road, and money when you're forced to upgrade.

If you don't have the budget, check out this list for more recommendations.

Tags: 

Review: Artisul D10 Pen Display Digitizer

$
0
0

Artisul D10 Pen Display Digitizer is the smaller variant of the 13-inch Artisul D13 released a few months ago. And Artisul is kind enough, again, to loan me one unit for this review.

What's in the box

Here are the items in the box

  • Artisul D10 Pen Display
  • HDMI cable
  • USB cable
  • 10 replacement nibs inside a case
  • Pen

There's no power cable. The Artisul D10 draws its power from USB so this means you need a computer with powered USB ports. This is great because the fewer cables there are, the better.

Build quality


Build quality feels solid. I like the round corners. On the back are large pieces of rubber to prevent slipping. The unit is only 700g so it's extremely portable should you want to bring it around, or put into a bag.

On the unit are six physical shortcut buttons, each with a firm tactile feel when pressed. It can be used by left handed users as well, just change that in the settings.


The 10.1-inch screen came with a matte film protector already pasted on it. It does affect the image quality but in exchange you get a better drawing experience when using the plastic nib on the drawing surface.

The resolution is 1280 by 800 which is sufficient for a screen this size. All the graphic software are able to display user interface (e.g. buttons, menus) at comfortable sizes.

Brightness of the screen stated at 300 cd/m2 with a contrast ratio of 700:1. In actual use, the brightness is adequate, but definitely nowhere near 300cd/m2 which is the typical brightness of desktop monitors. When used in an environment with bright conditions, colours and contrast are affected, washed out. So it's best to work away from bright light sources. Working indoors with normal lighting overhead is fine.


The battery-less pen supports 2048 levels of pressure sensitivity but there's no tilt sensitivity. There's No eraser on the back.


This is the case with 10 replacement nib. There's no stand for the pen though. That tiny hole in the middle is to take the nib out from the pen. Just tilt the nib when it's in there to pull it out.

Connecting to the computer

Driver disc is not included so you have to download the latest driver at artisul.com/downloads.

Before you install, you should uninstall other tablet drivers on your computer. Uninstall any existing Wintab driver, or just rename it. Artisul driver will install its own version of Wintab so you don't want any conflicts. To check for existing Wintab drivers, visit these two locations:

  • C://Windows/system32/wintab.32.dll
  • C://Windows/syswow64/wintab.32.dll

After you have installed the driver, plugged in the display and it should be detected.


Picture left: For me, I'm using a Windows 10 tablet that does not have HDMI port. So I had to use a USB Type C to HDMI adapter.
Picture right: On my Mac Mini 2012, somehow the HDMI port wasn't giving any video signal and I had to use a Thunderbolt to HDMI adapter.

Driver settings

The driver settings allow you to customise the physical shortcut button, pen buttons and pressure curve.

For physical shortcut buttons, there are already pre-configured software-specific shortcuts that you can choose from, e.g. Photoshop Undo, Brush, Corel Painter, Illustrator. I discovered that the pre-configured Photoshop's Brush Size Increase shortcut wasn't working. Anyway, I was able to customize a keyboard shortcut to replace that so it doesn't matter. You can basically bind any keyboard shortcuts to those physical buttons.

Drawing performance

My experience with Artisul D10 are on Windows 10 and Mac OS 10.9.5. Overall drawing performance is fantastic with the exception of some glitches.

Windows glitches: Most graphics software I've used work fine except Mischief. I had to turn off Wintab for Mischief to work properly. If you use Mischief, you can use this hack to turn on/off the Wintab driver easily. But to use Photoshop, you have to turn on Wintab again.

Mac glitches: I wasn't able to get pressure sensitivity in Adobe Illustrator to work by default. The workaround is to install Wacom Intuos drivers. I know earlier I said to uninstall other drivers but this seems like the only way to get pressure sensitivity to work in Adobe Illustrator. So far, there has been no conflicts with the two drivers. This affects Mac's Illustrator only.


These are strokes from Photoshop CS5 on the Mac. Pressure sensitivity works well. Strokes taper nicely.


This is Adobe Illustrator CS5 on Mac. Strokes here are unable to taper to a sharp point.


Both Medibang Paint Pro and Mischief on the Mac work well.

There is minimal lag. Cursor under the pen tracks quickly. There's parallax error though but you can minimise that by calibrating the pen through the driver settings.


This is Photoshop CS6 on Windows. Occasionally, there are some strange stroke tapering effect. In other words, the strokes don't taper gradually and smoothly. Sometimes they would taper abruptly and end with a thin line. You can see that effect at the end of the spiral stroke on the left. This effect happens when drawing the strokes very quickly, e.g. cross hatching. If you draw deliberate strokes, then it's not a big problem.

To workaround the strange stroke tapering effect, one can use the Lazy Nezumi Pro (not free) Photoshop plugin.

With all other graphics software, pressure sensitivity works well and all the strokes taper nicely. I've tried Sketchbook, Krita, Paint Tool Sai, Sketchable, ArtRage and Wacom Bamboo Paper.

Warranty and support

A one year warranty is provided for the monitor.

If you have problems, you can also submit a ticket to the support forum. They actually have someone who troubleshoots problems on the forum and is quite responsive.

Conclusion

Drawing performance is satisfactory. There are some glitches but no big deal as they can be solved easily.

The only downside is actually the screen size. I feel that 10.1 inch is small. But since it's small, it's also cheaper. It sells for USD $350 currently. Compared to the $600 Artisul D13, this is significantly cheaper. I consider this to be quite affordable.

The performance is definitely good enough for professional work in my opinion. If you're someone who creates line art with Photoshop on Windows, that stroke tapering effect may be of concern. Other than that, the accuracy is similar to Wacom tablets. When compared to Windows tablets, this is definitely much more accurate because strokes do not suffer from any jitter.

Overall, I think it's worth the money. It's good for digital artists with limited budget, but still want a screen to draw on. With the D10, you can continue using the graphics software from your computer, either Windows or Mac.

Pros and Cons

+ Good build quality
+ Extremely portable at 700g
+ Tactile buttons with good feedback
+ Powered by USB 3 port
+ Just two cables required to make it work
+ Significantly cheaper than D13, but also smaller
+ Runs cool
+ Wireless and battery-less pen
+ 10 replacement nibs provided
+ Rubber at the all the right places to prevent slip
+ Pressure sensitivity works great
+ Strokes taper well* and have no jitter
- Windows drivers are at different places: Start menu and taskbar
- Parallax exists, corrected by calibration
- Only HDMI port so you might need an adapter
- Strange stroke tapering effect in Photoshop (Windows)

Availability

You can find the Artisul D10 at https://artisul.com

There's 8% discount if you use the code PARKA when you get the unit direct from Artisul.

Tags: 

My thoughts on the Microsoft Surface Studio annoucement

$
0
0

Microsoft Surface Studio is no doubt a very cool computer. It elicits the same awe I had when the first iMac was unveiled, and then the white, and later the aluminium iMac. Microsoft really surprised lots of people during its October event.

Surface Studio is certainly powerful but who are the target users? And with a retail price of USD $2,999, will it sell?

Display

The 28-inch 4500 x 3000 resolution screen with 192 PPI looks awesome. It's sharp, no doubt. If you still run old software like Adobe CS5 or CS6, their user interface are going to look tiny and will be too frustrating to use. But since you can afford $2,999, you could already be running all the latest versions of graphic software. If you're upgrading from a 1080P or 1440P screen, check out relevant forums first for app and screen resolution compatibility.

3:2 aspect ration is great. More visual working space is always great.

There's no mention of the exact gamut range it supports except that it supports a "wide color-gamut". Microsoft promises fast color profile switching between sRGB, DCI-P3, and Vivid (P3-D65).

The fact that this is a touch screen that you can also draw on is amazing. This competes with Wacom Cintiq 27QHD which is also really pricey. However, to compete effectively, it will come down to the accuracy of the Surface Pen. That slow-diagonal-wavy-jitter-line issue has been well documented by now. I hope with the Surface Studio, they have managed to solve that. Gabe from Penny Arcade has already review the Surface Studio and he seems quite pleased with it. I'll remain skeptical until I can experience it myself.

If the display could be sold separately on its own, it would be perfect. Mac users are always on a look out for good monitors. This screen looks sleek enough for them. By combining the display with the computer, it basically excludes the whole of the Mac user market. It also excludes those who already have a (good) computer. Does it mean they have to sell off their computer and screen for this all-in-one?

Pros and cons of all-in-ones

The pros is obviously the lack of cables.

The significant con is everything is now combined into a single point of failure. It's just like a laptop when it goes down. I mean, who has two laptops anyway? Just worry about it when it happens. Can you afford the downtime when you send it in for servicing? Do you have a backup display and computer, and storage with your files to allow you to get back to work quickly?

That's something to think about. Recently, I had to send in my Mac Pro for servicing for the 4th of 5th time. My Mac Pro is still at the service centre after 2 weeks. Thankfully, I have a quad core Mac Mini as backup. With the Mac Mini connected to the monitor, I went straight back to work, and the only downtime I had was the time it took to boot up the Mac Mini.

For the price, they should have included better graphics card and a real SSD instead of some hybrid drive

That's the most frequent complaint that I see on forums. It's the type of question commonly asked whenever computers are released, especially for Apple computers.

If they have included the better graphics card, the higher capacity SSD, more RAM, you will be looking at a higher price bracket. And at that higher price bracket, we'll still have people wishing for better specs for the price they are paying. The higher price bracket also excludes a lot of potential customers. The Surface Studio is already USD $2,999.

Ports

  • 4 x USB 3.0 (one high power port)
  • SD card slot
  • Mini DisplayPort

It's great that they have included the SD card slot. Photographers would love it. I love it. There's also a mini DisplayPort should you want to use another display.

Hybrid drive

I'm not sure what they mean by a hybrid drive. If it's one of those SSD + Hard Drive combo, then it better have a large enough SSD partition. Apple has something like it called the Fusion Drive.

If the SSD portion is too small, once the internal flash storage gets filled, it can be challenging to work with large data files, e.g. editing hundreds of huge RAW photos, dealing with 4K video. My Mac Mini has a 128GB SSD + 1TB HDD hybrid drive and it slows down whenever I import large amount of data, e.g. video and photo files.

Since there are four USB 3 drives, editing 4K should not be a problem since you can get an external USB 3 SSD, such as the Samsung T3.

Why are they still using 6th generation Intel Core i5 or i7

6th generation processors are still fast, like very fast. It's no big deal that they are not using Intel Kaby Lake.

Who are the target users?

I believe this is targeted at digital artists who draw a lot. If you're a storyboard artist or animator, I can see how this will be beneficial to your workflow. It's essentially like a Wacom Cintiq but with a build-in computer. Basically any artists who uses digital stylus, who want to get that traditional experience of being able to see what you draw under the pen, those are the type of users who will enjoy this.

And you would need to be a rather rich artist to spend USD $2,999 on a new computer when there are so many options out there in the market, even if they don't look as sleek as the Surface Studio.

Would I buy it?

I like to keep my computer and screen separate. I'm using a Mac only because it allows me to boot up from an external drive regardless of the computer. If my Mac Pro is down, no problem, I can connect my external drive to my Mac Mini and keep on working. I can't do that if I have an all-in-one. I can't afford a single day of downtime.

So before buying, do ask yourself if the Surface Studio can fit into your workflow, how it's going to fit into your workflow and your backup plan.

Tags: 

Whoa! Wacom Cintiq Pro announced!

$
0
0

I was on Wacom's website and saw the Cintiq Pro that they have put on the front page. I clicked on the link and it brought me to a page with some product shots and a form to sign up for info on the actual release, which is suppose to be in December 2016.

There's no mention of any specifications though. Perhaps it could be similar to the MobileStudio Pro that was announced earlier.

Let's see the photos.


There are going to be two models, the 13 and 16. If they are of the same size of the MobileStudio Pro, then the exact screen size should be 13.3-inch and 15.6-inch, The WCP 13 is clearly going to replace the . The WCP 16 sits between the 13 and 22HD.

The pen, if it's the same on from the MobileStudio Pro, is going to have 8192 levels of pressure sensitivity.


To keep the design clean, it looks like they have not included any physical shortcut keys on the front. That's the Wacom Express Key Remote by the side. I guess the Express Key Remote is going to be sold separately to keep the cost down because that remote cost USD $100 on its own.


Looks like the screen is going to have some sort of texture. It's not totally glossy. From this angle, the display looks quite thin. There's a Thunderbolt (3?) port in USB-C. And is that a SD card slot?

There's no photo of the other side so we can't tell how it's going to be connected to the computer.


Is that a pen holder at the top? Looks like it's detachable because I don't see that in other photos. At the top right looks like some touch buttons. And there's a built in stand.

That's quite a bit bezel but big is good because at least there's space to rest the hand while drawing near the edges.


Looks like the stand only has one position. It also looks like the back is going to be thicker than the front.

That's all I can surmise from looking at the photos. I won't be surprised if the specifications are similar to the MobileStudio Pro. Overall, it looks like Wacom has taken the MobileStudio Pro and removed the computer. It's a good move because some might just want to get the screen alone. This is what Microsoft should have done for the Surface Studio.

Tags: 


Review: XP-Pen Artist 10S Pen Display Digitizer

$
0
0

This is a guest review by Annamarie

Hi there! My name is Annamarie and I work as a freelance artist. Today I will be reviewing the XP-Pen Artist10S that I purchased recently.


This is a pen digitizer monitor by the company XP-Pen that is aimed to rival the likes of the Cintiq 13HD.

I came across this tablet while researching a replacement for my old Intuos Pro Medium.

It must be noted, however, that this is a rebranded version of the Yiynova UC-logic SP-1001. There have been changes between the SP-1001 and the Artist10S though. Let us go over those changes!

Packaging

The product was securely packed and shipped in a normal brown cardboard box. The product’s packaging was a pleasant surprise. The package inside the cardboard had a white and black design with an image of the tablet, name of it, and the company’s logo on the front as well as an inked drawing next to the tablet picture.


It was a nice change of pace as most alternatives usually don’t have anything special or unique about the packaging.

Inside the box was another black box where the tablet and all the accessories were being held. The accessories were all separated into smaller black boxes consisting of the accessories, cords, and pen. The tablet was underneath the above mentioned accessories.


The items included were:

  • The pen display
  • USB/HDMI Cable
  • Additional power cable
  • A passive pen+8 replacement nibs
  • Pen holder (which also doubles as storage for the nibs)
  • CD Driver
  • Manual
  • Smudge Guard
  • Cleaning Cloth
  • HDMI to Mac adapter cable
  • Power adapter (which includes switchable plugs in case you do use a different plug outlet in your region)
  • Carrying case

The Tablet Design + Specifications

The Artist10S is made of matte black plastic that has a 10.1”screen. To the left of the tablet are 6 customizable buttons that you can assign to keyboard shortcuts. To the right side of it, where the logo is placed, is where your HDMI and Power cables will be plugged into. The tablet itself is pretty light and thin, yet surprisingly sturdy. It’s about half an inch thick overall, and the outer plastic isn’t too flimsy which makes resting your palm on the screen to draw not so worrying.


The 10.1-inch screen is actually an IPS display that has the resolution of 1280 x 800. When tablet is connected as an external monitor, it can either mirror the display, or be used as a second monitor (extending the screen). The resolution might be a problem to some if your monitor does not support the size, as it may cause your main monitor(s) to be stretched. The screen is slightly glossy which may also be an issue to those with bright light sources situated behind them while working, but if you have low lighting or have the lighting at a distance there should be no issues. As mentioned before, the screen has no real texture to it, so it may make drawing slightly harder for those who prefer having some resistance.


On the side of the tablet are two ports for cables that go to the computer's USB port, HDMI graphics port and the power outlet. Overall, it saves you from having an unnecessary and bothersome cord clutter on your desk which is greatly appreciated.

It must be noted that the tablet does not come with a stand nor has any built-in stand, which is slightly disappointing. The company does offer a stand for it separately for it with the price of $30.

Pen


The pen body is slightly triangular, 6 inches long, and is under half an inch thick. This may cause problems for people with bigger hands but it isn’t too uncomfortable. The nibs are a bit thicker than Wacom’s pen, but this is neither a negative nor a positive as it comes down to preference. There is no eraser either, however most alternatives at this price range don’t seem to have one.

This pen supports 2048 levels of pressure, which is the same level of pressure I've been using before so it didn’t feel any different switching over. It is also a passive free pen, so you never need to charge it or replace any batteries. It also has 2 buttons on the lower half of the body, but there is not much customization to them.

Drivers

Unfortunately I do not have a Mac system to test this on, so this will be only for Windows.


Drivers were easily installed with no issues and it was ready for usage immediately after installation. Something to note though is that I uninstalled all previous drivers I had on this my computer before installing as recommended.

The drivers don’t offer much beyond pressure adjustment/testing, calibration, and express key settings. The calibration offers a 4 point and 9 point option, and I highly recommend using one or both of them once you boot it up. When I first installed it, the cursor offset was a problem. It was not horrible yet bothersome enough to require fixing. After messing with calibration a few times to try and fix the parallax, I was able to get it almost completely on point.

The Drawing Process

Drawing on this device is delightful but with a few cons. For starters, the natural pressure curve is beautiful. It’s really nice and fluid, and works well with most, if not all, of the programs I tested out. The lag is small to none as well, with the cause being usually sketching too fast for the cursor to follow. So if you are a pretty fast sketcher, this is something to look out for. It is not particularly bad, as it only lags for about a second at worst. Below are some examples of work i did with this tablet!

I used this program with Photoshop CS6, Paint Tool Sai, Clip Studio Paint, Medibang Pro, and Open Canvas 6. The first image was done in Clip Studio Paint and the second was done in Photoshop.

Conclusion

The XP-Pen Artist10S is a great tablet for people who either prefer smaller screens or travel a lot but don’t want to break the bank for a Cintiq. It loses a bit in build quality and performance, but being less than half of the 13HD price, I think it does what it can very well!

Pros

  • Decent build quality
  • IPS panel
  • Doesn’t take up a lot of space
  • Passive pen, no battery required
  • 2048 levels of pressure
  • Bunch of shortcuts
  • No cord clutter

Cons

  • Small screen
  • Glossy screen, doesn’t take glare well
  • No resistance on screen
  • Small parallax
  • Overheats a bit on highest brightness
  • Where To Buy It

The company offers the tablet for purchase via a store on both Amazon and Ebay. To add clarification, the eBay seller is XP-PEN themselves and not a random person. I ordered mine from eBay personally and it was shipped in good condition. :)

Tags: 

Artist Review: Dell UP3017 Monitor (2560 x 1600 resolution)

$
0
0

Here's a review of the Dell UP3017 monitor for creative professionals who work on graphic design, art, photo and video editing.

The monitor I have is a review unit that I borrowed from Dell Singapore. This is my fourth Dell monitor review. The earlier ones were for UP2716D, U2717D and S2817Q and U2711 (my current monitor).

The Dell UP3017 is a huge 30-inch monitor that's supposed to replace the earlier U3014.

Let's take a quick look at the specifications and I'll point out the important parts to graphic designers and digital artists.

  • Screen size: 30 inches (100PPI)
  • Panel: IPS
  • Gamut: 100% sRGB & 99% AdobeRGB (deltaE
  • Resolution: 2560 x 1600 at 60Hz
  • Brightness: 350 cd/m2
  • Response Time: 6ms
  • Viewing Angle: 178°
  • Ports: DP, mDP, DP out, 2 HDMI, 2 USB 3.0 down, 2 USB 3.0 Up
  • Power Consumption: 54W (typical)
  • Adjustability: Height, tilt, swivel and pivot

What it comes with


Only three cables are provided: the USB 3, mini-DisplayPort to DisplayPort and the power cable.


These are the ports on the back. Note that there's no DVI port. DisplayPort and HDMI should be able to run the screen at full resolution 2560x1600 easily.


On the left side are two USB 3 ports. There's no more card reader.


Physical menu buttons are at the bottom. When powered on, there's a small white indicator light at the bottom right where the power button is.


If you want to VESA mount this, the distance between the screws are 4 inches apart.

This Dell UltraSharp monitor has specifications that should delight most creatives.

The screen

My current monitor is the still-surviving but half-dead U2711 that I bought in 2010. When compared to a 30-inch like this, I can't say I miss the smaller 27-inch screen.

This monitor features a 16:10 aspect ratio screen with 2560x1600 resolution. This aspect ratio is not common as monitors in the market are mostly 16:9. With the 16:10 aspect ratio, you have more vertical working space. There are 11% more pixels compared to the 2560x1440 resolution of typical 16:9 monitors. Overall, it feels quite immersive when looking at such a huge screen. And it's a pleasure to work on such a screen size and resolution.


In the photo above, the gray bar at the bottom represents the extra 160 vertical pixels across.

At the size and resolution, the PPI is 100 vs my 27-inch monitor's PPI of 108. This means the size of user interface of graphics software, and operating system, remain quite similar in size. Menus and buttons from Photoshop are large and can be seen easily without need for squinting eyes. By comparison, the next larger monitor Dell UP3216Q with 4K resolution has a PPI of 139 which is still not bad. The most recent monitor I reviewed, the Dell S2817Q has a PPI of 157 which is starting to make user interface look small. I guess it's still usable. I won't get any 4K monitor under 30-inches.

Colour gamut

The UP3017 supports up to 99% AdobeRGB. That's great for print designers because that gamut covers the whole CMYK gamut. For photographers and video creators, it means you also get a wider gamut to work with, before you export to other colour space.

I've used a Spyder5PRO colour calibrator and got a read out for 97% Adobe RGB so that's quite close to what Dell claims.


The advantage of AdobeRGB vs sRGB is the former has a larger colour gamut that includes all the colours from sRGB and more. Now, which monitor you choose will depend on where your work is going to appear. If your work is mostly going to appear on the web, such as designing for web or you're just hosting photos online, sRGB monitors are more than sufficient. For my purposes, I work with print so I want a monitor where I can see all the colours from the CMYK gamut. The CMYK gamut is within AdobeRGB but part of it is outside of sRGB. With a monitor like this, I can match what I see on screen with the actual printout which is very useful when checking proofs.

When you have a larger colour gamut, you can work downwards to a smaller one, but you can't do the reverse if you start out with a smaller gamut.

Ultimately, it depends on the type of work you do. Where are people going to see your work mostly?

Unfortunately for me, the unit that Dell sent me has problems with colour cast. On the right, there's a slight cyan cast. On the left there's a slight magenta cast. This can only be seen when working against white backgrounds, or surfing the web for example. It's very subtle and almost unnoticeable unless you're looking for it.


Can you see the colour cast from this photo above?


Now here's how the monitor look when I increased the saturation to make the colours more prominent. I had enhance the photo significantly because the colour cast is really subtle.


With this monitor, there's a Uniformity Compensation that can be found in the menus. The Dell engineer I spoke to told me to switch that on and see if it can get rid of the colour cast. After I switched it on, I could see that the colour cast has changed into one of alternating light blue and light pink diagonal strips. Again, it's very subtle. Uniformity Compensation works but I was still able to spot the colour cast, but it's now better compared to the original situation.

When I gave favorable reviews for other Dell monitors I've reviewed, there were comments saying that Dell cherry-picked a flawless unit for me. Well, it does not seem to be the case here. Anyway, if I were to get a monitor in this condition, I would return it for an exchange because this is a pricey monitor that Dell say is for "color-critical performance". Let's hope that it's my unit that has this issue.

Backlight and IPS glow

There's IPS glow for an IPS panel. It's not surprising. But it's only obvious when viewing the screen in total darkness.


Other than the colour cast, backlight is quite even but corners are slightly brighter.


Here's how it looks like when watching a movie. The areas where the black bars are are not totally black, again not unexpected for IPS panels.

With the 16:10 aspect ratio, wide aspect movies will have thicker horizontal black bars at the top and bottom. Those 16:9 videos from digital cameras and phones will have thinner bars.

For PC games, the game should fill the screen without black bars. I'm not too sure if console games can fill the screen or the proportion will remain at 16:9. The monitor should have no problems with console game at 60FPS.

Other things I like

I definitely feel less to no heat emanating from the monitor when seated one arm's length away. The typical power consumption is 54W compared to my current monitor's 113W (that's hot!). Newer 27-inch monitors nowadays uses around 30-50W. The Dell UP2716D uses 45W.

The monitor can detect graphic input automatically. This is a helpful feature for me as I often have to switch between HDMI and DisplayPort. It saves me the hassle of going into the menu to change any settings.

Conclusion

The Dell monitors that support up to 99% Adobe RGB are the UP2515D, UP2716D, Dell UP3017 and UP3216Q. These would be the monitors I would consider buying for professional print design work.

The pricing for Dell UP3017 can vary a lot depending on where you buy it from.

This is a pricey monitor. The Dell UP3017 is priced at USD $1000 currently on Amazon with shipping included. Dell UP2716D is USD $650. The 4K Dell UP3216Q cost almost 40% more at USD $1400.

Here in Singapore, UP3017 is SGD $2099 and UP3216Q is SGD $2259. The price difference is not significant so to me it's a no brainer to get the UP3216Q instead which has significantly more resolution. However, the UP2716D is only SGD $1099. I can't understand the SGD $1000 difference from the UP2716D. And unfortunately, the pricing of Dell monitors here in Singapore are also much higher than that in USA. Even Malaysia is selling cheaper than Singapore.

I hope the colour cast issue only affects the monitor that I have and not others. Other than that issue, this is a good monitor and I really enjoyed using it for more than a month.

Would I buy it personally?

Looking at the price difference, I prefer the smaller Dell UP2716D which has less pixels but not significantly less, but is significantly cheaper. Or if the price of the Dell UP3216Q is close, I would choose the 4K monitor for more resolution.

Availability

The Dell UP3017 is available on Dell's website.

Or if you want to support my blog, you can get it through these Amazon links below:
Dell UP3017 (99% Adobe RGB)
US | CA | UK | DE | FR | IT | ES | JP

Dell UP2716D (99% Adobe RGB)
US | CA | UK | DE | FR | IT | ES | JP

Dell UP3216Q (99% Adobe RGB)
US | UK | DE | FR | IT | ES | JP

Tags: 

Artist Hands-On Impression of Lenovo Miix 510 and Yoga Book

$
0
0

I was surprised when Lenovo Singapore invited me to their product launch. That was quite unexpected. But it's cool because I wanted to check out the new Lenovo Miix 510 and the Yoga Book.

And yesterday while I was at the event, I met my friends James Leong and Michael Ng. I found out that they have been testing the Yoga Book for a few weeks already. That is fantastic because they were able to give me lots of useful information regarding the Yoga Book.

So what's the difference between the Miix 510, Miix 700 and the Yoga Book?

The Miix 700 is a tablet that features an Intel m7 processor. The Miix 510 is a tablet that features up to 6th gen Intel i7 processor. The Yoga Book is a laptop with touch keyboard with no physical keys. So those are the main differences. You can think of the Miix 510 as a Surface Pro 4 competitor.

Here are the key specs for the Miix 510

  • Processor: Up to 6th Gen Intel® Core™ i7 processor
  • Operating System: Up to Windows 10 Home
  • Graphics: Up to Intel® HD 520
  • Memory: 8GB max
  • Storage: 256GB max
  • Display: 12.2 inch touch screen
  • Resolution: 1920x1200
  • Supports an optional stylus with Wacom technology
  • Comes with a detachable keyboard
  • Dimensions (W x D x H): (mm) : 300 x 205 x 9.9 (tablet ) / 300 x 205 x 15.9 (with keyboard)
  • Weight: 900 g, or 1.25kg with keyboard
  • Battery life: 8hrs
  • Ports: USB Type A + Type C, mini HDMI

And the key specs for the Yoga Book laptop:

  • Processor: Intel® Atom™ x5-Z8550 Processor(2M Cache, Quad-Core, Up to 2.4 GHz)
  • Operating System: Android or Windows 10 Home
  • Memory: 4GB max
  • Storage: 64GB max
  • Card Slot : microSD up to 128GB
  • Dimensions: (mm) : 256.6 x 9.6 x 170.8
  • Weight: 690 g
  • Display: 10.1 inch touch screen
  • Resolution: 1920 x 1200
  • Battery life: 13hrs
  • Ports: None except the microSD slot

Miix 510 quick artist impression

The unit on display did not have any respectable drawing applications but thankfully my friend came prepared. He managed to install the Leonardo drawing app onto the Miix 510 and we played around with it a little.


The form factor of the Miix 510 feels quite solid.


Just like the Surface Pro 4, it comes with a kickstand behind and a detachable keyboard is included.


The Miix 510 is compatible with the Lenovo Active Pen which uses Wacom technology so it does support pressure sensitivity. However, the stylus is sold separately. The stylus comes with a pen holder that uses one USB port space, leaving only the remaining USB Type C port.

Drawing with the stylus is very responsive. I felt no lag. There's no parallax error because the screen is quite thin. Pressure sensitivity works fine. Unfortunately, the stylus suffers from slight jitter when slow diagonal lines are drawn.

Yoga Book quick artist impression

Yoga Book is an interesting product.

This is a 10.1 inch laptop with a touch keyboard that has no physical keys. The first thing that caught my attention was the size. This is really small, thin and light. It's a 690g laptop. On a hot day, you can probably pick it up to fan yourself with it. The only port included is the SD card slot.


Yoga Book comes with either Windows 10 Home or Android. If I were to get one, I would get one with Windows because there are more drawing apps on the Windows platform. My friend James Leong was using this with the Leonardo drawing app as well and there's no lag. However, he said that with other applications, he could felt some lag. The Intel Atom x5-Z8550 processor may not be powerful enough to run more intensive drawing applications.

The cool thing about this laptop is the touch keyboard has no physical keys. It's just a flat surface. With the included stylus you can draw on the keyboard surface just like you would on typical graphics tablets, e.g. Wacom tablets.


When you need to type, you can light up the keyboard with the press of a button. And when you want to draw, press the same button to switch to drawing mode.


Design of the hinge actually allows you to flip the keyboard all the way to the back. 360 degrees.


Another feature of the keyboard surface is it also allows you to put paper over it, and let you draw on the paper while it records what you're drawing. In this mode, it works like the Wacom Bamboo Slate and Bamboo Spark.


To prevent the paper from moving when you're drawing or writing on it, there's a clipboard to hold the paper down. It's magnetised and it will stick to the keyboard surface too. If the paper moves while you're drawing, there's going to be misalignment issues with the recording.

I'm not sure of the actual size of the paper so I can't confirm whether you can buy standard A5 notepads to use with the Yoga Book.


The included stylus uses two types of nib, the stylus nib and the ballpoint nib. To use it like a stylus, you need to use the stylus nib which is really just like any other hard tip nib. The tip is quite small though so it's good for drawing without blocking the screen.


The ballpoint nib is actually from those 7mm ballpoint refills. They use the Ministar refill here. I can't confirm if you can use other brands besides Ministar.

The pen supports up to 2048 levels of pressure sensitivity. I forgot to test for jitter when using the stylus tip though. Ballpoint tip has no problems at all and the laptop was able to capture all the strokes perfectly.

Conclusion

I wasn't able to test the Miix 510 and Yoga Book more extensively with the two hours I had. If I can get my hands on review units, I'll put out more detailed reviews. Meanwhile, you can check out my other drawing tablet reviews.

Tags: 

Best laptop for artists and graphic design (4Q 2016 Updated)

$
0
0

This article was last updated in November 2016

When it comes to choosing laptops for creative work, art or graphic design, digital painting or 3D modeling, there are a few considerations.

This article is split into two parts. The first part looks at what the specifications mean, and the second part looks at the different laptops available currently in the market.

If you're an art student looking to get a new laptop for school, or an professional looking for a workstation, the list below should help you save some time.

My background: I'm an artist/designer/journalist working at a newspaper. Over the years, I've used slow, fast, powerful and crappy computers (still do), and work on both Mac and Windows platform.

Operating system
The most important thing is to find out if the software you use is supported on Windows or Mac.

Not all applications are cross platform. For example, Autodesk 3ds Max runs only on Windows. Final Cut Pro runs only on Mac. Thankfully, most of Adobe's graphic applications are supported on both Windows and Mac.

Specifications
Just to be sure, you check with the software's website for their minimal supported system specifications. That should give you a good starting point from which to choose your computer's specification. Generally speaking, laptops nowadays are quite powerful even for the entry level ones.

Storage - This happens to be the bottleneck of any machine. It's best to get SSD (more expensive) so that your system can load fast, save and open files fast. Some laptops offer both solid state drives (SSD) and the slower spinning hard disk drives (HDD) which gives you the best of both worlds - you can install the OS on the fast SSD and store your huge files on the spacious but slower HDD. Most 13-inch laptops have only one slot for storage drives. When it gets to 15-inch, there are some that offer more than one slot for storage drives, which means you get to choose both SSD and HDD.

RAM - This is memory used to store temporary work, e.g. Photoshop layers you have yet to save, the many applications opened in the background but not in use, your many browser windows. Note that your OS uses RAM too. 8GB RAM is the very least you should get. It's best to get 16GB. RAM is affordable and this is not the area to save significant money.

Graphics card - If you're just creating 2D work, you can save money by not getting a high-end graphics card. A high end graphics card allows you to move around a highly detailed or textured 3D model with no lag. For the purpose of this article and the laptop comparison further below, when I mention that a graphics card is mid-range, it means it's suitable for 3D work for a relative large number of polygons in wireframe mode and may lag when it comes to previewing textured mode and moving around. High-end graphics card can handle detailed textured 3D scenes and move around without lag.

Processor - Either duo or quad core processors. Not many applications use quad core processors effectively yet. If you need to render 3D or videos regularly, definitely go for a quad core.

Weight
Since it's a laptop, portability is going to be a concern. If you bring your laptop around often, it might be better to get a lighter one. But seriously speaking, performance laptops are not going to be light.

Screen size and resolution
Screen size and resolution will affect your productivity. A resolution of 1920 by 1080 pixels should provide ample working space and still be able to show menus, control palettes. Next consideration is screen size. A larger screen will enable you to see details clearer (if the resolution is high enough) and make it easier to click on the menus and control palettes. I suggest at least a 15-inch screen with 1920 by 1080 resolution.

Nowdays, there are screens that offer much higher resolution than 1080P. E.g. 4K screens at 3840 by 2160 resolution. If you want a high resolution screen, make sure that the software you're using supports it or the user interface, e.g. menus and buttons, are going to appear tiny and almost unusable. Do your research in respective software format. E.g. Adobe CS5 and CS6 menus are buttons are tiny and incredibly frustrating to use.

Panel type
It's best to get an IPS panel that will provide the widest viewing angle. In another words, you'll be able to see the same colour no matter the angle of the screen. For the laptop comparisons below, if there's no mention of IPS, it means I wasn't able to find any information regarding the type of panel.

It's also good to get a matte screen instead of one that's glossy. Glossy means you'll get reflections. I prefer matte. It's just a personal preference.

Gamut
If you're into print production or need colour accuracy, then get a laptop that supports as close to 100% Adobe RGB as possible. The laptops have good IPS screens with decent colours and viewing angles, however they don't come close to 100% Adobe RGB.

If you have the budget for laptops with 100% Adobe RGB screens, check out this list

Battery life
Graphic applications can be processor intensive and use up a lot of battery power. Of course it's best to have a laptop with longest lasting battery life but in the real world, you're likely to be plugging into a power supply.

Note that 4K resolution screens will use up more power as well.

My quick recommendation: For the budget constrained, get the ASUS K501UX (2kg) (my recommended value for money choice), followed by Dell Inspiron 15 (7559) (2.7kg). For high end systems, look at the Lenovo Thinkpad P-series, Dell Precision or HP Zbook Studio G3..

The choices

Alright, here are the laptop choices.

Lenovo ThinkPad P-series (Released 1Q 2016)

The P-series Thinkpad laptops are the portable workstations offered by Lenovo. It used to the the W-series. I wish they would stop messing around with the letters as it gets confusing fast.

The P50s is considered low-end but still powerful. If you have the budget, go for the P50 or P70 for the quad-core processors and more configurable.

Note that there 3 screen options to choose from, 15.6-inch FHD, 15.5-inch (2880x1620) and 15.6-inch 4K. There's an anti-glare filter that's not totally matte.

Here's quick comparison.

ModelP50sP50P70
ProcessorUp to Intel Core i7-6600U (dual 2.6Ghz)Up to Intel Xeon E3-1505M (quad 2.8Ghz)Up to Intel Xeon E3-1575M (quad 3Ghz)
Screen15.6 inch IPS15.6 inch IPS17.3 inch IPS
Resolution1920 x 10801920 x 10801920 x 1080
Graphics cardNVIDIA Quadro M500M 2GBNVIDIA Quadro M1000M 4GBUp to NVIDIA Quadro M2000M 4GB
RAMUp to 32GBUp to 64GBUp to 64GB
StorageUp to 512GB SSDUp to 1TB SSDUp to 1TB SSD
OSWindows 10 HomeWindows 10 ProfessionalWindows 10 Professional
Weight2.2kg2.5kg3.43
PriceClick to checkClick to checkClick to check

Alienware (R3 released in Q3 2015)

Alienware have some of the the biggest and baddest (in a good way) laptops in the market. The brand is synonymous with gaming laptops. Their laptops are noted for their graphics prowess, in other words they have high-end graphics card, which means they are also good for 3D work. The hardware is of high specifications, and the price is also on the high end.

Alienware laptops models are differentiated by their screen size, e.g. 13, 15 and 17.

Recently, they have added the option to included a Alienware Graphics Amplifier (AGA) to further boost the graphics prowess. Basically, the AGA is a graphics card enclosure that you can connect to your laptop via a proprietary cable. Note that you have to purchase the graphics card separately. It's really targeted at gamers. 3D digital artists probably don't need that extra bulk.

Model131517
Screen13 inch IPS15.6 inch IPS17.3 inch IPS
Resolution1920 x 10801920 x 1080, 3840 x 21601920 x 1080
Graphics cardNVIDIA GeForce GTX 965M (4GB)NVIDIA GeForce GTX 965M (2GB) or 970M (3GB) or 980M (4GB)NVIDIA GeForce GTX 970M (3GB) or 980M (4GB)
RAMUp to 16GBUp to 16GBUp to 16GB
StorageUp to 512GB SSD or 500GB HDD2 slots for 1TB SSD and/or 1TB HDD2 slots for 1TB SSD and/or 1TB HDD
OSWindows 8.1 (64-bit)Windows 8.1 (64-bit)Windows 8.1 (64-bit)
Weight4.5 lbs / 2.1kg7.1 lbs / 3.2kg8.33 lbs / 3.8kg
Warranty1 year (up to 5 years on Dell's website)1 year (up to 5 years on Dell's website)1 year (up to 5 years on Dell's website)
PriceClick to checkClick to checkClick to check

If you need portability, the 13-inch is most compact and light. The smaller model also uses a weaker graphics card but you can configure up to NVIDIA GeForce GTX 965M with 4GB GDDR5.

The bigger brothers 15 and 17 have a variety of graphics card options, such as the high-end NVIDIA GeForce GTX 970M, AMD Radeon R9 M395X with 4GB GDDR5 or NVIDIA GeForce GTX 980M with 8GB GDDR5.

There are many screen options. You can go for matte 1080P or 4K resolution.

Again, get one with SSD.

The warranty for Alienware is only 1 year. If you buy it through Dell's website, you get the option to extend your warranty, and also choose more customization.

If you don't like the flashy design of Alienware, the plain but equally as powerful Dell Precision workstation is your alternative.

Surface Pro 3 (Released 2Q 2014)

This is a tablet laptop, one where you can draw on the screen. With the Surface Pro 4 out already, the price has dropped for Surface Pro 3 so if you don't need the latest, it's worth considering the earlier model.

Key specifications:

  • Screen: 12 inches, 2160 by 1440 pixels
  • Weight: 1.76lbs (800 grams)
  • Processor: i3, i5, i7 (Dual core 1.5Ghz - 1.9Ghz)
  • Storage: 64 - 512GB
  • RAM: 4 - 8GB
  • Comes with pressure sensitive stylus

I've invited a guest artist to review the Surface Pro 3 before and it's a review you should check out if you're interested in the ultimate portable laptop.

The downside of the Surface Pro 3 is the use of integrated HD Graphics (HD 4200, 4400, 5000). This means the unit is not as good at 3D performance compared to other laptops in this article.

One important thing to note is, the storage space indicated has not taken into account the OS which takes up 28GB (huge, I know). So getting the 64GB model means you only have 36GB of storage left.

The huge plus for the Surface Pro 3 is the ability to bring it everywhere and use it with comfort because it's so light (lightest amount all other laptops mentioned). At a moment's notice, you can just pack it up and go, fast.

Surface Pro 4 (Released 4Q 2015)

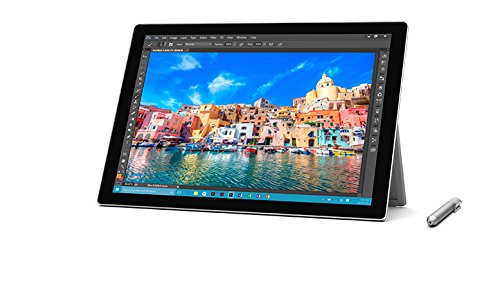
Microsoft has improved on the SP3 in every imaginable way with the Surface Pro 4. If you want the latest all-in-one tablet/computer, then this is the one to get.

There are many models with different configurations to choose from and they are

I would personally get the 256GB storage and 8gb RAM system if I'm in the market for one. That's the unit somewhere in between. The higher end units are too pricey.

Microsoft Surface Book (Released 4Q 2016)

While the Surface Pro 4 is a tablet that doubles up as a laptop, the Surface Book is a laptop that doubles up as a tablet.

Main difference is the Surface Book has dedicated graphics card so you'll be able to handle 3D programs more efficiently. Check out a guest artist review of the Surface Book at http://www.parkablogs.com/picture/artist-review-of-microsoft-surface-boo...

Microsoft has added the option to have Intel i7-6600U processor (dual 2.6Ghz) in late 2016. It's a decent and fast processor for a 2-in-1 like the Surface Book.

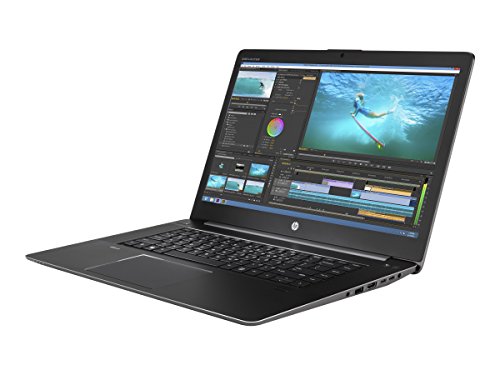
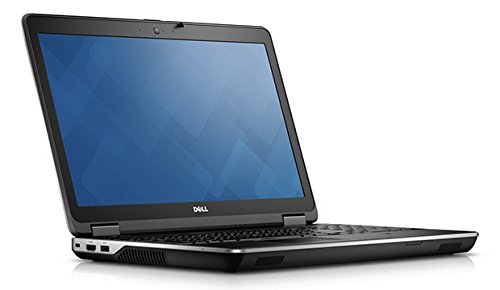
Dell Precision Mobile Workstations (Released 1Q 2016)

If you don't like Dell's flashy Alienware, then check out the Dell Precision Workstations. The Precision Workstation computers intended as workstations for CAD / Architecture / CG professionals, or as small-scale business servers.

Dell Precision latest series are 5000 and 7000, available in 15.6 and 17.3 inches. More specifically, the model numbers are 5510, 7510, 7710.

Key specifications:

Model5000 Series7000 Series
Screen15.617.3
Resolution1920x1080 matte or 3840x2160 glossy touchscreen1920x1080 matte or 3840x2160 glossy touchscreen
Graphics cardNVIDIA Quadro M1000M/M2000M with 2GB/4GBNVIDIA Quadro M3000M/M4000M/M5000M, AMD FirePro W5170M, W7170M
ProcessorQuad 2.3Ghz to Quad 2.8GhzQuad 2.3Ghz to Quad 2.8Ghz
StorageUp to 1TB SSD and/or 1TB HDDUp to 1TB SSD and/or 1TB HDD
RAMUp to 32GBUp to 64GB
Weight3.93lb / 1.78kg6.16 lbs / 2.79kg
Warranty3-years/1-yr battery3-years/1-yr battery

They are available in either 15.6-inch or 17.3-inch screens. The graphics card in all the models are different.

I've been sent a 5510 Series 5000 to review a few months ago and it's extremely fast. Not surprisingly since it's quad core and running on SSD.

The default configurations are not optimal so you have to configure them to get the best performance. I recommend upgrading the SSD, RAM and processor in that order. You might want to get a battery with longer life too. To get pre-configured models, visit these links to Amazon: 5510, 7510, 7710

These laptops are quite heavy and start at 2kg.

3 year warranty is provided for the Dell Precisions as compared to the 1 year for the Dell Alienware. It's best to get these laptops on Dell's website because there are many ways to customize them, and you also get to buy up to 5 years of warranty support.

Zbook Studio G3 (4Q 2015)

HP Zbook Studio G3 competes with the Dell Precision at the high end market. Whatever the Dell Precision offers, you can find it on the HP Zbook Studio G3 also.

The main highlight is how configurable it is.

The other thing I like is it has a 15.6-inch 4K matte screen with 85% Adobe RGB gamut support. While the colour gamut cannot match glossy screens, it is great for a matte screen.

If you have the budget, go for Dell Precision or HP Zbook Studio G3. And before you label a laptop from 4Q 2015 as slow, note that the Apple Macbook Pro released in 4Q 2016 was one year late and was not able to overtake the Dell Precision and HP Zbook 3 in terms of specifications.
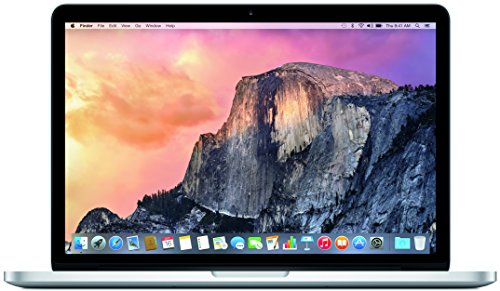
Apple Macbook Pro with Retina Display (Released 4Q 2016)

There are 13-inch and 15-inch Macbook Pro models and the price range mentioned above are for the 15-inch models. The 13-inch screen may be too small for graphics work.

Key specifications

  • Processor: Dual 2.0Ghz to Quad 2.9Ghz
  • RAM: Up to 16GB
  • Graphics card: Intel Iris Graphics 540, Intel Iris Graphics 550, Radeon Pro 450, Radeon Pro 455
  • Storage: Up to 1TB Flash storage
  • Weight: 1.37 - 1.83kg
  • Screen: 15.4 inch, 2880 by 1800 pixels
  • Warranty: 1 year warranty with optional 2 extra years with Applecare purchase

The Macbook Pro that came before the 4Q 2016 released was already quite good in terms of performance. The new Macbook Pro, in my opinion, offered only incremental improvement that's not worth the extra price that Apple is charging.

The screen is great and is now brighter at 500 nits but I've never seen anyone use monitors at their maximum brightness. Colour accuracy and viewing angles are great. The screen resolution of 2880 by 1800 is also sweet because details will appear sharp.

Macbook Pro 2016 has the new Touch Bar feature which is nice to have but it's just a different way of doing things, and does not mean you will save significant time using it.

Main downside of the Macbook Pro 2016 is they have replaced all the old ports with USB Type-C Thunderbolt 3 ports. This means you'll may adaptors to connect to your external monitor, phone, SD card, scanner and other devices.

As with Apple computers, the most important thing to do before buying is to check if the software you're using is supported on the Mac OS, and for 3D programs whether they are supported by the graphics card.

If this is the first time getting a Mac, note that files created by an application can be opened in the same application running on Windows. E.g. Photoshop for Mac files can be opened by Photoshop for Windows.

In my opinion, Macbook Pro 2Q 2015 is represents greater value for money. It's only slightly slower but significantly cheaper. And you get to have all the commonly used ports. The future may be USB Type-C, but that future is not here yet so it's probably still better to stick with something accessible. For all friends who ask me for advice, I always ask them to save the money and get the 2Q 2015 model if they can find it at a good price. Try the refurbished section on Apple online store. Use the money you save to get the 2 additional years of AppleCare.

Aorus (Released Q1 2016)

Key specifications:

ModelX3 PlusX3 Plus v3X7X7 v2X7 Pro
Screen13.9" QHD+ 3200x180013.9" QHD+ 3200x180017.3-inch Full HD 1920x108017.3-inch Full HD 1920x108017.3-inch 1920x1080 IPS LCD
Graphics cardIntel® HD Graphics 4600 (i7-4710HQ)
Intel® HD Graphics 5200 (i7-4860HQ)
NVIDIA GeForce GTX 870M GDDR5 6GB
Intel® HD Graphics 4600
NVIDIA GeForce GTX 970M GDDR5 6GB
NVIDIA GTX 765M SLI 4GBNVIDIA GTX 860M SLI 8GBNVIDIA® GTX 970M SLI 6GB
ProcessorIntel® Core i7-4710HQ (2.5GHz-3.5GHz), i7-4860HQ (2.4GHz-3.6GHz)Intel® Core i7-4710HQ (2.5GHz-3.5GHz)Intel Core i7-4700HQ (2.4GHz-3.4GHz)Intel Core i7-4860HQ (2.4GHz-3.6GHz)Intel Core i7-4870HQ (2.5GHz-3.7GHz)
RAMUp to 16GBUp to 16GBUp to 32GBUp to 32GBUp to 32GB
Storage2 slots for SSD and/or HDD2 slots for SSD and/or HDD4 slots for SSD and/or HDD4 slots for SSD and/or HDD4 slots for SSD and/or HDD
Weight1.8kg1.8kg3kg3kg3kg
WarrantyWarranty: 2 years / 1 year batteryWarranty: 2 years / 1 year batteryWarranty: 2 years / 1 year batteryWarranty: 2 years / 1 year batteryWarranty: 2 years / 1 year battery
PriceClick to find outClick to find outClick to find outClick to find outClick to find out

Marketed as gaming laptops, these are also among the more powerful laptops.

The various models offered by Aorus are X3, X3 Plus,X3 Plus v3, X7, X7 v2, X7 Pro.

X3 was left out because it's has a 13-inch screen. Sports a NVIDIA GeForce GTX 870M GDDR5 6GB by the way.

X3 Plus and X3 Plus v3 have 13.9-inch 3200x1800 screens. The graphics cards are NVIDIA GTX 870M and GTX 970M respectively. The GTX 870M is very good, and the GTX 970 is top of the line.

X7, X7 v2 and X7 Pro main difference would be in the graphics card. They are NVIDIA GTX 765M, GTX 860M and the GTX 970. These laptops all have 17.3-inch screens but their resolution is only 1920x1080, lower than that of the X3s' 13.9-inch models.

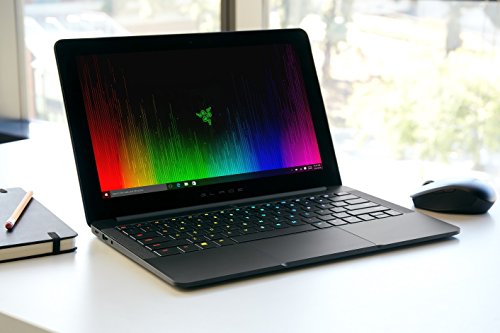
Razer Blade (Release 1Q 2016)

These laptops are from the same makers as their popular Razer gaming computer mice. Currently, they have two models, the small 12.5-inch Razer Blade Stealth and 14-inch Razer Blade.

The interesting model is the Stealth which comes with the not-so powerful Intel® HD Graphics 520. However, you have the option to pair it with a Razer Core, an external graphics card enclosure through Thunderbolt 3 connection. Razer Core's graphics card is sold separately. Anyway for a 12.5-inch screen running 2560 x 1440 resolution, it's not suitable for graphics work (user interface is too small) so you need to plug it into an external monitor.

Key specifications:

ModelsRazer Blade StealthRazer Blade Pro
Screen12.5-inch LED14-inch LED
Resolution2560 x 1440 or 3840 x 2160 touchscreen3200 x 1800 touchscreen
Graphics cardIntel® HD Graphics 520NVIDIA GeForce GTX 970M (6GB)
StorageUp to 512GB SSDUp to 512GB SSD
OSWindows 10Windows 10
Weight2.75 lbs./ 1.25 kg4.25 lbs / 1.93 kg
Warranty1 year1 year

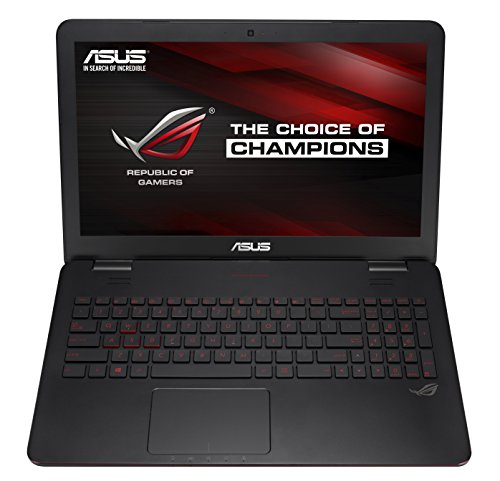
ASUS (Released 3Q 2015)

ASUS has a few notable laptops at really attractive prices.

My favourite all-time recommendation for budget hunters would be the ASUS K501UX. For USD $800, you get dual-core 2.5Ghz, 1080P matte IPS screen, 8GB RAM, 256GB SSD and the NVIDIA GeForce GTX 950M.

Or add USD$ 100 and get the ASUS K501UW and you can get a 512GB SSD and NVIDIA GTX 960M.

You have access to the RAM slot and can easily add another 8GB RAM to it.

MSi (Released 1Q 2016)

MSi, the best gaming notebook provider, or so they say. Actually, they are very good indeed.

I've picked out a few laptops that caught my eye.

ModelMSI GS40 PhantomMSI GS60MSI GT60 Dominator ProMSI GS70MSI GT72 Dominator Pro
Screen14-inch15.6-inch15.6-inch17.3-inch17.3-inch
Resolution1920 x 10801920 x 10802880 x 16201920 x 10801920 x 1080
Graphics cardNVIDIA GeForce GTX 970M (3GB)NVIDIA Geforce GTX 860M (2GB)NVIDIA Geforce GTX 880M (8GB)NVIDIA GeForce GTX 860M (2GB)NVIDIA Geforce GTX 980M (8GB)
ProcessorIntel Core i7-6700HQ (Quad 2.6Ghz)Intel Core i7-4700HQ (Quad 2.4Ghz)Intel Core i7 4800MQ (Quad 2.7Ghz)Intel Core i7-4700HQ (Quad 2.4Ghz)Intel Core i7-4710HQ (Quad 2.5 GHz)
RAMUp to 16GBUp to 16GBUp to 16GBUp to 32GBUp to 32GB
Storage2 slots for SSD and/or HDD2 slots for SSD and/or HDD2 slots for SSD and/or HDD2 slots for SSD and/or HDD2 slots for SSD and/or HDD
Weight1.6kg1.96kg3.5kg2.66kg3.9kg
Warranty2 years warranty2 years warranty2 years warranty2 years warranty2 years warranty
Price

MSi laptops are on par with ASUS in most cases. The main difference is MSi backs their laptop with 2 years warranty (1 year global).

The Geforce GTX 960M, 860M are mid-range graphics card. Geforce GTX 880M and 980M are the high-end ones.

Conclusion

As you can probably see, there are lots of options.

My preference for choosing a laptop would be to have at least SSD for storage, an IPS panel with at least 1080P resolution and at least 2 years of warranty.

As usual, check out more reviews on Amazon. All the links are provided for above.

In short, for budget conscious, I recommend the ASUS K510UX. For those with more budget, I recommend the Dell Precision 15-inch 5510 or HP Zbook Studio G3.

Tags: 

Artist Review: Adonit Snap Stylus for iOS and Android

$
0
0

Adonit Snap is a stylus that's designed to go with phones rather tablets because of its small size.

The stylus that I have is a review unit sent to me by Adonit. I've used many Adonit styluses in the past, some are bought, some are given. In this review, I'll compare it with a few others that I've own.

Build quality

Design of this stylus is unlike any other Adonit styluses before. It's designed like a carpenter pencil in shape. It's a flat stylus that measures only 4mm thick. It's also quite short at 12.2cm. It weighs 9.3g.


Because the stylus is so thin, I can put the phone and stylus in my pocket and not feel that I've carried anything extra. It's very portable.

The 1.9mm tip is small so it does not block lines as your write. Unlike other styluses that feature the 1.9mm tip, this one does not wobble.


With the stylus in hand, it feels like holding a piece of flat unwrapped chewing gum. I thought I could bend it so easily because it's so thin. Looks can be deceiving because it's incredibly strong. You're not going to bend the metallic body unless you're using an unnatural amount of force.

The smooth matte surface is available in black, white and rose gold.


Overall, it looks quite stylish.

Battery
Battery life is rated at 7 hours of continuous use. It needs 1 hr to be fully charged. I don't draw for 7 hours straight so battery life is not a problem to me.


The stylus uses micro-USB charging. I like this method of charging better than the USB thumb drive of other Adonit styluses because I don't have to bring a USB thumb drive around. I have micro-USB cables at home, in the office and at my friend's house. The micro-USB port is so much more convenient. And I don't have to worry about losing the USB thumb drive which I have lost one before and had to buy one to replace it, only to discover it was in my bag all along because it was so small that I could not see or feel it.

In short, good move on using the micro-USB port for charging. Do it for the other styluses, Adonit.

Features
Adonit Snap does not require Bluetooth to work.


However, if you want the extra functionality of being able to take photos with the side button, then you can pair it your iOS or Android device. I can't get it to work on my Android phone but it works fine with iOS. It's a shutter remote that's quite helpful because it makes taking photos with the phone easier. People usually take photos with phones using one hand holding and the thumb for the shutter. With the remote, you don't have to use your thumb to reach for the shutter on the screen anymore so there's going to be less hand shake as you can now hold your phone firmly.

The other feature is the stylus' body has magnets. In the packaging box, it comes with a small piece of metal with adhesive that you can paste onto your phone. This allows the stylus to snap to that metal plate. The magnet is strong so no amount of normal shaking is going to dislodge the stylus. The thing is, some mobile phones or covers already have magnets and you can actually just just those without the need to paste that metal plate. And if your phone cover does not have magnets, you still don't have to stick the adhesive because you can just put that metal place between the phone and cover, with the unpeeled paper adhesive towards the phone so it does not scratch.


Shown above is that small metal plate. I've not taken off the paper protecting the adhesive on the back.

If you're sticking the adhesive to your bare body phone, it would be difficult to remove the sticky stuff in the future.

Performance
To use it, you just have to push the button on the side and a green light comes on momentarily. It powers on instantly and since it does not require Bluetooth pairing to use the stylus for drawing or writing, you can use it instantly.

When using this stylus, I test for accuracy and responsiveness. There's no pressure sensitivity and no palm rejection.

On the iPad I've tested with the following drawing and note taking apps:

  • Sketches Pro
  • Procreate
  • Adobe Draw
  • Adobe Sketch
  • Medibang Paint Pro
  • Bamboo Paper
  • FiftyThree Paper
  • Penulimate
  • Notability
  • GoodNotes
  • Notes Plus

They all work quite well generally speaking.

Whether there is lag really depends on the the app and I'm glad to say that most are quite responsive. FiftyThree Paper is a bit slow but it's not a big issue. By slow, I mean the lines trail behind the tip. With other apps, the lines almost come out instantly.

Accuracy depends on how you hold the stylus. I find that if I hold the stylus where the flat side is towards the screen, there will be some misalignment where the line appears 2-3mm away. If I hold it flat side away from the screen, there's almost no misalignment. Generally speaking when I'm using it, there's no misalignment and that's great!


Holding it this way is more accurate.


Holding it this way can cause misalignment.


There's still some slight jitter when drawing slow diagonal lines. However, it seems to have minimized but it's still there. For taking notes it's not going to be a problem because no one writes that slow. However for drawing, if you do draw diagonal lines that slow, it may be a problem. When I'm drawing at normal speed, I don't really experience the slow diagonal line jitter.


This was drawn on Wacom Bamboo Paper app. I've drawn the diagonal lines very slowly.

Handwriting apps
Unfortunately, not a lot of handwriting apps work well.

The apps with best performance on the iPad are Wacom Bamboo Paper and Penultimate. My handwriting was captured quite accurately without distortions.

GoodNotes 4 did not work with the stylus. I could write with my finger, but I could not with the stylus. Notes Plus and Notability had distortions and stray strokes when I'm writing.


Notes Plus sample


Notability sample


Penultimate sample


Wacom Bamboo Paper sample


On the Android, I only tried the note taking app Inkredible and Wacom Bamboo Paper and both work well.

Last thing is about line skipping. There's rarely any line skipping when I'm using this stylus. I'm quite surprised because with other digital styluses, I do experience line skipping sometimes but with the Adonit Snap, it's rare. Currently I'm also testing the Adonit Dash 2 and that stylus has line skips once in a while.

Conclusion
I'm pleasantly surprised by the Adonit Snap. It looks good and the performance is satisfactory. It does what it says it does so I've no complaints. Initially, I was rather skeptical because of my experience with other Adonit styluses, or more specifically I did not like the slow-diagonal-jitter-line issue. With the Adonit Snap, they have minimized the jitter.

I've checked out some Amazon reviews and people are having problems with alignment, magnets interfering with the signals and lines skipping. Now that's interesting because I did not have any of those issues.

With drawing apps, the stylus works quite well. However with note taking or handwriting apps, it's a hit and miss. Penultimate (iOS), Wacom Bamboo Paper (iOS and Android) are the ones that work well for me.

Overall, I've a positive experience using this stylus.

I hope this review is helpful to you.

Pros and cons at a glance
+ Beautiful design
+ Small, light and portable
+ Micro-USB charging
+ Works well with most apps
+ Does not require Bluetooth for writing/drawing
+ When pair with Bluetooth, you can use it as a remote camera shutter
- Bluetooth remote camera shutter does not work on Android
- If you stick the adhesive to your phone body, it may be difficult to remove

Availability

You can find the Adonit Snap on Amazon through the links below:
Amazon.com | Amazon.ca | Amazon.co.uk | Amazon.de | Amazon.fr | Amazon.it | Amazon.es | Amazon.co.jp

Tags: 

Viewing all 160 articles
Browse latest View live