Quantcast
Channel: art electronics
Viewing all 160 articles
Browse latest View live

Review: Bosto Kingtee 14WX Pen Display Tablet Monitor

$
0
0

First off, thanks to local Singapore distributor One Thirty Five for lending me the Bosto Kingtee 14WX for review. You can order this in Singapore from Basheer Graphic Books or contact Bosto Singapore at bosto-singapore.com or www.facebook.com/BostoSingapore. Those overseas can get the 14WX on Amazon.com.

The Kingtee 14WX is the little brother of the Kingtee 22HDX. If you have read my review for the 22HDX, you'll find that I was reasonably pleased with the performance for Windows and not so much on Mac.

Important notes

Before using the 14WX, you should uninstall all Wacom drivers and install the lastest Bosto drivers from the Bosto website. There will be driver conflicts if you have multiple tablet drivers.

The drivers for 14WX uses the same one for 14WA-22HD-22HDX. There's a separate driver for the keyboard shortcuts.

I tested the 14WX on two Macs, one at home running Mac OS (10.10.5) and one in the office with Mac OS (10.9.5). The one at home was not able to detect the stylus. The one in the office worked fine. When the drivers do not work, it's frustrating. Maybe the Mac drivers have not been updated for Mac OS 10.10 yet.


After you install the drivers, the driver files will appear in the Applications folder. You can change the settings from the System Preference.

Unfortunately, I did not have the time to test it on a Windows machine before I had to return the unit.
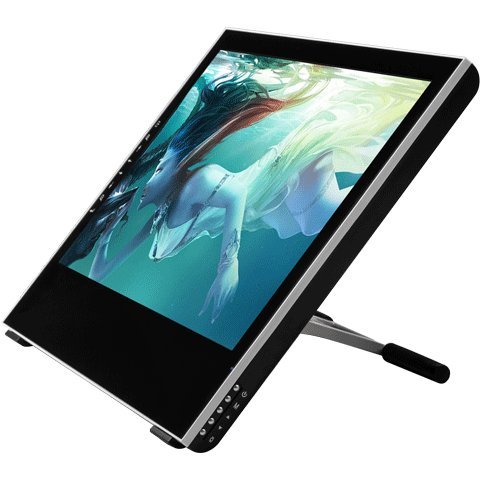
Bosto Kingtee 14WX

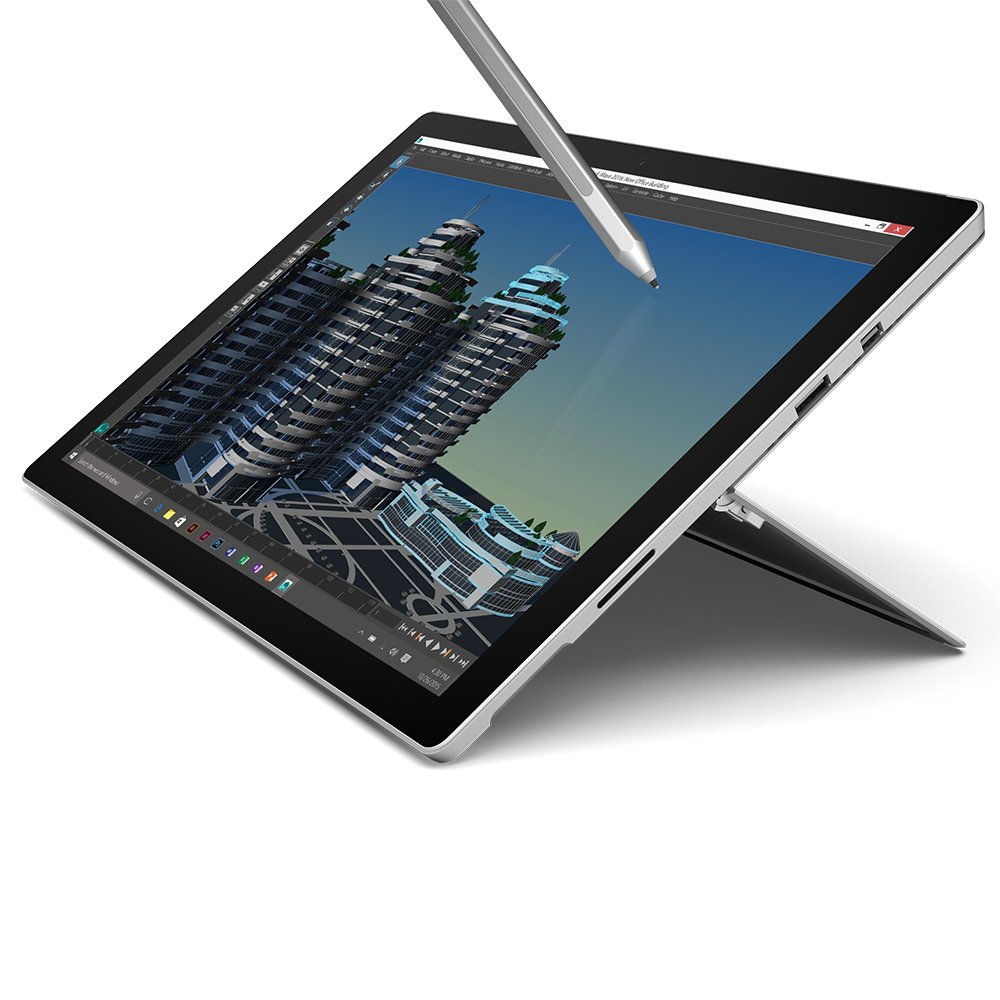
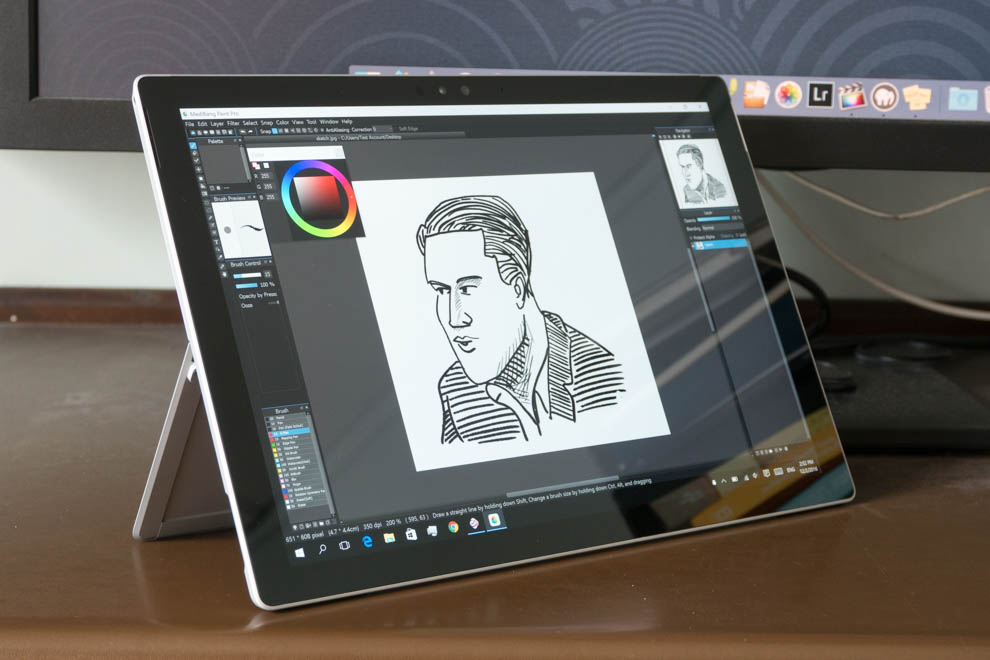
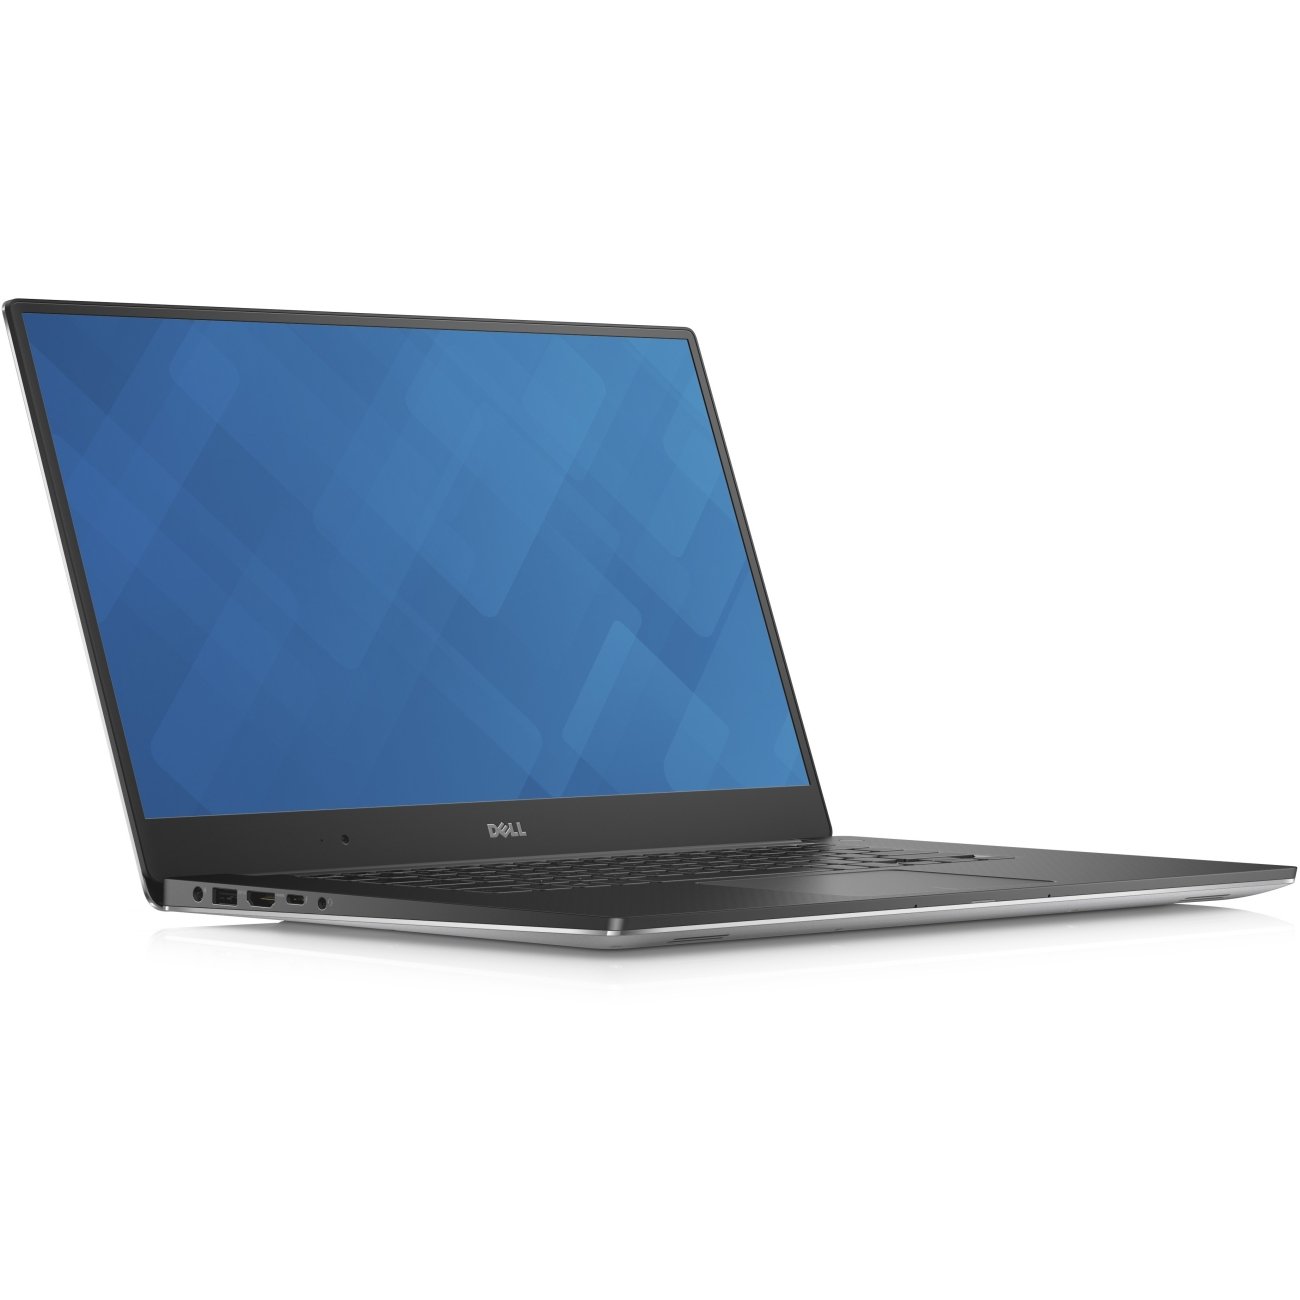
The Bosto Kingtee 14WX is a pen display tablet monitor. It's like a Cintiq. It's a monitor and you can draw directly on the screen. It's a Cintiq alternative and it competes Wacom Cintiq 13HD.

The 14-inch screen is a 1920 by 1080 resolution IPS LED panel (72% Adobe RGB gamut) with fantastic viewing angle. It supports 2048 levels of pressure sensitivity. The pen does not require batteries. For the full specifications, just visit Bosto's website.

The unit came in a cardboard box without any packaging art. That's how they save money.


The items included in the box are:

  • The monitor
  • HDMI-DVI cable
  • VGA cable
  • USB cable
  • Stylus
  • Glove
  • Cleaning cloth
  • A cloth case for monitor
  • Power cable

I checked the Bosto website and some of the items I have aren't listed there, such as the cloth case. In any case, check the listing from the website you're buying from.


The main thing to take note is the HDMI-DVI cable. The monitor has a DVI and VGA port. The DVI end of the HDMI-DVI cable is just actually an HDMI-DVI adapter.


Build quality is good and the monitor feels solid. The black plastic body is matte with smooth surface.


Corners are rounded off. There are two rubber feet beneath to prevent the unit from sliding while working on it.

There are 20 shortcut buttons and two dial wheels on the front. The buttons feel a bit mushy but works. The 14WX is a small unit and comparable to the size of 13/14-inch laptops in the market, except that it's much lighter.

The screen is glossy so reflections is to be expected with you have lights behind you.

Bottom part of the unit becomes slightly warm after half an hour but it's not a big issue or unbearable.


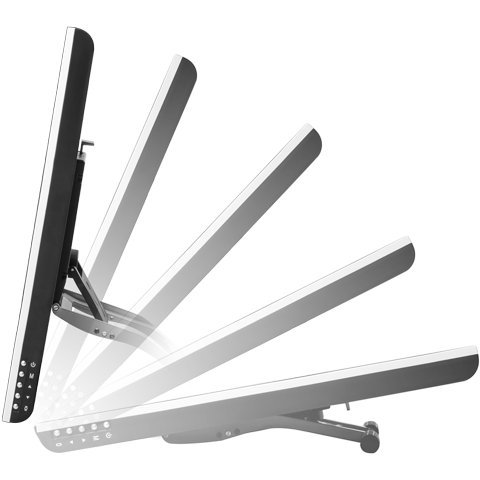
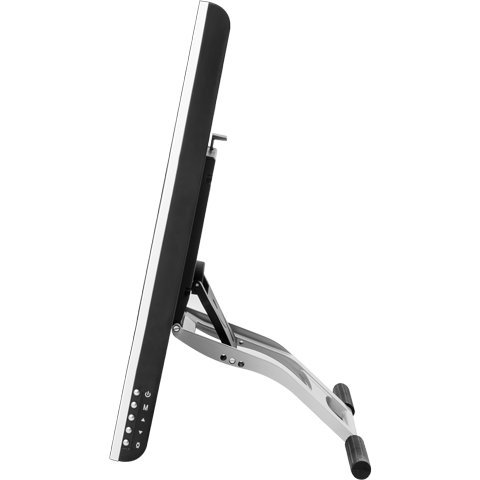
Unlike larger tablet monitors, the 14WX does not have a big stand. There are only two short plastic legs behind that you can release to prop up the screen. There are three working positions to choose from: flat and two inclined positions.


Ports for the 14WX are at the top, so are the physical menu buttons. There are ports for 2 USB, power, DVI and VGA. The cables come out from the top neatly. If you need a VESA mount, this uses the 7.5cm.


Main issue is when you plug in the USB port, the cable will block access to the menu. In real life, after you have fixed the settings, then chances are you won't be needing to access those menu buttons any more, so this is not going to be really a problem.

When plugged in, the 22HDX should automatically detect your system (Mac and Windows). There's no need to choose which cable connection before powering up the screen.


When I first plugged in the display, the Mac went into extended desktop mode. You can also choose the Mirroring mode if you want to, from the System Preferences. The screen is IPS so colour accuracy and viewing angles are great. You might not need an extra monitor for colour checking. If you don't mind the small size of the screen, you can use this as the main screen.

As mentioned above, this is a small tablet. I've a small table and I can still put it on my table and still have space for the keyboard.
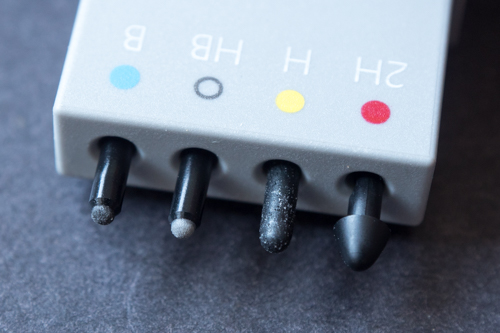
The stylus


The wireless stylus is thinner than I expected. The design feels like a ballpoint pen and it feels like drawing with a normal ink pen.

There's only one button on the side. The back has an eraser. It is not battery powered.

The tip is hard and firm, and glides smoothly on the glossy screen.


There's a convenient pen slot at the back of the monitor.

The shortcut buttons


There are 10 shortcut buttons and a scroll wheel on each side of the screen. You can configure the shortcut buttons to any keys on the keyboard, or commands (e.g. show desktop). The drivers for the shortcut key customization has to be downloaded and installed separately. It's not included with the drivers provided.

Performance


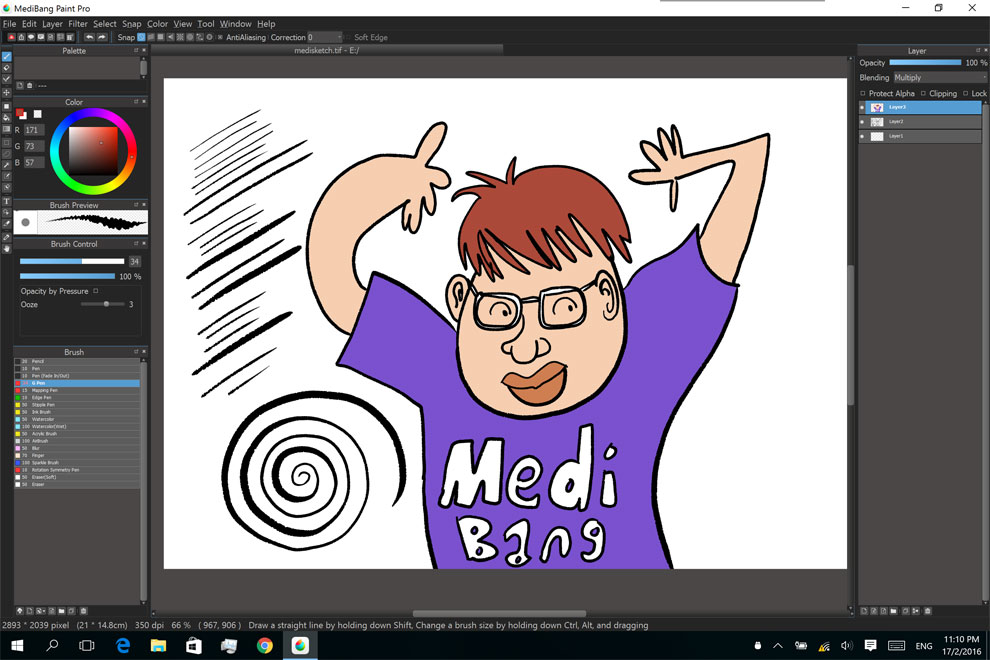
These are some test strokes in Photoshop.

Slow strokes has some jitter. I'm not sure if it's due to the difficulty of controlling pressure at such slow speed. Actually, I wrote the words "SLOW STROKES" slowly as well and they don't display the same amount of jitter compared to the strokes I drew slowly.

The pressure curve settings by default is a bit too sensitive. It was too easy to get thick strokes. You can adjust that in settings. The main issue is the transition between thin and thick strokes is quite fast. It will take some time to get used to it.

Overall, for drawing purposes, it performs well and satisfactory. Parallax is not a problem.

Selecting the menus that are near the edge of the screen can be tricky because the screen is small and that makes the menu small so you have a smaller surface area to click on the menus. Again, it will take time to get used to it. There's no crazy cursor jumps and skips near the screen edges.


These are sample strokes from Illustrator. With the Bosto 22HDX on Mac, I had serious issues with drawing. The 14WX has improved tremendously.

There are still some stray strokes but generally speaking most of the time it performs predictably. The stray strokes may be caused by the hovering stylus. The screen can actually detect the stylus almost an inch away.

A 14-inch screen is not optimal for working with Illustrator because the control points (those small squares) for the anchor points are a bit too small. It can be difficult to click right on top of the control points.

I only use Photoshop and Illustrator for drawing. Both software work well with the 14WX.

There's little to no noticeable lag. Everything feels responsive.

Conclusion

If the driver works, then this is really a decent alternative to the Wacom Cintiq. There could be a problem with my Mac at home because I tested too many drivers, or maybe the drivers just aren't compatible with Mac OS 10.10.5 yet.

My office Mac uses OS 10.9.5 and the Bosto 14WX performs very satisfactory except for the occasionally Adobe Illustrator stray strokes.

Shortcut keys which did not work for the 22HDX have now worked for the 14WX. Those are quite convenient. But I still prefer using the keyboard for shortcuts.

Unfortunately I did not have the time to test it on the Windows OS. If you have experience with this on Windows, share your thoughts in the comments section below.

Currently the Bosto Kingtee 14WX is selling at USD $549. The Bosto 22HDX and Wacom Cintiq 13HD are both USD $899 each. It's quite a significant savings compared to the Cintiq 13HD. If you're using it for digital painting, it's really a tablet monitor worth considering.

My overall rating would be 4 out of 5 stars. One star deducted because of the issue with drivers on my home Mac.

Availability

Just check out more reviews of the Bosto 14WX on the Amazon product page at
www.amazon.com/Graphics-Tablet-Bosto-Kingtee-14wx/dp/B00UFG3YG6

Those in Singapore can get it from Bosto Singapore at bosto-singapore.com or www.facebook.com/BostoSingapore or Basheer Graphic Books.

Tags: 


Review: Yiynova MVP10UHD+IPS USB Digitizer Tablet Display

$
0
0

This review is written by guest artist Joel Watson.


BIG improvement over the previous version. Great for the traveling digital artist, but still has room for improvement.

About Yiynova and the MVP10UHD+IPS+IPS

Yiynova is a Chinese manufacturer of budget-minded tablet monitors. They are most know for their 19” model, the MSP19U which, in my opinion, was the first real competitor to the Wacom Cintiq line of products. The MVP10UHD+IPS is 4th version of Yiynova’s 10.1” USB powered, portable tablet monitor.

Specifications

  • 10.1" USB Tablet Digitizer/LED Monitor
  • IPS panel
  • USB powered, no VGA Input, no DC Power
  • Mode Switch Between Digitizer and Monitor
  • Active display/drawing area (H x V): 216.96 (W)X135.6 (H) mm (10.1" diagonal)
  • 8 Hot Key
  • Digitizer:Tablet resolution at 4000 LPI
  • Tracking speed at 200 PPS
  • Pen pressure sensitivity at 2048 levels
  • LCD:16.7M Colors,1280x800 Resolution, View angle: H:160°(80°/80°), V: 160°(80°/80°) ( CR >=10 ), 0.1695(H)X0.1695(V) mm Pixel pitch, 650:1 Contrast
  • Warranty: 1 Year with The Panda City (Warranty will be voided if the prodcuts are used outside USA)
  • Support OS:Win8/7/Vista/XP, Mac OS 10.4.x-10.10.x.

Initial Impressions and Build Quality

The MVP10UHD+IPS is a little longer than a full sized iPad and a little shorter. If you’re used to holding Apple, Android or Kindle tablets, it’s quite thick. Of course this device doesn’t do what those items do and isn’t intended to compete with them, but it does feel bulky by today’s electronics standards. It’s both powered and received its video/input signal from a dual ended USB Y cable. It has white bezel around it’s modest screen which hold 8 user programable hotkeys. There’s an adjustable stylus holder on the side opposite the buttons. The back of the unit has 3 flip out feet, controls for monitor brightness and a power switch.

Unfortunately, the overall build quality is sub par. It's very plastic-y and creaks and flexes when you hold it. The hotkey buttons do have a nice solid click, but the housing seems like it needs more bracing between the screen surface and the outer shell. There is nothing sleek or stylish about the utilitarian design. It’s well made, but not EXTREMELY well made. The MVP10UHD+IPS looks and feels like a prototype that was made from off the shelf components.

The detachable USB cable can be routed to either the left or the right of the device through channels in the back of the case which makes keeping it out of your way much easier than if it were in a fixed position. The fact that the cable is detachable is also nice, considering the USB cable is typically the first thing to go bad in a tablet from repeated bends, winding and being taken in and out of a carry bag.

The left and right flip out feet on the back allow the tablet to rest on a desk at a comfortable drawing angle. They're tall enough that I can get my left hand under the tablet while still operating the hot keys with my thumb. There's a 3rd flip out foot on the back of the device, in the center. If you try to use this to stand up the tablet while drawing, it will just fall over. Perhaps it's for displaying the tablet like a picture frame, or if you are just using it as a secondary monitor.

Connectivity and Driver Setup

As I mentioned, the MVP10UHD+IPS connects to your computer via a single USB Y cable. One end of the cable transmits video and tablet input signal, and the other supplies the unit with an extra 5v of power. On some of the computers I tested it with everything seemed to function fine with only one end of the cable plugged in. This was not the case on my primary testing computer, an 11” Macbook Air. Since that computer only has 1 USB port on each side, I had to purchase a 1ft USB extension cable to connect the tablet.

Two drivers are required to get the MVP10UHD+IPS up and running: one DisplayLink driver to run the USB video, and one from Yiynova for tablet functionality. I had no issues installing either driver (again, all of these tests were performed on a Mac under OSX and do not necessarily reflect what potential performance on a Windows PC would be like), and I was able to get the computer to recognize the tablet as a tablet and monitor relatively easily, save for occasionally having to unplug/replug the USB Y cable. It seemed like my Macbook Air was particular about which half of the device (tablet or monitor) was recognized first.

Video

I was using the earlier (non-IPS display) version of the MVP10UHD for a few months before I replaced it with this updated version. The difference in screen quality is astounding. This is less of a testament to the quality of the current version (which is high), and more of an admonishment of the previous version. The non IPS display had the most minimal viable viewing angle of any monitor of any size that I've ever used. You had to get exactly in the right spot when working on it. Any deviation to the right, left, top or bottom and the colors would shift until they became inverted. I was able to pencil and ink with the old one, but color work was impossible due to the color accuracy being non existent.

I am happy to say that the new IPS version has solved essentially all of these problems. The image and resolution is MUCH sharper, the viewing angles are respectable, and the color accuracy is workable. I can't speak for those that need custom color profiles, but I am able to do color work in my illustrations and comics using my predefined color palettes with no issues. The screen could be brighter, but I assume the brightness is a power limitation of the USB cable connection to provide sufficient power for a truly bright screen. I’m also happy to see there was little to no parallax effect when drawing.

The 1280x800px screen is about 2" to 3" too small to really make this a killer device. I would love to see a 12" or 13" version of this tablet in a 4:3 aspect ration instead of 16:9, so I didn't feel so cramped when I had all of my Photoshop tools and menus on the screen. Even compared to a full sized iPad, the 16x9 aspect ration makes the usable space feel minimal.

Stylus hardware


The MVP10UHD+IPS comes with a full sized stylus, comparably sized to a Wacom Cintiq or Intuos stylus. It’s glossy plastic, but has a rubber grip surrounding the two rocker switches. These switches can be programmed to perform right or left clicks and a few other predefined commands, but are not user assignable to any keyboard presses or macros. The stylus is battery powered, but the battery is said to last for 4 months. In the several months I was testing the unit, I never had to replace the battery. There is no eraser tip on the opposite end of the stylus, as this feature still seems to be a Wacom exclusive. It comes with a hard plastic tip and a couple of extra replacement tips.

Tablet Functions

Cursor tracking, lag, overall responsiveness are all on par with your typical Wacom tablet product. More accurately, they are identical to every Yiynova tablet I’ve ever used (or any other tablet that uses UC Logic internal hardware, such as Huion made tablets). If you are used to Wacom products, there is a difference in “feel” but not function. You will notice that the pressure curve is looser than expected, even after adjusting the brush firmness in the drivers. You blow past the first 50% of the pressure curve with little to no applied pressure, then the real variation is in the upper half of the curve. The specs claim 2048 levels of pressure sensitivity, but that number is rather arbitrary when there seems to be a discrepancy between the settings you choose in the drivers and the actual performance of the device. It takes some getting used to, but didn’t impair my ability to get a decent range or brush stroke widths with varying pen pressure.

An unexpected and positive feature of the MVP10uHD+IPS was the dual tablet mode. With the power switch in the “on” position, it functions as a tablet monitor. With the switch in the “off” position, it functions as a stand drawing tablet where you draw on the blank screen and view your work on your laptop or computer monitor. I found this useful for color work since my laptop screen was a little bigger and I could see more of my image at once.

Hotkeys

The 8 hotkeys are great for speeding up your workflow. They are user assignable to basically any key or key combination you could think of. There is, however, some difficulty in setting them up. The hot keys are not "in numerical order" in the drivers. Going down the side of the device, from top to bottom, the keys are actually labeled 7,1,2,5,6,4,3,8 as far as the drivers and set up software are concerned. This means if you are in the drivers and you tell it to make button 1 perform an “undo,” you are actually assigning this function to the second button from the top. This issue is further complicated by the fact that the buttons are permanently labeled with little graphics of what they expect you to use them for (zoom in, zoom out, enter, etc.). I actually ran a strip of white electrical tape down the device next to the buttons so I could label their number and their intended function with a Sharpie.

There's also a driver issue that after you press a hotkey, you lose stylus connectivity for a half a second or longer. If you are someone like me who uses "space" and "undo" constantly while drawing, this requires a bit of an adjustment. I usually have to pick the stylus up from the monitor while pressing a hotkey to negate this effect. Yiynova confirmed both of these driver issues to me and said they hoped to fix them in a future release. Since I only tested on a Mac, I do not know if these issues exist when using the tablet on a PC.

The placement of the hotkeys at the very edge of the case was a bit of an issue for me. Holding the tablet in my left hand meant my thumb naturally fell about a half inch to the right of the buttons. I had to strain to both hold the tablet and keep my thumb above the buttons. After an hour or so, this caused some fatigue in my left hand.

Portability

I didn’t care for the included draw string carry bag. It's not form fitting, and the material is very rough to the touch. I replaced it with a neoprene generic tablet zip case with a pocket on the front to hold the stylus and cable. It had more padding, and storage and it holds the device much more securely. I paid about $20 for it.


In order to fit the tablet into the new case, I had to remove the stylus holder from the right side. It seemed like an unnecessary and bulky protrusion at first, but once I removed it I missed having somewhere easy and convenient to store the stylus.

Since the device is USB powered there’s no power brick required. This is a big plus for portability. Everything needed to use this tablet (the tablet itself, the stylus and the USB Y cable) fit in the iPad sized carrying case I bought.

Final Thoughts

If you are a traveling digital artist and you need a set up for working in a hotel, an airplane or a coffee shop (and you don't want to put up $1000-$2500 for a Surface Pro 3 or a Cintiq Companion... ESPECIALLY if you are a Mac user like me), it's hard to argue with the utility and capability of the MVP10UHD+IPS. I take my 11" Macbook pro and this tablet in a tiny bag and I can literally do my job from anywhere in the world. There is certainly room for improvement, but if you need a light, portable, very functional tablet monitor for digital art WITH MINIMAL CABLES, I can definitely recommend this tablet. When it’s available (it is almost always sold out on Amazon), it sells for $399.

I would note that if you are just looking for a digital tablet monitor for art and you DO NOT intend to travel, I do not consider this a stepping stone towards larger tablet monitors. Save your money for a Yiynova 19" or 22" stationary model. The MVP10uHD+IPS really only makes sense for the traveling artist, or someone that is more comfortable working in their lap as opposed to a desk.

Availability

You can read more reviews at http://www.amazon.com/gp/product/B00KRWOJF8?tag=artprdus-20

Tags: 

Review: Yiynova UC-logic SP-1001 Pen Digitizer Tablet Monitor

$
0
0

This review is written by guest artist Joel Watson.

About Yiynova

Chinese tablet manufacturer Yiynova has been providing affordable and serviceable alternatives to the Wacom Cintiq line of tablet monitors for roughly 4 years. Since they released their popular 19 tablet monitor, the MSP19U, in 2012 artists looking to expand their digital tool set without breaking the bank have flocked to the brand. Most of their product line lacks the spit and polish of Wacoms offerings, but at 1/2 to 1/3 the price, its hard to argue with Yiynova's affordability and functionality.

Yiynova were the first to market with a portable 10.1 tablet monitor that received power, pen input and video from a single USB cable when they released the DP10 in 2012. The first version of this hardware suffered from a lackluster screen with a sub HD resolution, but subsequent versions have gradually improved on the screen and overall build quality. I recently reviewed the most recent Yiynova branded 10.1 tablet monitor, the MVP10UHD + IPS. It seems this may be the final version of this tablet to bare solely the Yiynova brand name, as the newest version released in March of 2015, the SP1001 Penates, is now branded as a joint venture between Yiynova and UC-Logic, the Chinese manufacturer that has long been providing the internal components for Yiynova’s tablets.

Specifications

  • Digitizer: Tablet Resolution (5080 LPI), Tracking Speed (200 PPS), Pen Pressure Sensitivity (2048 levels)
  • 6 User Assignable hot-keys; USB & HDMI 2-in-1 Cable; Battery-less Pen
  • Support OS: Windows 8.1 / 8 / 7 (32/64bit); Mac: OS X 10.6.8 or later (Intel processor)
  • 10 Interchangeable Soft and Hard Nibs
  • Active display/drawing area (H x V): 216.96 (W)X135.6 (H) mm (10.1" diagonal).

Initial Impressions and Build Quality

Before you even plug the SP1001 in and switch it on, there are several, immediately apparent upgrades from the previous models. I say previous models because the SP1001 appears to have nearly identical internal components to the MVP10UHD +IPS. More on that later.

Right off bat, it's obvious the case and overall aesthetics of the SP1001 have been completely redesigned. The case is about half as thick as the previous version. It features smooth, tapered edges as opposed to the 10UHDs sharp corners, and the back is coated with a nonslip rubber, common in many Wacom products, that provides excellent grip and adds to the overall feel of the build quality. Speaking of build quality, the SP1001 is the first in this line of products that FEELS like a finished product. All of the previous Yiyova portable tablet monitors flexed and creaked in your hands. They felt like they were built from off the shelf products that didn’t quite fit together properly. The SP1001 is SOLID. Its well balanced and has a decent heft, but isn’t heavy or uncomfortable to hold.

Hotkeys


They have also completely redesigned the 6 hotkeys built into the face of the tablet. On the previous versions the buttons were hard plastic, had a very click feel and were placed right on the outer edge of the monitor bezel. This placement made it difficult to hold the tablet in your hand while drawing and also easily access the hotkey buttons without setting the tablet down. I tend to use it in my lap with my left hand holding the tablet (the buttons would be directly beneath my left hand palm) and drawing with my right hand. In order to access anything but the top two hotkey buttons with my left thumb, I had to contort it not a weird position which often left me with hand cramps after repeated undo or drag tool presses. The SP1001 has moved to the button placement about a half inch in towards the screen leaving a nice border between the buttons and the edge and allowing for much easier thumb access. They buttons are also spaced further apart and now made of raised rubberized plastic, instead of flat, hard plastic keys that are placed one immediately after the other. This makes finding the button you’re looking for without looking MUCH easier.

As I mentioned earlier, the internals of the SP1001 appear to be nearly identical to its predecessor. I don’t know specifics on the exact model of digitizer used, but the screen resolution and pixel density are identical (1280x800px, 5080 LPI), and the hotkey buttons are in the same configuration (and have some the same software problems which I will go into shortly). The only main difference in the hardware besides the look and feel of the case and buttons is the method of connecting the tablet to a computer. Previous Yiynova 10.1 tablets passed power, signal and video through a single (albeit double ended) usb cable. The SP1001 uses USB for power and signal, but is now equipped with a mini HDMI port for video. HDMI has much higher bandwidth for video throughput than USB 2.0, and this the video is much smoother. This is most prevalent when just using the SP1001 as a second monitor to play a video. With USB video, the host computer would typically fire up all the fans when playing video over a USB monitor due to the low bandwidth and increased processor power required. That said, just drawing in Photoshop there is little difference in the video experience over USB or HDMI. The screen is so small (think just a bit shorter, and a bit wider than a standard iPad), that you really don’t notice any sort of lag or refresh rate issues. Either way, my brain knows that the HDMI connection is much better for video, but my eyes don’t perceive it much at all. Still, my laptop’s fan and battery appreciate the new connection option.

Connectivity and Driver Setup

Here's where the SP1001 stops shining and need further refinement. I must point out that all tests were conducted on a Macbook Air, and I have no idea what the setup, driver configuration or overall performance are like on a Windows PC.


USB cable, display cable and the stylus

Previous Yiynova 10.1 tablet monitors needed a tablet driver as well as a DisplayLink video driver to handle the usb video connection. The SP1001 just needs a tablet driver, as video is handled by the internal video card of your computer just like any external monitor would be. If you install the driver without the tablet connected, then attempt the open the tablet monitor configuration app, you will be present with a blank screen that simple says “No Tablet Detected.” Upon connecting the SP1001 there are at least a dozen different things that might happen depending on what order you plug the cables in and what kind of mood the tablet and your computer are in on that particular day. Installing the drivers was painless (at this time there is a standard driver for this tablet monitor on both UC-Logics and Yiynova’s websites, but the UC-Logic website also have a beta driver for OS X). Getting the SP1001 hooked up and usable, however, was a frustrating mess.

If I plugged the USB cable in first (the pressed the power button just beneath the USB connection on the tablet), the tablet configuration appreciated would detect the tablet after a few seconds and allow me to see the various options for video calibration and hotkey and stylus settings. Sometimes, at this point, the tablet would function as a standard no-monitor drawing tablet. This was how the other Yiynova 10.1 tablet monitors worked as well, and the feature often came in handy, especially when connected to a computer with a much larger screen. Other times, when connection the USB cable, the tablet wouldn’t register the stylus at all, and still other times it would register the stylus but no matter where you placed the point, the cursor would jump to the bottom or the corner edges of the screen.


Plugging in the HDMI cable (the tablet has a dual cable with mini HDMI and micro USB on one end and standard HDMI and USB on the other end) which I was connection with an adapter to the mini DVI/Thunderbolt port on my Macbook Air, provided a similar bevy of undesirable and unpredictable results. Sometimes the screen on the SP1001 would come on and show digital snow. Other times it would come on and display a mirror of my laptop screen (per the display settings on my Macbook Air), but the stylus issues listed above would persist. I spent about 30 minutes installing and uninstalling the drivers, plugging and unplugging the tablet cables in different orders while pressing the power button at different times, and rebooting my laptop either with the tablet already plugged in or not yet plugged in. Eventually I ditched the beta OS X driver, reinstalled the current one, rebooted the laptop twice, then plugged in the usb cable followed by the HDMI cable. 13th to 14th time must have been the charm, because eventually I got it to work as it is intended.

Once I was at this point, I opened the configuration utility and tried to set up the hotkeys, and stylus. I first performed the monitor calibration, which takes you through the stand array of click the stylus tip on these various points tests. I should note that the first few times I tried to run the monitor calibration, the button in the application simply didn’t respond. I do not remember if this was with the beta driver or not.

Next I attempted to set up the monitor and stylus hotkeys. The options for the two buttons on the stylus are limited to a few presets like right-click, left-click, and none. It would be preferable to be able to set one of the stylus buttons to a macro like undo or the drag tool. The monitor hotkeys have more options, but this is difficult to realize if you don’t know what you’re looking for. You can select from a long drop-down list of preset key presses and macros for each button. All of the most common tool functions for Photoshop are included in this list. However, whereas they do offer an undo option, they do not have a step back or multi-undo (cmd+option+Z on a Mac or cntrl+alt+Z on a PC) option in the default list. There is a user defined item in the dropdown list, but selecting this does not lead to a logical next step. In Wacom tablet drivers, if you select user defined you are given a new dialog box to name the macro, press the key or keys for the hotkey to emulate and save. I assumed this feature was just broken in the drivers because it was not apparent what I was supposed to do in order to set up my own macro. After emailing back and forth with my contact at UC-Logic a few times (it took awhile to explain my issue due to a language barrier), I realized that I was just supposed to click inside an empty box that was not labeled and press the keys I wanted. I explained that this confusion could be easily solved by labeling the empty box and adding a single instruction like, click inside the box and press the key or keys you desire, etc. They indicated that they would consider this for future software revisions.


There is also a tab for setting up the stylus pressure curve. This tablet monitor is listed as 2048 levels of pressure sensitivity. The pressure curve calibration is designed to allow the artist to choose how stiff they want their stylus to feel. With a soft setting, the stylus (using a brush size of 30 pixels, and the width set to pressure in the drawing application settings) should move very easily from 1 pixel wide to 30 pixels wide when drawing with little to no pressure. With a firm setting (still at a 30 pixel brush size), the artist should be able to comfortably sketch with a very small line of 1-10 pixels, then apply more pressure to achieve a larger line width of up to 30 pixels. I found the pressure curve settings in the setup application for the SP1001 to make almost no difference regardless of what I set them to. I was able to test the pressure curve in a small preview box in the setup application which simulates a drawing app like Photoshop. At the lowest or softest setting the brush blew through the pressure curve with little to no pressure from my hand at all (which is to be expected). At the highest or firmest setting, the performance was only slightly different. There should be a decent range of settings available in this tool, but it seems to only go from extremely soft to pretty soft. This doesn’t make it unusable, but it does differ so greatly from almost every other tablet I've tried that I suspect most artists will have a steep learning curve when applying pressure to achieve a desired line width.

Video

Video quality on the SP1001 is impressive for such a small screen. It’s no Retina iPad, but it’s bright and viewable from any angle. My opinion may be swayed by how terrible the viewing angles were on previous versions of this tablet, but it’s quite usable. If anything, I wish I had the option of making it a bit brighter, but I would assume this was a limitation of the unit being USB powered.

The resolution is lacking (again, comparing to a retina iPad for reference), and I found it difficult to fit Photoshop’s menus within the 1280X800 pixels and still have room to draw on my canvas. Eventually, I settled on leaving all of my tools and menus on the laptop’s screen and using the Penates just as a canvas. Switching from pen input back to my trackpad and keyboard to change layers or tools was a but frustrating at first, but I got used to the new workflow with time. I did not attempt to watch any videos on the monitor, but I would assume if you have a stand for it, or a way to prop it up, it would make a decent second screen for your laptop while on the go. There was nothing about its performance to indicate otherwise.

Stylus hardware


The included stylus is another area in which the SP1001 differs from previous Yiynova 10.1 tablets. The bundled stylus is, I believe, their first battery-less model. Previous models have required internal AAA batteries or USB rechargeable batteries. This one takes a cue from Wacom and requires no battery or recharging to function.


There are two rocker-style buttons for performing right click or pan/zoom features (these functions can be configured in the drivers, but options were limited to a few manufacturer’s presets) and decent overall ergonomics. It’s quite light. Adding a bit of heft wouldn’t hut it, but it seems to be about the same weight as my Wacom Cintiq stylus. It is coated in a similar soft touch rubber to that which coats the body of the tablet, so keeping a grip on it is not difficult. There is no eraser on the opposite tip. Wacom seems to still have a firm lock on this technology.

The stylus comes with a weighted, rubberized holder for keeping it vertical and out of the way on your desk, and a very nice rubber lined storage case for when you need to toss it in a bag or backpack. The storage case also stores 9 additional hard plastic stylus tips.

Tablet Functions


With all of my hotkeys set up to zoom, pan, undo, switch between pen and eraser and save my file, I was ready to go. I opened a new Photoshop document, picked my standard inking brush and got started sketching.

When you have used one particular digital tablet or tablet monitor for years and years, it’s impossible to not immediately compare any new hardware to whatever you are used to. The difficult part is distinguishing if the new hardware is LESS than your current set up or just DIFFERENT. The SP1001 does not feel like a Cintiq. Then again, I don’t think it’s supposed to. It does, however, feel exactly like a Huion tablet I reviewed a few years back (The GT-190), which also used UC Logic internals. The pressure curve was very soft and unlike what I was used to, but it only took a few minutes of doodling to adjust my stroke and my expectations. In almost no time I was able to sketch and ink with my standard brushes and get nearly identical results to those I would expect on my Cintiq. Cursor tracking was similar to every UC Logic based tablet I have ever used. The cursor APPEARS to lag behind the stylus tip about 1/4” as you move the stylus around the screen, but as soon as you make a mark it catches up immediately and the mark is where you intended it to be. If you can learn to ignore the position of the arrow/cursor and just draw where you want to draw, your results will be excellent. It took a bit of training to ignore the cursor position, but eventually it was hardly noticeable.

Wacom tablet users should be aware that the distance above the tablet at which it notices the stylus (how high above the tablet surface you can “hover” the pen and still register cursor movement or input) is much shorter than you are used to. I’d say it’s roughly an inch, maybe a little more. You have to keep your stylus very close to the tablet to register movement. I learned to just pick my hand up, move it where I wanted to place the cursor, then put it back down. The cursor always jumped immediately to where I wanted it. I just didn’t get to drag it along with my hand the way I was accustomed to.

My biggest disappointment with the SP1001 was in using the hotkeys. Having to move all of my tools to my other monitor to save drawing space meant being able to use frequent commands like undo, pan, zoom, etc. with the hotkeys was integral to my workflow. There is a flaw in either the hardware, the drivers or both where after repeated presses (think of pressing “undo” 5 or 6 times in a row) the buttons stop responding, and the stylus no longer registers on the tablet. The only way I found to “reset” normal function was to lift the stylus away from the screen, wait a few seconds, then put it back down. I encountered this exact same issue with both the MVP10UHD and the MVP10UHD+IPS, and I am surprised the manufacturers haven’t been able to fix it by now. With the previous tablets I emailed Yiynova back and forth several times about this issue and they admitted that it was a known bug, and they would attempt to fix it in the future. I wonder if this bug only occurs on Macs, and perhaps that is why they don’t receive enough complaints to take care of it.

Final Thoughts

Overall this tablet is a great alternative for the traveling digital artist.

Honestly, everything that is wrong with this tablet could and should be fixed with driver updates. The initial setup/connectivity issues and the hotkey problems make it difficult for me to recommend it as an artist’s primary tool, but as a backup, or travel-only device it gets the job done. It’s almost always sold out at Amazon, but when you can purchase it, it’s less than 1/4 the price of the cheapest Cintiq companion. It’s almost unfair to compare it to a device like the Companion that contains an entire Windows computer, have much larger, higher quality screen, and doesn’t suffer from buggy drivers, but there just aren’t really any other products on the market that the Penates SP1001 would compete with. If your goal is to draw on a digital tablet monitor on the couch, on a plane, in a hotel room or at a coffee shop and you don’t have $1600+ dollars to spend, this is pretty much it. Is that a resounding endorsement? Not really.

The SP1001 has a lot of room for improvement, but once you fight with the drivers, get it set up, ignore the hotkey problems and get to work, you can actually create finished production quality digital art with it. For $350 (assuming you have your own laptop to hook it up to) and a minimum of cables, you can take your art game on the road with relative ease.

A 13.3” version of this tablet is slated to be released later this year, but it will require a dedicated power supply. I’d be interested to see if Yiynova/UC Logic are able to iron out some of the wrinkles in their software by the time it is released.

Availability

You can check out more reviews of the Yiynova SP1001 at www.amazon.com/Yiynova-UC-logic-SP-1001-Digitizer-Tablet-Display/dp/B00P7J6NL4

Tags: 

Review: Wacom Intuos 2015 tablet: Draw Art Photo Comic

$
0
0

Wacom Intuos 2015 tablet: Draw Art Photo Comic - 01

Wacom has just refreshed their Intuos product line in September 2015 with the release of 4 new tablets, namely Intuos Draw, Art, Photo and Comic.

Note that Wacom has the Intuos Pro and Intuos product lines. Intuos is more budget friendly while the Intuos Pro is more expensive and targeted at professional digital artists.

I bought the Intuos Art tablet and it arrived the next day as they had it in stock here in Singapore.

Comparison between Draw, Art, Photo & Comic

Before we get into the actual review, let's take a look at the differences between the Intuos Draw, Art, Photo and Comic using this comparison table below.

ModelSoftwareSizeMulti-touchColoursOfficial price
DrawArtRage LiteSmall, mediumNoWhite, Blue$70, £55 / $150
ArtCorel Painter EssentialsSmall, mediumYesBlack, Blue$100, £75 / $200, £150
PhotoCorel PaintShop Pro, AfterShot Pro (Windows);
Macphun Creative Kit, Corel AfterShot Pro (Mac)
SmallYesWhite$100, £75
ComicClip Studio Paint Pro, Anime StudioSmall, mediumYesBlack, Blue$100, £75 / $200, £150

Three things to note.

1. The names of the models are related to the software they are bundled with
2. Intuos Draw does not have the Multi-touch feature
3. Intuos Photo only has one size which is Small (6 by 3.7 inch working surface)

If you use your own drawing software and don't need multi-touch, you can just get the Intuos Draw which cost USD $70 and $150 for Small and Medium. That would be the cheapest option.

Specifications

Here are the key specifications

  • Small size: 6 by 3.7 inches working surface
  • Medium size: 8.5 by 5.5 inches working surface
  • ExpressKeys: 4
  • Pressure levels: 1024
  • Tilt: No
  • Spare nibs: 3
  • Resolution: 2540 lpi
  • Reading speed (pen): 133pps
  • Connection: USB
  • Wireless support: Sold separately
  • OS: Windows 7,8,10, Mac 10.8.5 or newer
  • Warranty: 2 years in Europe, 1 year everywhere else

It supports 1024 levels of pressure sensitivity and the pen does not support tilt recognition. If you need 2048 levels of pressure sensitivity or tilt recognition, then you have to go with the Intuos Pro.

The Intuos line is for beginners and budget conscious people. Personally, I think they are good enough for production work as well, but that's just me.

What's in the box

Wacom Intuos 2015 tablet: Draw Art Photo Comic - 02
Included in the box are the tablet, USB cable, stylus, manual and driver CD. I would advise you to download and install the latest drive from Wacom's software while waiting for your tablet to be shipped.

The password for the bundled software is pasted on a sticker on the box.

Wacom Intuos 2015 tablet: Draw Art Photo Comic - 04
The tablet design is quite cute with the placement of the 4 ExpressKeys. You can set the button functions in the Wacom settings panel.

Wacom Intuos 2015 tablet: Draw Art Photo Comic - 07
Buttons are functional and has a nice click to them.

The overall build quality is good even though it is plastic throughout. The blue coloured top part has a nice rougher textured surface while the working area is smooth. In addition to Mint Blue, you can also choose from white or black coloured tablets. Colour availability depends on which model you're getting.

Wacom Intuos 2015 tablet: Draw Art Photo Comic - 05
That's my old Intuos3 with rather similar specifications compared to the Intuos Art.

Wacom Intuos 2015 tablet: Draw Art Photo Comic - 06
The new Intuos 2015 is smaller, thinner and lighter. By smaller, I mean the areas outside the working areas are reduced. I like that because my table space is limited.

The tablet is also thin and light. It weighs about 480g. It's as thin and light as an 10-inch iPad. This means it's convenient to pack up the tablet to bring to your office, school or home. The USB wire is detachable for packing.

Wacom Intuos 2015 tablet: Draw Art Photo Comic - 08
The tablet's back is textured and there's a rubber feet at each corner.

Wacom Intuos 2015 tablet: Draw Art Photo Comic - 09
You can slide open the top flap to reveal the internals.

Wacom Intuos 2015 tablet: Draw Art Photo Comic - 10
Under the flap, you can put in the optional wireless module and a battery to power the tablet in wireless mode. There are instructions carved onto the surface so you'll know exactly what is what.

The spare nibs are also located under the flap, so is that little round metal nib extractor.

Wacom Intuos 2015 tablet: Draw Art Photo Comic - 11
All the ports are located at the top of the tablet. At the top right of the tablet is the hole for you to physically lock the tablet and the switch for the Multi-touch function.

Wacom Intuos 2015 tablet: Draw Art Photo Comic - 12
At the top left is the USB port.

Stylus

Wacom Intuos 2015 tablet: Draw Art Photo Comic - 03
The stylus has two buttons by the side. There's no eraser and to me it's not really a big deal.

The stylus is thinner than the usual Intuos Pro ones. There's no rubber grip but the textured surface throughout ensures that it's not slippery even if you have sweaty hands. It has a nice weight and comfortable to hold and draw with.

Wacom Intuos 2015 tablet: Draw Art Photo Comic - 13
That's the setup on my table.

Performance


The new Intuos 2015 tablet performs well and predictably, as expected from a Wacom tablet. Installation of the tablet drivers is effortless. Wacom is usually very good with their driver support for Mac and Windows.

The 1024 levels of pressure sensitivity is a joy to work with. At no time did I feel restrained because it did not have 2048 pressure levels. The pressure curve is similar to other Intuos/Pro tablets that I've worked with. If you have used other Intuos tablets before, you'll feel right at home.

There's a nice tactile feel to the nib as it glides on the working area. There's no lag to speak of. Strokes appear instantly as dictated by the stylus movement. Quick strokes are smooth and have no jitter.

Excellent performance overall.

Multi-touch

Multi-touch feature is available. Wacom has their own preset gestures for certain functions. You might already know some of these gestures because they are quite similar to gestures that you would use on a tablet or smartphone. For example, you can pinch to zoom in, or pinch out to zoom out. Moving two fingers around will pan the drawing area, like the Hand tool in Adobe Photoshop or Illustrator. Rotating two fingers will rotate the canvas, but your software must have that Canvas Rotate feature in the first place, e.g. Illustrator doesn't.


There are many other gestures, you can also set your own gestures. Whether or not the gesture will work depends on whether your software has that particular feature.

When you're in the drawing applications, the software will not register your finger taps or swipes as strokes to draw. You still have to use the stylus to draw. Personally, I prefer to use the keyboard for shortcuts and functions because I've been using them for years and more used to using the keyboard.

Drivers

There are two places for you to change the settings.


After you installed the drivers, when you first plug in the tablet, the Wacom Desktop Center application will open. This is where you can control the more general settings, basically settings not related to drawing, such as backing up your settings, checking for updates, etc.

Under System Preferences, you get a whole lot of other settings. You can adjust the pressure curve, assign functions to shortcut buttons or gestures, and many other things. It will take a while to figure things out because there are really many things you can setup. Or you can also leave them to default in which case the tablet will work perfectly fine too.

Wireless

The wireless accessory kit is optional. I did not buy it so I can't really say anything much. You can read the many reviews for it at www.amazon.com/Wacom-Wireless-Accessory-Tablets-ACK40401/dp/B006MRAVFE

Video review

Conclusion

I think releasing the Intuos 2015 in so many models is a smart move because people can get to choose the software they want to use it with.

It's a great tablet. It performs predictably and well just like most Wacom tablets I've tried. There's nothing bad that I can say about it.

5 out of 5 stars.

Availability

You can find more reviews and the tablet from these product links below:

Intuos Draw:
Amazon.com | Amazon.ca | Amazon.co.uk | Amazon.de | Amazon.fr | Amazon.it | Amazon.es | Amazon.co.jp

Intuos Art:
Amazon.com | Amazon.ca | Amazon.co.uk | Amazon.de | Amazon.fr | Amazon.it | Amazon.es | Amazon.co.jp

Intuos Photo:
Amazon.com | Amazon.ca | Amazon.co.uk | Amazon.de | Amazon.fr | Amazon.it | Amazon.es | Amazon.co.jp

Intuos Comic:
Amazon.com | Amazon.ca | Amazon.co.uk | Amazon.de | Amazon.fr | Amazon.it | Amazon.es | Amazon.co.jp

Tags: 

What the iPad Pro and Apple Pencil Announcement Means to Artists & Designers

$
0
0

Oh yeah, Apple just released the biggest iPad ever, the 12.9-inch iPad Pro. And they also released a stylus called the Apple Pencil specifically for the iPad Pro.

Here are some of my thoughts on the announcement from the perspective of an artist.

iPad Pro runs on iOS, not Mac OS

Some part of me actually wished that it would run Mac OS.

The iPad runs on iOS which means you still won't be able to use the full version of desktop software, e.g. Photoshop (at least not directly -- read further below).

iPad Pro weighs 1.57lb / 712g

You'll not be holding this in the hand to draw without some form of good support.

Retina 2732x2048 resolution

Drawings are going to be sharp. What's more enticing is you'll be drawing on a larger screen which will feels less constraining. Even when drawing on iPad Air's 9.7-inch screen, I still feel a bit constrained by the size. The 12.9-inch iPad Pro has 78% more surface area than the 9.7-inch model.

Is Apple Pencil going to be a good stylus?

The Apple Pencil has features such as pressure and tilt sensitivity, and supposedly palm rejection as mentioned by Mashable correspondent Lance Ulanoff.

How good the stylus is will depend on the software applications that support it. And by the word 'support' (and for the rest of this article), I mean full support of all the features. The stylus will still work on apps even if none of those features are supported. Many feature-rich styluses are just normal styluses when used on apps that do not support the stylus. E.g. Wacom Bamboo Paper app is one of my favourite drawing apps but it only supports their own Wacom line of less-than-satisfactory pressure sensitive styluses.

IMPORTANT
Before you buy, make sure to check out the list of Apps that are supported by Apple Pencil. Otherwise, you'll just be buying an expensive stylus that does nothing special. Currently, Apple list Mail, Notes and Paper by FiftyThree as the only Apps that support drawing features of the Apple Pencil. Update: Procreate & Adobe Sketch are supported also, as mentioned by Phil Schiller in the presentation video.

Diagonal wavy line problem

A lot of digital styluses cannot draw a diagonal line without making the line wavy. Will Apple Pencil be one of those styluses?

There doesn't seem to be shortcut buttons on the sides of Apple Pencil

It's not a big deal but those shortcut buttons are quite useful.

Apple Pencil is only usable on iPad Pro

Don't buy it for other iPad models because it won't work.

It could be a good alternative to the Cintiq or Cintiq Companion

Wacom Cintiq is the monitor you can draw on. The Cintiq Companion is the wireless version of Cintiq, aka the tablet computer you can draw on.

The main thing about Cintiq is you can use it with full desktop applications, for example the entire Adobe Creative Suite.

If you're using it purely for drawing, sketching, then the iPad Pro competes directly with the Wacom Cintiq Companion 2 and Surface Pro 3. Main difference is the Cintiq Companion and Surface Pro 3 are capable of installing desktop software.

For the 32GB iPad Pro's price tag of USD $799, you can get a 64GB Surface Pro 3 (with 36GB working storage). Cintiq Companion 2 is USD $1299.

Astropad could turn the iPad Pro into a Cintiq

There's this iPad App called Astropad that can provide the Cintiq-like functionality.

Astropad is actually a 2-part software. You need to install it on both your iPad and computer (it supports Mac only).

Astropad will mirror your computer's desktop onto the iPad and allow you to draw on it even with a pressure sensitive stylus.

Astropad has told me that Apple Pencil will be supported when it comes out in November 2015.

Battery life

Apple claims that battery life is around 10 hours. Apple Pencil can last 12 hours. Apple Pencil charges through the port on the iPad Pro. Does that mean that you cannot charge both devices at the same time? No information on that yet.

Apple Pencil is not a capacitive stylus and it's battery powered. It's likely that it will not work even as a normal stylus when there's no battery power. I could be wrong here but I've used other similar types of stylus like the Adonit Jot Touch with Pixelpoint which behaves like that.

Conclusion

Wait for more drawing apps to support the Apple Pencil.

I can almost be sure that Wacom will not be supporting the Apple Pencil. If Wacom Bamboo Paper app supports Apple Pencil's pressure sensitivity or palm rejection, people won't buy their styluses anymore, judging by the number of unfavorable reviews on Amazon.

From Apple's website and the presentation, the drawing apps currently supported are Paper by FiftyThree, Procreate, Adobe (Photoshop) Sketch, and very likely Adobe (Illustrator) Draw by association. Other popular drawing apps that need support would be Sketchbook Pro and ArtRage.

Oh, it's not going to replace the sketchbooks

You can't replicate the tactile feeling and satisfaction of drawing on paper. :-)

Tags: 

Table comparing iPad Pro, Surface Pro 3, Cintiq Companion 2, Galaxy Note Pro 12.2

$
0
0

This table is for artists looking for a portable drawing device.

Main thing to note is the OS, because that will determine the software you can run on it. The OS will also determine productivity. And it will come in the form of file management. How fast can you attach a picture or two to an email? Upload an artwork to DeviantArt or even your own blog? What do you do for work? Or will you just be using the tablet more for leisure?

ModelApple iPad ProMicrosoft Surface Pro 3Wacom Cintiq Companion 2Samsung Galaxy Note Pro 12.2
Dimensions30.5 x 22 x 0.69 cm / 12 x 8.69 x 0.27 in29 x 20.1 x 0.91 cm / 11.5 x 7.93 x 0.36 in37.4 x 24.8 x 1.5 cm / 14.7 x 9.8 x 0.6 in29.5 x 20.4 x 0.795 cm / 11.64 x 8 x 0.31 in
Weight713 g / 1.59 lbs800 g / 1.76 lbs1.7 kg / 3.75 lbs750g / 1.65lbs
Resolution2732 x 20482160 x 1440, IPS2560 x 1440, IPS2560 x 1600, WQXGA TFT
OSiOSWindowsWindowsAndroid
ProcessorA9XIntel Core i3 to i7 (1.5 - 3.3 GHz)Intel Core i3 to i7 (1.7 - 3.1 GHz)1.3 - 1.9Ghz octa-core, 2.3Ghz quad core
RAM???4 - 8 GB4 - 16 GB3 GB
Storage32 or 128 GB flash memory64 - 512 GB SSD64 - 512 GB SSD32 - 64 GB flash memory
Removable storageNoneMicroSDSDHC, MicroSDMicroSD
USB portNoneOneThreeNone
StylusOptional Apple Pencil (USD $100) with pressure and tilt sensitivityN-trig stylus with 256 levels of pressureWacom stylus with 2048 pressure & tilt sensitivityS Pen with 1024 pressure
WirelessWiFi + CellularWiFiWiFiWiFi + Cellular
Camera8MP5MP front, 5MP back2MP front, 8MP back2MP front, 8MP back
Battery life10 hrs9 hrs4.5 hrs9 hrs
Retail PriceUSD $799 - $1079$799 - $1949$1299 - $2499$650 - $750

Tags: 

Artist Review of Adonit Jot Dash Stylus for Drawing

$
0
0

Video review is above if you want to skip the text.

Jot Dash

Adonit released the Jot Dash stylus in September 2015 to join their already huge family of styluses. I've already reviewed several of them before and will make some slight comparisons in this review.

By the way, I'm reviewing this stylus from the perspective of an artist.

In the box

Adonit Jot Dash Stylus for iOS and Android - 01
Inside the box are the stylus and USB charger. There are no replaceable nibs.

Design

Jot Dash is a digital stylus designed to work like a normal capacitive stylus that can be used on most touchscreen devices, Android, iOS or Windows.

Adonit Jot Dash Stylus for iOS and Android - 07
Capacitive styluses usually have bigger nibs, e.g. those rubber ones. The highlight of Jot Dash is its 1.9mm nib. Adonit has managed to minimise the size of the nib, but in order to do so had to make the stylus digital (battery powered) so as to enable tablets to detect that smaller point of contact on the screen.

One important thing to note is it requires power to work, and you must switch it on before it can work. It powers on very quickly compared to other Bluetooth styluses because it does not need to search for devices to be paired with.

This is not a Bluetooth stylus does not require Bluetooth to work.

Build quality

Adonit Jot Dash Stylus for iOS and Android - 02
The body is sturdy and feels like metal throughout. The diameter is quite similar to typical ballpoint pens. It has a nice weight and good to hold.

There are two colour options to choose from, black and silver.

Adonit Jot Dash Stylus for iOS and Android - 03
A clip is included and at the bottom is the power switch that doubles as a charging port.

Adonit Jot Dash Stylus for iOS and Android - 04
The stylus is charged by a USB charger provided. Be careful not to lose the charger because it's small — I've lost one from another Adonit stylus before.

Adonit Jot Dash Stylus for iOS and Android - 05
The tip is plastic polymer and makes a slight tapping sound against glass surfaces. It's not really irritating so it's much of an issue.

Functionality

The 1.9mm nib glides smoothly on the iPad that I use it with. However, I still feel that the Jot Pro Fine Point has a slight edge to being smooth on screen.

There is little to no noticeable lag for most of the drawing apps that I tested it with, e.g. Wacom Bamboo Paper, Procreate, Paper from FiftyThree, Adobe Draw & Sketch.

The stylus functions like a normal stylus. There are no extra features such as shortcut buttons on the side, pressure sensitivity or palm rejection.

Offset

As with all digital styluses, I'm concerned about the nib offset, which is the distance where the line appears compared to where your nib is.

Jot Dash handles offset well. As long as you hold the stylus roughly at 45 degrees tilt, offset is not a problem. I'm right handed and can hold the stylus in various other positions and the stylus is still quite accurate when it comes to putting down lines where I want it to be.

Quirk

Jot Dash can draw horizontal, straight and quick strokes well.

However, when it comes to drawing diagonal strokes slowly, the lines will become wavy.


Quick diagonal strokes are fine but not if you draw them slow.


If you are an artist, sometimes you need to draw slowly and carefully, such as when drawing a portrait. In the drawing above, I'm very sure you will be able to differentiate the quick from slow strokes quite easily.


If you only draw quick strokes, like this quick sketch above, then you are not going to be affected by diagonal wavy lines. However, I do not use quick strokes all the time.


When it comes to writing, it's an excellent stylus. The fine point lets you see what's beneath the nice and strokes appear instantly.

Battery

Since this stylus is battery powered, it needs to be switched on before using. Battery life is around 10 hours or so.

I'm wary about how durable the battery is. I've three other Adonit styluses that are also battery powered and they all went fail after months. One was out of warranty and I wasn't able to exchange it. The other two have been replaced. All three are different models. So this Jot Dash is my fourth stylus that's battery powered. 3 out of 4 stylus that failed because of the battery is not a good track record.

On the plus side, customer service for Adonit is very responsive. If your stylus is still under warranty, you can provide them with proof of purchase and serial number and can get your replacement fast. Their styluses are expensive and good customer service is something I expect, especially where there are so many complaints from others, including me, about battery problems.

Conclusion

It's a good stylus for writing but not so much for drawing.

The problem with diagonal wavy lines is not limited to this stylus but also to a lot of digital styluses, including Wacom's. And it happens in all the different drawing apps that I use. It's just the way the iPad is designed to detect fingers. Many digital styluses are just trying to work around the problem and in many cases still can't quite get there yet.

I would consider this a pricey stylus. Its selling point is the fine tip which other cheaper styluses do not have. So maybe that's worth the markup in price alone.

For artists, look elsewhere, actually check out the Jot Pro Fine Point.

Availability

Check out more reviews for the Adonit Jot Dash on these direct Amazon product pages below:
Amazon.com | Amazon.ca | Amazon.co.uk | Amazon.de

Tags: 

Best High-End Monitor For Artists and Designers 2016

$
0
0

Here's the 2016 updated list for the best monitors for graphics and video work, written for designers, artists, photographers and video production staff. I will continue to update this list throughout the year.

The best monitors cost money so I'll assume you have a decent amount of budget. For budget monitors, visit this instead http://www.parkablogs.com/content/budget-monitors-artists-and-designers-...

For this article, I only look at monitors with the following features:

  • IPS panel: They have good colour accuracy and wide viewing angles
  • Wide colour gamut: So that it can display a a wide range of colours
  • 2560 by 1400 resolution: You'll get more workspace for your software and desktop
  • Screen size larger than 24-inch: You'll see the details more clearly and have more working space for the OS
  • LED backlight: Lasts longer, has lower power consumption, less warm

It's important to check your graphics card first to see if it supports the monitors at the resolution and frequency you want.

By process of elimination, we're down to a few monitors and they are as follows:

Dell

For Dell, I've narrowed down to the following monitors

Dell has added a few more monitors compared to the ones I've listed for last year. The new additions are the UP2516D and UP2716D which have similar specs with only difference in screen size.

All the monitors above are noted for their wide color gamut support. It's advertised to display 1 billion colours as compared to typical IPS panels' 16.7 million colours.

They support a wide variety of ports: DVI-D, DisplayPort, HDMI and have four USB 3 ports build in. They also have full adjustability in terms of height, tilt and swivel.

Some notable difference would be U3014 and U3415W for their size and resolution, 2560x1600 and 3440 x 1440. The 30-inch monitor has more screen estate but at that high resolution compared to the 2560 by 1440 resolution, but the lack of 160 vertical difference is not a major issue because the screen already has very high resolution. The U3415W is interesting because it has a curved screen. If you want a flat screen, then that would not be a wise choice — great for watching widescreen movies though.

All the monitors are terrific for graphic and 1080P video work. Dell has good reputation with their monitors, just check out the reviews on Amazon (links above).

My recommendation
My vote goes to the UP2716D which is the new monitor Dell released for 2016. You can save a hundred or more by getting the smaller UP2516D that features the same specifications.

Quick specs UP2516D and UP2716D

  • 25 and 27" Diagonal Viewing Size
  • 2560 x 1440 Resolution
  • 6 ms Response Time
  • 1,000:1 Contrast Ratio
  • 300 cd/m² Brightness
  • 178°/178° Viewing Angles
  • In-Plane Switching Technology
  • Supports 100% Adobe RGB, sRGB, REC709, 98% DCI-P3
  • 1.074 Billion Color Support
  • DP, mini-DP, DVI-DL, HDMI Inputs, USB3

Quick specs U2713H

  • 27" Diagonal Viewing Size
  • 2560 x 1440 Resolution
  • 6 ms Response Time
  • 1,000:1 Contrast Ratio
  • 350 cd/m² Brightness
  • 178°/178° Viewing Angles
  • In-Plane Switching Technology
  • Supports 99% Adobe RGB & 100% sRGB
  • 1.074 Billion Color Support
  • DP, mini-DP, DVI-DL, HDMI Inputs, USB3

Quick specs U3014

  • 30" Diagonal Viewing Size
  • 2560 x 1600 Resolution
  • 6 ms Response Time
  • 1,000:1 Contrast Ratio
  • 350 cd/m² Brightness
  • 178°/178° Viewing Angles
  • In-Plane Switching Technology
  • Supports 99% Adobe RGB & 100% sRGB
  • 1.074 Billion Color Support
  • DP, mini-DP, DVI-DL, HDMI Inputs, USB3

Quick specs U3014

  • 30" Diagonal Viewing Size
  • 3440 x 1440 Resolution
  • 8 ms Response Time
  • 1,000:1 Contrast Ratio
  • 300 cd/m² Brightness
  • 178°/178° Viewing Angles
  • In-Plane Switching Technology
  • Supports 91% (CIE1976), sRGB 99% ( average Delta E of
  • 1.074 Billion Color Support
  • DP, mini-DP, DVI-DL, HDMI Inputs, USB3

Dell 4K

Dell added a new 4K monitor since my last year's article. That's the Dell UP3216Q 4K.

Dell's 4K monitors are all marketed at graphics and video professionals. They are IPS panels with the ultra-wide colour gamut that supports at least Adobe RGB 99%, sRGB 100% and 120% (CIE 1976).

You'll need a powerful graphics card to drive these monitors. Many 4K monitors are connected with the DisplayPort which is able to utilize the full colour gamut offered by the monitors.

If you need 4K, check out the following monitors (with some features highlighted):


The 5K-capable UP2715K is still the most awesome monitor with 5120 x 2880 at 60 Hz (Dual DP cable required). You can edit a 4K video and still see the application interface. Unfortunately for Mac users, this monitor is not compatible even with the most expensive Mac Pro.

If you're not into 4K video production, you can save a lot of money by going for the 2560 x 1440 monitors.

Dell provides 3-5 years warranty for their monitors.

NEC

NEC monitors are also noted for their colour accuracy and they cost more than competition. But ultimately, they are worth the money.

The models to check out are the PA272W (2560x1440), PA302W (2560x1600) and the new EA304W (2560x1600).

Check out the full specifications of the two monitors at

NEC monitors are often sold bundled with colour calibrators. If you already have a calibrator, take note of this.

NEC provides 4 years warranty for their monitors.

Eizo


Eizo is the other high-end monitor manufacturer. The following models have the 10-bit colour displays (just like the other brands above): CG277, CX271 and CG248-4K and CG318-4k

Links to full specifications:

The 4K monitors are Eizo's most recent monitors and have the USB 3 hub as compared to the slower USB 2 on their smaller size and older monitors.

These monitors have built in spectrometer that can perform self calibration. Incredibly convenient. What you see on screen will be able to match the colour proofs closely in terms of colours. Their monitors come with monitor hoods.

Eizo provides 5 years warranty for their monitors.

Conclusion

My personal preference is towards Dell monitors because of their aggressive pricing. EiZO and NEC are great too but they are also more costly.

Tags: 


Budget Monitors for Artists and Designers 2016

$
0
0

Here's the 2016 updated list of budget monitors for artists and graphic designers.

I've previously written all the factors to consider when getting a monitor for graphics work so I am not going to repeat myself too much.

In short, I'm looking at monitors that have the following features:

  • IPS panel for good viewing angles and colour reproduction
  • Matte screen because reflections are distracting
  • 1920 by1200 resolution
  • Full adjustment for height, tilt and swivel

The monitors listed are all below USD $300. If you want high-end, check out the best high-end monitors list.

The list will only have two models from each brand so as not to confuse you with too many choices. When in doubt, go for the bigger screen if you can afford it.

QUICK PICK: My top choices would be the Dell U2415 24-inch and ASUS PA248Q 24.1-inch. They are the rare breed of monitors that still support the 16:10 aspect ratio with 1920x1200 resolution, comes with full adjustability for height, tilt and swivel, has USB3 ports inbuilt, great viewing angles, great colours and lastly they are proven to perform based on all the favorable reviews on Amazon. And they are a good deal for the money.

Recommended monitors

As usual, my personal favourites are the Dell monitors so I'll start with them first.

Dell

The UZ2215H 21.5-inch and U2415 24-inch are the two models from 2015 and they continue to be what I think are the best bargain monitors under $300.

ProductUZ2215H 21.5-inchU2415 24-inch
Resolution1920 x 10801920 x 1200
Contrast1000:11000:1
Brightness250 cd/m2300 cd/m2
Colour Support16.77m colours16.77m colours
ConnectionHDMI, DisplayPort, USB3HDMI, DisplayPort, mini DisplayPort, USB3
Price

While we wait for Dell to release new budget IPS budget monitors, these are the two current workhorse.

I would recommend the Dell U2415 for the larger screen and extra 120 rows of vertical pixels. Reviews on Amazon are almost all favourable.

Dell offers 3 years warranty for their monitors. You have the option to increase the warranty period if you buy from their website.

ASUS


Once again, the two monitors I featured last here are recommended here again. They are VS24AHL 24.1-inch and PA248Q 24.1-inch.

Note that there's the PA249Q which is the newer model of the PA248Q. I don't think it's worth the extra money to get the newer model.

ProductVS24AHL 24.1-inchPA248Q 24.1-inch
Resolution1920 x 12001920 x 1200
Dynamic Contrast80,000,000:180,000,000:1
Brightness300 cd/m2300 cd/m2
Colour Support16.77m colours16.77m colours
ConnectionHDMI , D-Sub, DVI-DHDMI , D-Sub, DisplayPort, DVI-D, USB 3
Price

I would go with PA248Q because of the very useful inbuilt USB3 ports. PA248Q supports more connection with HDMI, DisplayPort, DVI-D and D-Sub.

Both come with full adjustability for height, tilt and swivel.

ASUS provides 3 years warranty for their monitor. Overall, they are quite price competitive with Dell.

Samsung

The only one I think is good from Samsung is the S24E650BW. However, it's more expensive compared to the competitors so going by price, I would not pick this.

ProductS24E650BW
Resolution1920 x 1200
Contrast1,000:1
Brightness250 cd/m2
Colour Support16.7m colours
ConnectionDVI, VGA, USB2
Price

Conclusion

I'll continue to update this list as new monitors come out in 2016.

Meanwhile, my recommendation are, and still are, the Dell U2415 24-inch and ASUS PA248Q 24.1-inch.

Happy shopping.

Tags: 

Artist Review: Dell UP2716D Monitor (2560x1440)

$
0
0

Disclaimer #1: Dell loaned me the UP2716D for two weeks for review purposes.
Disclaimer #2: I'm not paid for this review.
Disclaimer #3: I have bought Dell monitors for personal use since 2005, starting with 2001FP -> 2405FPW -> 2709W -> U2711 (5-year-old currently, spoiled and replaced 2 times)

The Dell UP2716D

With the disclaimers out of the way, let's talk about the UP2716D.

The Dell UP2716D is one of three monitors released recently by Dell for 2016, the other two are UP2516D and UP3216Q (4K). They have specifications aimed at artists, graphic designers and video makers who place emphasis on colour accuracy.

Who am I?

I'm an artist who also does graphic design, photo, video editing and write a lot on my blog.

I'm reviewing this monitor from the perspective of someone into print production at a newspaper company. I cannot speak for professional video or photography work because I don't do those for a living. However, I do produce a lot of videos and photos for my Youtube channel and website.

Colour accuracy is something I respect. But I'm not obsessed to the point, nor does my work require me, to get a screen colour calibrator. Paper quality of newsprint is beyond my control. If your work is meant for screen, photography or video, or for magazines, then I highly recommend you get a screen calibrator like the Spyder.

Specifications that matter

My ideal monitor for production work is one with the following specifications:

  • IPS Panel
  • Widest gamut
  • Resolution higher than 1920 by 1080
  • Screen size larger than 24 inches
  • Matte non-glossy screen
  • Adjustability for tilt, height and swivel

After filtering out Dell monitors that do not meet the criteria, we are left with...

Main difference between UP2516D and UP2716D are screen size and resolution.

Colour accuracy is of utmost importance when it comes to production work. When I type in numbers for CMYK, the colours have to come out precisely the way I intend them to be. The colours also have to appear uniform across the entire panel. A good IPS panel meets all these criteria so having an IPS panel is a must. UP2716D uses a 10-bit IPS panel, capable of producing 1 billion colours, more than meets my specifications.

For TN panels (cheaper), their viewing angles are restricted in the sense that colours change depending on where you are viewing the screen. Colours like grey that appear at the top of the screen may look white when viewed from the centre. No kidding. Someone standing and sitting behind a TN panel will see different colour.

If you respect the work you do when it comes to print and video production, get an IPS panel. If you're working for magazines, or shooting for weddings, get the best monitor you can afford.

UP2716D Specifications

Below are the specifications for UP2516D and UP2716D. The only difference in screen size.

Viewing size27-inch, 25-inch
Panel typeIPS
Resolution2560 x 1440 @ 60Hz
Contrast Ratio1000 to 1 (typical), 2 Million to 1 (dynamic)
Brightness300 cd/m2 (typical)
Response Time6ms
Color Support1.07 billion colors
Color Gamut100% Adobe RGB, sRGB, REC709, 98% DCI-P3
BacklightLED
CoatingAnti-Glare with 3H hardness
AdjustabilityTilt, Swivel, Height Adjust
PortsDP, mDP, HDMI, 4 x USB3

What the monitor comes with

  • Monitor
  • Stand
  • Power Cable (varies by country)
  • mDP-DP Cable
  • USB 3.0 Cable
  • Drivers and Documentation Media (CD)
  • Quick Setup Guide
  • Safety and Regulatory Information
  • Factory Calibration Report

The stand and the mount are the latch on type, so you just slide the monitor onto the stand, hear a click and it's locked in place. To detach the screen, the press the release latch beneath the mount. No screwdriver is required for setup, unless you want to mount it on a VESA arm.

The monitor does not come with DVI or HDMI cables.

Design of the monitor

I'm currently using the U2711 monitor that I bought in 2010. Compared to my 5-year-old U2711, the new UP2716D is slightly smaller and compact. The front to back takes up less space on my small table so I really appreciate the compactness.


The bezel is 7mm thin except for the bottom. I use a Mac and the bezel is as thick as the Mac OS menu bar. At times when I move my mouse cursor towards the top, I get the impression my mouse cursor is going to fly out of the bezel. The bezel is even thinner that laptops bezels.

The screen is matte which is terrific. Screen surface is flushed with the bezel, making the front almost one seamless flat surface.

The backlight technology is LED. It uses less energy compared to CCFL backlight, After running the monitor for hours, it warms up only slightly. Overall, it uses less energy (45W vs my U2711's 113W).


All the controls are touch sensitive and the menus are pretty simple and straightforward. Anyway, after you've configured the settings, you'll never use the menus again.

Connectivity

  • DisplayPort
  • mini-DisplayPort
  • 2 x HDMI (MHL)
  • 4 x USB3 with one charging port
  • 2 x USB3 upstream


What's missing is the multi-memory card reader seen in some Dell high end monitors. I don't miss the memory card reader though. The current card reader on my old U2711 has broke. With the UP2716D, I've USB3 card reader plugged permanently into the USB port.

The USB 3 port is fast. I can transfer 10GB in less than 2 minutes. Transfer speed depends on your storage device, be it a memory card or external drive.

Performance

Phenomenal.


When it comes to colour accuracy, I configured the monitor to match what I see on my watercolour sketches and the colours are reproduced faithfully.


The 2560x1440 resolution is high enough for me. I can't see individual pixels at one arm's length away. You can open two 1024px wide browser windows and still see icons on the desktop. That's good for writing with research material in another browser window.

Backlight bleeding is not noticeable from what I can see. Black levels are exceptional. I filled a screen with 4C black (Total ink level at 400) and black screen is indistinguishable from the bezel.


Doing graphic design work on this monitor is more than satisfactory. You can lay out pages and still see much of the controls and palettes. The 27-inch can fit a physical sheet of A3 paper, so for most purposes like laying out a magazine or book, chances are you will be able to see your pages at 100% size. If you work for newspaper, the pages on screen will of course be scaled down, just like what you see in the photo above.

The advantages of working on a screen that can show your pages at 100% size is that you see fonts at the actual size that they will be printed.

The 2560x1440 resolution runs at a maximum of 60Hz. Gaming on consoles like the XBox or PS3/4 is not a problem as they top out at 60 FPS so the monitor can handle them with no problems. I've no experience with PC games so I can't comment on that. As the screen resolution is higher than 1080P, the graphics are upscaled with the unavoidable graininess but it's really not too bad when you look at it from far, like two arms length. For gaming on Windows machine at the native 2560x1440 resolution, you'll need to have a decent graphics card if you run at full resolution at high frame rates.

While on the topic of gaming, note that you can plug both Xbox and PS3/4 into the two HDMI ports provided. There's a 3.5mm audio jack out so you can get sound out from your gaming consoles with that.

For my purposes which deals with 2D work (including video editing), I've no problem running that resolution even with a 2012 Mac Mini with an integrated graphics card, Intel HD Graphics 4000. You just need a DisplayPort.

You'll get the best performance with the mini-DisplayPort cable provided. HDMI runs 1080P but it might not work at 2560x1440 with some systems. And there is not DVI port with the UP2716D.

Make sure your computer supports DisplayPort.

Video review

Would I buy this monitor?

If I'm choosing a monitor today for production work, I will consider the UP2716D and UP3216Q because of the larger screen size compared to the 25-inch UP2516D.

Here's who I think the various monitors are for

UP2516D: You want a more compact screen at high resolution. You get to save up to USD $200 from the UP2716D. Slightly better for those with limited table space.

UP2716D: You want a larger screen for production work but do not produce 4K videos.

UP3216Q: You produce 4K videos. Note that monitor's DCI-P3 support is at 87% (down from 98% of the 27-inch).

Overall, I find the UP2716D to be an excellent monitor in terms of price, value and performance. If you don't produce 4K video, this is the monitor I would recommend over the UP2516D.

Why I've used Dell monitors over the years?

The Dell Ultrasharp series of monitors provide good value for money. Prices are very competitive with other brands. Warranty coverage is quite good too as you have the option to extend it up to 5 years. My U2711 was actually exchanged twice because the original unit's LCD screen leaked, and the second unit had a yellow cast. After two exchanges, the monitor I'm using is now 3 years old and still going strong. However, the spring mechanism in my multi-card reader has broken, which is the reason why I don't miss the lack of card reader in the UP2716D.

Availability

You can read more reviews on Amazon links (below), or read the full specifications on Dell's website.

Dell UP2716D: US | CA | UK | DE | FR | IT | ES | JP

Dell UP2516D: US | CA | UK | DE | FR | IT | ES | JP

Dell UP3216Q: US | UK | DE | FR | IT | ES | JP

Tags: 

Artist Review: Epson Perfection V39 photo Scanner

$
0
0

I've recently bought a new scanner for the office. If you've read my article on scanner comparison and Canon Lide 220, you might remember that I use a Canon scanner. So this time I decided to try something different and get an Epson scanner instead.

The Epson V39 is a budget flatbed scanner that's price competitive with the Canon Lide 220.


That's my Canon scanner on the right. The two are about the same size. Compact and slim.


One notable feature that Canon does not have is on the Epson, you can remove the lid. So it's easier to scan thicker books. You can do so with the Canon as well, just that the lid will there there. Not really a big issue.


These are the shortcut buttons for scanning and other features, like saving to the cloud, email, Facebook (gasp!).


The Epson V39 uses Contact Image Sensors (CIS). In short, you need the paper surface to be directly in contact with the glass to get the best possible scan. If there's a gap between the paper and glass, the scanner will not be able to capture the detail.

Because of the scanning technology, the scanner might have problem with scanning watercolour paper, spiral sketchbooks, or a sketchbook that cannot open flat. Watercolour paper may buckle, and those areas above the glass will not be captured. Same for spiral sketchbooks where the paper surface lifts off near the wire, and sketchbooks where the paper curve into the gutter.

This is a problem that the Canon Lide scanners face as well. Not unexpected.


This is the sketchbook page I scanned to test the scanner.


This is the scan with no post processing.

If you click on the picture for a larger view, look at the top of the scan where the paper buckled and the scanner wasn't able to capture the detail there. That's the only issue with this scanner, again it's not a problem limited only to this scanner.

In terms of quality, the scanner is able to pick up high levels of detail, such as the grain of the watercolour paper. It can actually scan up to 4800 dpi. Scanning speed is fast too.

Colours captured are quite close as well. If I have to compare with the Canon, I say the Canon is just a tiny bit closer. However, with the Epson driver software, you can tweak the way the scan is capture (more on that later).

Driver software

In order to use the scanner, you have to install the Epson Scan software. If you're on Mac OS, the Image Capture application will not detect the scanner.


You can tweak the way colours are captured with the Epson Scan software. However, it's very tedious because there's no way to have instant feedback to your colour adjustments. After every adjustment, you have to scan and check the result. If it doesn't work, you have to repeat the process. Of course as a graphic artist, you just have to edit the scan with Photoshop. Just saying.

Epson Scan is a really old software. There's an extremely old scanner in my office that uses the same exact software.

The scanner uses USB for connection and power. No need for extra power cable. The USB cable is the type used to charge Samung, HTC phones and Amazon Kindles. So I always share the cable with my phones. No need to have so many cables coming out of the computer.

Conclusion

Overall, the Epson V39 is a great scanner at a competitive price. Just note the limitation when scanning paper that might not be in contact with the glass surface.

Visit Amazon to check out more reviews.

Here are direct links to the book:
Amazon.com | Amazon.ca | Amazon.co.uk | Amazon.de | Amazon.fr | Amazon.it | Amazon.es

Tags: 

Review: XP-Pen Artist 22HD Pen Display Monitor (IPS)

$
0
0

This review is written by Ryan Lopez, a freelance artist, live streamer, and product reviewer.


This is a review of the XP-Pen Artist 22HD, a graphic tablet monitor that displays what you are drawing on screen as you work. In this review we will discuss the some of the positives and the negatives about this product. Also I will try my best to be as in depth for someone that is brand new to this type of product. I myself have used a few Wacom bamboo tablets, and also a few products from Ugee, like the 2150 and 1200b. I have never worked with a Cintiq, but hopefully someday. This product is known as a “Cintiq Alternative”, with sharing many similarities... but one not being the price. Without hesitation, let's get it started.

Overview

The XP-Pen 22HD is a 21.5 inch 1920 x 1080p resolution IPS drawing tablet monitor. This is your basic resolution for everything classified as High Definition.

The benefits of this being an IPS monitor are the viewing angles and the true rich colors the monitor puts out. This monitor can be viewed from many angles and really only seeing some color degradation when at the extreme side viewing angle.

The colors are spot on and there is little to zero calibration needed of the monitor when coming out of the box. This monitor has 2048 levels of pen pressure sensitivity and comes with 2 rechargeable pens in the standard package. 2048 levels of sensitivity is the standard for most pen tablets, meaning that you can apply as many points of pressure to see a difference in line or stroke size.

The pens have 2 express hot keys located on them that can be customized to about 9 assignable shortcut keys. This monitor has HDMI, DVI, and VGA ports for all of your output needs. Cables that are included in the standard package are USB, Power, DVI, HDMI, VGA. Also included is a mini-DVI adapter, cleaning cloth, a brush, screen protector, a pen stand and extra nub holder, and a XP-Pen artist glove. There is more technical terms and more specifications that could be listed above, but these are the ones I find most important.


Some of the included items.

Comparison

The recognizable name in this product field is Wacom with their Cintiq line. As for myself, a person that has never used a Cintiq, I can only comment on the differences simply on paper and from what others have previously discussed. Commonly described as a Cintiq alternative, here are some of those differences.

The Artist 22 has no express keys at all. Express keys are keys that are on the front face of the tablet to enable shortcuts to certain functions like “undo, erase, move, zoom” and more that can be customized to your liking. With the pen having 2 buttons on it I set them to erase and color picker for easy use. I also found that as long as your keyboard is near this shouldn't be a problem for the average user that has no experience with a Cintiq anyways.

The glossy glass screen is quite the contrast to the Cintiq that has more of a flat plastic surface. The gloss tends to reflect the light that you have in the room and makes it hard sometimes to see the screen clearly. The gloss also tends to stick to your hand as you try to move it for larger brush strokes, a good thing XP-Pen recognized this problem and included a very comfortable glove to help. It's a 2 finger glove that leaves your thumb, index, and middle finger free to grip the pen naturally, while covering you pinkie and ring finger to help your hand slide across the screen.

The prices between the Cintiq 22HD and the Artist 22HD are night and day. With the Cintiq HD (non-touch) coming in at $1799.95 USD, currently on Amazon, and the Artist 22HD coming in at $609.99 the price comparison isn't even close.

These three key differences are what I can see affecting a lot of consumers decisions when purchasing these similar products. With the over one thousand dollar price difference being the biggest factor of all.

Build Quality


Default stand.

So let's now talk about the monitor build itself. The stand provided works well enough, with a single latch that you hold up at the top of the monitor to have the stand slide up and down. It's made of a thick plastic and has rubber grommets on each of the four foot contacts. The only issue I have seen with the stand is I just didn't find it comfortable for extended periods of time. With my current setup I have my monitor on a movable arm so that I can bring the tablet to me instead of moving to the tablet, so yes it is VESA mount compatible also which is a plus.


VESA mount applied

Five buttons are located on the bottom right corner of the monitor, Auto, -,+, Menu, Power. The “-” and “+” being volume control for the built in speakers located on the back. I didn't test out the speakers, but it's strange that the product specifications makes no mention of them at all.


Hello glossy screen!

The screen has a glossy finish, as I mentioned earlier, and has quite a gap between the glass and the point at where your pen is displayed, which is described as parallax. The gap only becomes an issue towards sides of the screen. With most of the work you will be doing towards the center, this isn't a problem.


Slight parallax.


Cables become bunched when lowering stand.

One of the problems I ran into when using the provided stand is the cable placement located at the bottom of the monitor. When adjusting it up and down, some of the cables would get caught under the monitor and wouldn't allow it to go all the way down with out me reaching behind and pulling the cables out of the way. A minor inconvenience, but one nonetheless.

So while we are talking about the build quality we might as well discuss the similarity between this and other Cintiq alternatives. I personally own, and have been using for quite some time, the Ugee 2150. These are the exact same product. With only a difference in the packaging (much nicer than that from Ugee) it came in and the name on the front of the screen. I do not know the logistics of Chinese manufacturing, but all I know is that both of these products work great.


Ugee 2150 (left), XP-Pen Artist 22HD (right)

The pens included have a great weight to them and feel comfortable in your hand. Included are extra nubs located in the stand for the pen and two charging cables for the pens as well. A full charge on the pens will last a couple weeks, depending on how much you use them of course. The only issue I ran into is the sound that the pen sometimes makes when moving across the screen. I believe that the screen protector is included to help prevent this noise, but with me previously trying to get the screen protector applied without any bubbles on the Ugee 2150 and failing, I didn't even try on this unit. As a suggestion, I would hope that these screen protectors could come pre-installed from the manufacturer in the future.

Other than the cable placement I am impressed with the build quality of the Artist 22HD. With a solid construction and a beautiful display I can't say much bad about it.


Different positions of the stand.

Software and Drivers

Installation of the drivers and software from XP-Pen were the easiest I have ever encountered. I used the CD provided, installed and rebooted in a flash. I currently am running Windows 10 with the latest updates. This tablet is also compatible with Windows XP/7/8/8.1/Mac OS x 10.7.0 or later. I also tested this unit using Adobe Photoshop and Manga Studio Pro and had no issues at all. After the restart, I was getting ready to do the 9 point configuration tool, like I have done with other products, but realized that the configuration was already spot on. It was a very nice surprise from having so many issues from other products before. All of the other configurable areas of the software are ready from the start, with only one suggestion to turn the pen sensitivity all the way down. I felt like I had a much more consistent pressure control with the slider at the zero position.


Quick Test for jitters and inconsistencies, results none.

Breakdown

So let's breakdown the pros and the cons of the Artist 22HD.

Pros:

  • Priced at $609.99 USD currently on Amazon is an amazing deal
  • Screen size, Resolution, and Color reproduction quality
  • All of the outputs you could want. And all cables included
  • Software and Driver installation was really smooth

Cons:

  • Glossy Screen and slight Parallax
  • Cable placement at bottom of monitor
  • Stand can make it uncomfortable, but VESA mount compatible
  • No express keys

Recommendation

With the pros definitely outweighing the minor cons of this product, I can't help but have to recommend this to anyone considering this unit. Much like the Ugee 2150, well exactly like it, this product has an outstanding value that can't be beat. Stop thinking about, just buy this now

Availability

Check out more reviews on Amazon at
amazon.com/Graphics-Painting-Adjustable-Disaplay-Protector/dp/B015FP25V6

There's also a 10-inch version at
amazon.com/Artist10-Interactive-Display-Graphics-Drawing/dp/B017K6O96W

Check out other graphics tablet reviews at http://www.parkablogs.com/tags/drawing-tablet-reviews

Tags: 

Best Computer or Laptop for Photoshop & Graphic Design

$
0
0

This article is for those looking to buy a computer or laptop primarily to use Photoshop or Lightroom, either for digital painting, graphic design or photo editing. I've used Photoshop for more than 10 years in my job as an artist creating art for newspaper publication.

This article is divided into two parts, the specifications and my recommended systems. To understand what you're buying, read the specifications section.To save time, just scroll to my recommended systems.

Oh, yeah. All the systems are pre-built. If you're the DIY kind, then this article probably might not be as useful.

Official specifications vs my recommended specifications

Below are the specifications as recommended by Adobe for running Photoshop:

  • 2 GHz or faster processor
  • 2 GB of RAM (8 GB recommended)
  • 2 GB of storage for installation

Those above at the minimum specifications recommended by Adobe. I'm happy to say that most computers nowadays are much more powerful than the listed specifications.

Here are my recommended optimal specifications for running Photoshop

  • At least a dual-core 2Ghz or faster processor
  • 8 GB RAM minimum
  • SSD for storage

Below are reasons for my recommendations.

Processor

Unfortunately after all these years since the introduction of multi-core processors, Photoshop is still unable to take advantage of all the cores available.

In short, a 4-core processor will not be significantly faster than a 2-core processor. Getting 4-core is recommended if other applications you have can make use of the cores though. However, for Photoshop, getting a 2-core processor is sufficient.

The important thing is to get as high a processor clock speed as you can (afford). A dual-core 3Ghz will perform faster a quad-core 2Ghz. Because Photoshop don't use all cores, clock speed of each core will matters more.

You will definitely want a dual-core because the OS also needs processing power. So having a dual-core will balance the load out between Photoshop and the OS, either Windows or Mac.

Storage

There are two types of storage options, the traditional hard drives HDD vs modern solid state drives (SSD). Here the takeaways you should know

HDD are cheap and have larger storage capacity. They are great for storing huge files, or files you don't use that often, and good for backup purposes. They transfer up to 50 - 120MB/s of storage.

SSD are more expensive, have lesser storage capacity compared to HDD. They transfer up 200 - 500 MB/s. If you install your OS or Photoshop on the SSD, they will start in a fraction of time compared to HDD. When opening and saving huge files on SSD, you save a few seconds with each save. Time savings with SSD is significant.

Storage is often the bottleneck to performance on any system. If you have limited budget to upgrade your system, I recommend upgrading the HDD to SSD first. You can get external storage later on.

If your computer has two storage slots, you can get a smaller SSD (save money) to install OS and applications and a HDD to store more and or larger files.

RAM

RAM, aka Random-access memory or just memory, is the temporary storage for your opened files.

RAM usage depends on the number of files you open, the file sizes, the number of layers in your Photoshop files, and also other applications that are opened and also how the OS is managing memory.

Running the OS, launching Photoshop, working on multiple files at the same time, looking at a photo reference on a web browser, listening to music --- all those require memory.

8GB of RAM is the minimum I would recommend. Having 16GB RAM will be great.

Photoshop has a feature called scratch disk. A scratch disk is a place for temporary storage for memory as well, such as caches for your opened files. You can choose to use storage (either HDD or SSD) as a scratch disk. Storage drives are slower than the RAM. So if you have more RAM, having a scratch disk becomes less important.

Graphics card

A powerful graphics card is not necessary for Photoshop. Even an integrated graphics card with the CPU will suffice. If you intend to play 3D games on your computer, then go ahead and get a better graphics card.

Screen

Photoshop runs at a minimum of 1024 x 768 resolution. Nowadays, it would be difficult to buy a monitor or laptop that runs at that low a resolution.

If you want to get a desktop, I recommend you check out the budget non-glossy monitors I've featured on this article at http://www.parkablogs.com/content/budget-monitors-artists-and-designers-...

Nowadays most laptop screens are glossy. Glossy screens present colours more vividly compared to matte screens. Personally, I don't like the distractions of reflections, or looking at my own face on the screen when working.

My system recommendation

I'm splitting this section into desktops and laptops.

Mac vs Windows? Photoshop, including most of Adobe's Creative Suite software, runs on both platforms. Main difference comes down to interface and also slight differences in usability. It's a personal preference. Subjective stuff. Which OS you choose depends on what other applications you want to run. If you want to run games as well, then it's better to get Windows for the wider selection. If your system is purely for work, either OS is fine.

All the systems below fulfill my recommended minimum specifications:

  • At least a dual-core 2Ghz or faster processor
  • 8 GB RAM minimum
  • 128GB SSD for storage
  • 13 to 15-inch screen for laptops

I've included only systems that use SSDs. For extra storage capacity, get an external hard drive. I recommend Western Digital My Passport (I have several for backups of backups).

Not all systems below are budget systems, so click their names to see the continuously changing prices and more reviews.

DESKTOPS

High end (above USD $1000)


Budget (around and below $1000):

The Mac Mini, Intel NUC, Gigabyte Mini and other miniPCs do not come with keyboard and mouse so you have to factor in the extra cost. I recommend the Logitech Marathon wireless mouse and Logitech K360 wireless keyboard.

And all desktops above do not come with screens except the iMac. For budget high quality monitors, check out this list: http://www.parkablogs.com/content/budget-monitors-artists-and-designers-...

Laptops

The main compromise for laptops is screen size vs weight. While I want to help you save money, a good laptop is just not cheap.

There aren't a lot of matte screens nowadays and ASUS's one manufacturer that still makes some. If you don't mind glossy screens, there are lots of options.


While I want to include the Microsoft Surface Book (above), they are more expensive compared to the laptops listed above. Probably because of the Surface Book's gimmicky detachable screen. If you don't need to use the computer in tablet mode, you can save a few hundred dollars by getting other laptops.


The Microsoft Surface Pro 4 is a good choice too but the screen is only 12.3-inches. And it does not come with a keyboard. 13-inch screens to me still feels small but I've to say they are much more portable. But if you have an external monitor, the getting the 13-inch screen makes more sense when you have the option to work from a larger screen.

Note that the Surface Pro 4 does not come with the keyboard cover (expensive).

Tags: 

Review: Yiynova MSP19U+V5 Pen Digitizer Tablet Monitor

$
0
0

Hi, I’m Chris and this is my review of the Yiynova MSP19U+V5 tablet monitor.

I came across this particular tablet while searching for a tablet monitor to replace my old Wacom Bamboo. Besides my Bamboo, I had some experience using various models of Wacom’s Cintiq. I was looking for a cheaper alternative to the Cintiq, which is probably the most well-known and widely used tablet monitor.

After doing extensive research of various alternative tablet monitors, I decided that the MSP19U+V5 was the best option from what I had seen. I bought it on Amazon for $479, with the original price listed as $699. Since then, at the time of writing this, the price has gone down to $449. After spending several hours drawing with it, I can say that it is definitely a great alternative to the Cintiq, especially for being about a quarter of the price of the Cintiq 22 HD and over $300 cheaper than the Cintiq 13 HD.

Tablet Details

The tablet itself is 17.9 by 14.2 inches and 9.7 pounds (4.4kg), so it is not too bulky and can fit on a fairly small desk.

The stand that it comes with is sturdy and has rubber grips on the bottom so that it doesn’t slide around. I don’t feel like I’m going to slide the tablet around or break the stand when I draw on it, even if I’m pushing down hard.

The screen is smooth glass, so it doesn’t have the same paper texture feel as the Cintiq, but after using both, I’ve found that I prefer the smoother screen of the Yiynova. The smoother screen also prevents scratching and the wearing down of the pen nibs. I don’t think a screen protector is necessary and I haven’t seen mention of any need for one in the reviews I have read. The smoother screen also has more potential for glare, but I haven’t had much of a problem with this since I don’t usually have mine close to a bright window.

There are programmable buttons for different commands on the left side of the monitor, but I haven’t really used these much. The labels for the default settings are printed on the front of the monitor, while the buttons are in the back. They seem to be in an easily accessible location, but they make loud clicks when you press them, which may be annoying to people who would use them frequently. The power button and settings buttons are on the lower right side and it took me a few minutes to figure out how to maneuver through the menus to change the colors and brightness. The menus can be difficult to navigate, but I only change display settings occasionally so I wouldn’t consider it a detraction from the tablet.


The default stand setup on the back of the monitor


The programmable buttons on the back left of the monitor and the power and settings buttons on the lower right side

Display

The 19-inch screen has a resolution of 1440x900 and 4000 LPI.

The colors were a bit weird with the default settings, but after playing with the color settings for a while, I managed to get them fairly close to the colors on my laptop. I usually keep another window open on my laptop so that I can check the colors and make sure they look the way I intend. This also helps with the differing resolutions, since the tablet is 1440x900, while my laptop is 1920x1080. Even though the resolution of the tablet is a bit lower than that of my laptop, I usually zoom in enough while I’m drawing that I don’t notice the lower resolution much. The only time that the resolution is noticeable is when working with really fine detail, but even in those instances, the lower resolution is not too much of a problem.

There is a small amount of parallax (where the glass thickness causes a difference in the location of the pen tip and the cursor), but it’s usually not noticeable. Occasionally, if I am sitting in a much different position than I was when I calibrated the screen, I’ll have to recalibrate, but usually that’s not necessary.

The viewing angle isn’t the best because there is no IPS panel, so sometimes if I’m looking at the very top or bottom of the screen, I need to move my head a bit to make sure I’m looking at the screen as close to perpendicularly as possible. However, this probably wouldn’t be too much of a problem for most people because the most comfortable drawing position is directly in front of the monitor.

Accessories

When I received the tablet, it came in a fairly sturdy box that I now use if I need to transport it somewhere. It came with the manual, a disk with the latest drivers, two drawing gloves, two pen kits, all of the necessary cords, and some adapters.

The drawing gloves are well-made and comfortable, as well as reversible, so they can be used whether you are right-handed or left-handed. Although one glove is sufficient, it is nice to have the second one as a backup in case the other gets lost or worn out. Since the tablet screen is a glossy glass, drawing with a glove can prevent smudging on the screen. It can also prevent your hand from sticking when trying to move across the screen while your hand is sweaty, but since the monitor doesn’t give off too much heat, this isn’t much of a problem anyway.

The power cord detaches from the tablet, while the DVI-I input cable does not. It comes with three adapters for HDMI, VGA, and DP++. Use of the tablet requires plugging the power cable into an outlet, one branch of the input cable into a USB port, and the other branch into an input of your choice (I use HDMI). The wires take up a lot of space, but I manage to fit my laptop and tablet on a fairly small desk along with a lamp and other desk clutter.


The box can be carried by the handle without it feeling like it’s going to fall apart.


Two of these reversible gloves came with the tablet


Starting from the left: DVI-I input, USB input, HDMI adapter (I use this one), VGA adapter, DP++ adapter

The Pens

The two pen kits each consist of a P2X pen, two extra nibs (for a total of six nibs including the ones that came in the pens), a nib-remover, and a plastic case for the pen.

The pen itself is comparable to any of the other tablet pens I have used, including those of the Bamboo and Cintiq. The P2X is Yiynova’s best pen model compared to the P2H and older models. The pen has 2048 levels of sensitivity (double what my Bamboo had, but equal to the Cintiq) and does not have tilt detection, but I don’t personally need or use tilt detection, so I don’t consider this a loss.

It is battery-powered and takes one AAA battery. So far I have not had to replace the battery, and from what I have read, the pen can be used regularly for a long time (at least several months) without needing a new battery. The battery doesn’t add a very noticeable amount of weight to the pen, and the weight feels similar to the Wacom pens I have used.

The pen does not have an “eraser” on the other end, but I have not really missed it too much.

There are two programmable buttons on the side which is really my only complaint about the pen. The buttons are positioned in such a way that they are too easy to press, and I often do that accidentally while drawing and end up interrupting my stroke or switching colors unintentionally. Due to this, I often try to position my fingers on the pen differently so that I am less likely to accidentally hit the buttons. However, the buttons can be disabled in the settings menu if you don’t use them. The pen case makes a nice pen holder since it has a hole that you can stand the pen up in. It doesn’t make the best case though because the pen fits a bit too snugly and it is also really hard to pry open. The case also has a transparent ruler on the side, but I haven’t had the need to use it.

pens
The two P2X pens showing their structure and how they open for the battery


The pen cases with extra nibs and nib remover on left and right sides of the open case respectively

Use and Drawing Experience

I use the HDMI adapter with my Dell XPS L511Z laptop running Windows 7.

The software I have used for drawing with this tablet the most is Clip Studio Paint (same thing as Manga Studio), but I have also had a good experience using it with Photoshop.

Drawing is really smooth and natural and I don’t notice any lag or jitter at all.

The pressure sensitivity feels a bit different than Wacom pens, but I was able to easily get the pressure levels how I wanted them by adjusting some pen settings. There is a really nice pressure ramp and I don’t feel as though I need to press too softly or too hard in order to get the full range of pressure values that I want.

The color and resolution difference between the tablet and my laptop isn’t a problem either because I almost always have another window open on my laptop of the drawing so that I can check to make sure everything looks the way that I want it to. As I said before, as long as I calibrate the screen, I don’t have much noticeable parallax and even with a somewhat smaller viewing angle, as long as I stay close to perpendicular to the screen, I don’t need to worry about it affecting my drawing.

The tablet also stays cool for long periods of time and it hasn’t gotten uncomfortably warm, even after several hours of continual use. The tablet also makes a great second monitor, even if I’m not using it for drawing. I can have a window open for reference when using Autodesk Maya, or when using Unity, I can have the code up on one screen and the project window open on the other. Having the extra screen space can help speed things up and make things easier no matter what software I’m using. I also usually have a USB mouse plugged in when I’m using my tablet, so that I can quickly move windows between screens or just for software like Maya or Unity where a mouse is easier to use than a pen.


My setup with my laptop and the MSP19U+V5 with Clip Studio Paint open


Some of the tablet options including pen button settings and pressure sensitivity


Pen pressure sensitivity tests/demonstrations done using Clip Studio Paint

Driver Installation and Problems

I had read in some reviews that it was a good idea to make sure I had installed the tablet drivers before even plugging in the tablet, so I did so. However, I was hoping that I could at least leave my Wacom drivers on my computer so that I could use my Bamboo if I wanted to, but I was unable to get things working correctly until I uninstalled all of the Wacom drivers. This isn’t a big deal because the UC-Logic drivers for the Yiynova installed really quickly so I could uninstall and reinstall drivers in the future if for some reason I needed to use my Bamboo.

Everything was running smoothly, but when I drew with the tablet for long periods of time, the pen pressure would stop working after an hour or two and I would be unable to draw with it until I restarted my computer. This went on for a while, and I would just restart my computer every couple hours, until I finally contacted the seller, The Panda City (in the US), and emailed support. Their customer support was really helpful, responded within a day, and kept up communications until my problem was fixed.

Driver Solution

I will talk about how I solved the problem for reference for anyone else having the same issue. Part of the problem was due to the fact that I had overlooked which version of the drivers I was using. The disk that the tablet came with contained the newest version of the drivers, which were not recommended for use with Windows 7. I downloaded and installed version 5.02 from the Panda City website, but was still having problems. It turned out that my computer was using the default Windows tablet drivers instead of the UC-Logic drivers. I ended up having to create a new administrator account on my computer and reinstall the drivers, which finally solved all of my problems. This was partially my fault for not paying attention to which driver version I needed for my operating system.

I recommend that anyone getting this tablet makes sure they follow the installation instructions located on The Panda City’s Facebook page and uninstalls all other tablet drivers and installs the correct version for their operating system before even plugging in the tablet.

Conclusion

I would definitely recommend the Yiynova MSP19U+V5 to anyone who is looking for a good tablet monitor. It is a great and cost effective alternative to the Wacom Cintiq, and depending on your preference, could be an even better option than the Cintiq. As an upgrade from the Wacom Bamboo, this tablet has made drawing digitally feel much more natural and has drastically sped up my workflow. Here is a quick pros and cons list of what I feel are the most important details of the tablet:

Pros:

  • Price (at the time of writing, $449 on Amazon)
  • Very responsive and helpful customer service (at least with The Panda City)
  • Minimal lag, jitter, and parallax
  • Light but sturdy monitor and stand
  • Stand is adjustable and doesn’t slide
  • Lots of accessories: two gloves, two pens, adapters, nibs, etc.
  • Programmable shortcut buttons on the side of the monitor
  • Pen battery lasts a long time
  • Good range of pen pressure sensitivity
  • Glossy screen prevents scratching and nibs from wearing down
  • Vivid colors once properly adjusted due to lack of anti-glare surface

Cons:

  • Small viewing angle due to having no IPS panel
  • Lower resolution
  • Possible difficulties with driver installation
  • No eraser on pen
  • No tilt detection
  • Wires take up a lot of space, adapters needed
  • Glossy screen more likely to cause glare
  • Colors and brightness need some adjustment out of the box

Hopefully this review has provided you with some useful information that will make your tablet-buying choice easier!

Thanks for reading,
Chris Phillips

Availability

Check out more reviews on the following product pages at
Amazon.com | Amazon.ca | Amazon.co.uk | Amazon.de | Amazon.fr

Tags: 

Artist Review: Epson E11000XL A3 Scanner

$
0
0

This review is written by Stephanie Bower.

I use a scanner nearly every day for work, as I’m professional architectural illustrator and also an avid Urban Sketcher. I mostly scan pencil sketches drawn on translucent vellum and watercolor illustrations painted on textured watercolor paper. Most of my work is large format 11” x 17”, so I need a large, flat bed scanner, and I need to provide my clients with high quality, high resolution (300-600dpi) scanned images. I also scan my travel sketches, many of which are in sketchbooks. While I am no technical expert (and forgive my lack of knowledge regarding technical jargon), but this is the fourth scanner I’ve owned and used so I can at least talk a little about my experience.


About a year ago, I upgraded my computer to a new Apple desktop, which forced me to also upgrade my scanner to a new model—the Epson 11000XL was the only large format scanner that offered the drivers I could use with my new computer using OS X that also allowed me to scan directly into Photoshop. Scanning into Photoshop was something that was really important to me — for time savings and image quality.

With my previous scanners (all of which were purchased as used on eBay and worked great), I could scan directly into Photoshop using Twain drivers. This saved me a lot of time as the scanned image imports automatically as a Photoshop .psd file, and then I could quickly manipulate the images in Photoshop as well as save them as archival high resolution Photoshop files. The alternative was to use the Image Capture software, but then I’d have to go through the extra step of pulling a TIF or jpeg into Photoshop and making a psd file—these extra steps would be more trouble and basically, time is money. But this brand new scanner was a whopping price, nearly as expensive as my new computer, and it was tough to decide if my desire to scan directly into Photoshop was worth the expense.

Below is a screen grab showing the various windows open when I use Epson Scan directly into Photoshop. You can see I scan in Profession Mode, usually at 300-600dpi. I like to use the Unsharp Mask feature for sharper images, but all the other settings are pretty much the reset default. The image looks pretty good! The colors are quite accurate, although amped up a bit on my screen.


300dpi scan from Photoshop without edits

Conclusion

After using this scanner a lot for the past year, I can offer some pros and cons based on my experience and use.

Pros—Easy, good color, high resolution

+ Right out of the box, I could plug it in and it was easy to set up and use. Amazon delivered in in only one or two days.
+ Epson offered good telephone support—I did have to call several times with questions. I also had to download the driver again when my computer updated to El Capitan OS 10.11.2.
+ I can indeed scan through Photoshop using Epson Scan, with images importing directly as .psd files. I downloaded the drivers from the Epson website for free.
+ The color and quality of the scans seem to be pretty good with the native, default settings. There are lots of adjustments you can make to the image including Auto Exposure, Histogram Adjustment, Tone Correction, Image Adjustment (sliding bars that let you change Brightness, Contrast, Saturation, and Color Balance) and Color Balance, but I’ve been pretty happy with the default settings. I do like to use the Unsharp Mask feature, as it seems to make my linework a little darker and crisper.
It seems like most scanners and monitors tend to amp up the color a bit when compared to the watercolor original, and I have never taken the time to try and adjust that…I think I’ve just gotten use to seeing the brighter colors on my screen. I do sometimes desaturate and brighten the images in Photoshop, also adjusting using Levels.
+ The design of the scanner is pretty sleek with a nice matte gray color.
+ The top lifts up for scanning thicker things like books, although the scanning light casts a shadow at the book’s gutter.
+ There really is no comparable, relatively affordable large format, high resolution scanner out there other than this one. I hope it doesn’t go into extinction.

Cons—LOUD, big and heavy, expensive

- It is LOUD, much louder than my previous Epson scanners. Really? In my small, one person office, I almost sent it back, as the whine it makes is really intolerable. I have to turn the machine off immediately after using it or it drives me nuts. (Listen)
Eventually, the noise level will go down when it drops into a sleep mode, but my older scanners didn’t do this at all. It’s also loud as it makes the actual scan, but at least that is brief and not as annoying as the whine. (listen)
- The other thing that really drives me nuts is that I have to reopen the Epson Scan program every time I want to do another scan. My older machines let me do multiple scans without the program closing, but this new one actually requires more time and effort
to do multiple scans. I have tried updating the driver, and still it isn’t fixed. Really dumb for a new, pricey machine. If someone out there knows a solution to this, let me know. Apparently, you CAN scan multiples using Image Capture, but again,
there is that Photoshop thing I want to do. So ironically, the time I gained by scanning directly into Photoshop is lost by having to always reopen the program to do each scan.
- This thing is BIG (roughly 17” x 28”, 6” high) and HEAVY (Amazon says the item weight is about 29 pounds) so have a nice, big desk top waiting.
- And of course, it is not cheap… but then the large format scanners have always been about this price when purchased new. I was spoiled by buying slightly older ones for much less on eBay!
- I do get a slight shadow on one side of the scan when I’m scanning translucent material. If the paper is opaque, this shadow doesn’t show up.

Availability
Check out more reviews at
Amazon.com | Amazon.ca | Amazon.co.uk | Amazon.de | Amazon.fr | Amazon.it | Amazon.es

Tags: 


Review: Huion Giano WH1409 graphic tablet (wireless)

$
0
0

Disclaimer: Huion sent me the WH1409 tablet for this review.

Huion Giano WH1409 wireless graphics tablet

The Huion Giano WH1409 can be considered the bigger brother of the DWH69, also wireless, that was released around May 2015.


The working surface area of this tablet measures 13.8 by 8.6 inches. It's huge! It measures around 17-inches diagonally. Drawing on such a large working area tires my hand faster than working on a smaller tablet (I use a Medium Wacom Intuos currently).


The highlight of this tablet is its wireless feature. The USB wireless receiver can be found behind the tablet, kept behind a latched holder. Throughout my usage, I did not encounter any lag or disconnection.

The wireless receiver also acts as a flash drive with 8GB of storage capacity. It's quite handy to store files in case you need to bring the tablet around. Transfer speed of the USB feels like USB 2.


Both the tablet and pen comes with built-in batteries that you can charge with the USB cables provided. I've been using the tablet for a few weeks with the initial charge. Even if the tablet or pen runs out of battery power, you can still draw by using them in wired mode.


These are the indicator lights that show you that the tablet is switched on, pen is working, and battery level.


The drawing surface has a matte texture with a feel that's similar to Wacom tablets. The pen draws with a good tactile feel and friction.

The pen


The pen has a nice comfortable non-slip grip and comes with two buttons. Weight is light but not too light. Just right.


A pen holder and four space nibs are provided. The replacement nibs are hidden inside the pen holder.


The pen has no eraser at the back. It's just a charging port.

Driver installation and features

Before you install the Huion drivers, make sure you uninstall all other tablet drivers first. e.g. Wacom drivers.


After installing the driver, you'll be able to get the pressure sensitivity to work and also customize the 12 shortcut keys on the tablet.

I've tested the tablet in Windows 7, 8.1, Windows 10 and Mac OS 10.10.5.

On Mac OS

On Mac OS, the tablet works perfectly.


Brush strokes on the Mac are almost flawless. Occasionally there will still be some jitter, but it's really a non issue and you really have to look out for it specifically to see it.


Here's a drawing using Photoshop (Mac). It's great. All the strokes turned out the way I want them to be.

On Windows

My experience with Windows and the tablet isn't satisfactory. Actually my main issue is the compatibility when it comes to working with Photoshop.


There's slight jitter when it comes to using Photoshop (Windows) with the default Huion driver. The workaround is to install Lazy Nezumi Pro to make the jitter go away and create beautiful smooth strokes. However, Lazy Nezumi Pro cost USD $35. This is quite strange because there's no such issue with Photoshop on the Mac, and I'm using the same version of Photoshop with different OS.


Drawn with Photoshop (Windows) with Lazy Nezumi Pro plugin.

If you have to work with Photoshop, you'll have to factor in the cost of Lazy Nezumi Pro.


Using with Illustrator (Windows) is satisfactory as it will smoothen out the brush strokes. The brush is able to detect pen pressure too.


Strokes in Mischief


Strokes in Krita

The jitter stroke issue seems to affect only Photoshop. I've tested the tablet with other Windows drawing applications without any problems, namely, Wacom Bamboo Paper, Mischief, Sketchable, Medibang Paint Pro, Krita and Autodesk Sketchbook (tablet version). In all these drawing apps, pressure sensitivity works perfectly and there is no line jitter.

I've tried Photoshop CS5, CS6 on Windows 7, 8 and 10 and there's the line jitter issue with all of them. So maybe this is more of a Photoshop issue than a problem with the tablet driver.

Conclusion

If you're using a Mac OS and thinking of getting this tablet, I say go ahead without hesitation.

If you're a Windows user, if you use Photoshop, you have to factor in the additional cost of buying Lazy Nezumi Pro to remove the jitter from Photoshop brushes. If you use other Windows drawing softwares, there's no problem.

Below are the pros and cons at a glance.

+ Affordable compared to Wacom tablets at the same size
+ Wireless tablet
+ Wireless pen
+ 12 shortcut keys are useful
+ Pen pressure works well
+ Replacement pen nibs are included
+ Works perfectly with Mac OS
+ Works with most Windows drawing applications except Photoshop
+ Drivers has lots of customisation
- Windows Photoshop brush strokes have jitter
- Working on this huge tablet can be tiring
- No eraser on back of pen

Availability

You can get the tablet and check out more reviews at
https://www.huiontablet.com/huion-wh1409.html

Tags: 

Old Surface Pen 3 vs Surface Pro 4 Pen

$
0
0

This article is for those who are thinking of getting the Microsoft Surface 3 for drawing and are wondering which Surface Pen to get.


Currently, there are two different Surface Pens you can choose from. There's the older model which is designed for the Surface Pro 3 and Surface 3 (I'll call that the S3 pen in this review). And there's the newer model designed for Surface Pro 3 (I'll call that the SP4 Pen in this review).

Here are the features of the two pens:

Old S3 penNew SP4 pen
Side buttons21
Back buttons11, doubles as eraser
TipHard plasticFelt-like
Pressure sensitivity2561024
BatteryAAAAAAAA
Colors42
Misc-Pen kit available with different tips


For drawing purpose, the new SP4 pen now comes with a felt-like tip that provides more friction when working on the glass surface, and hence slightly better control.

I'm not exactly sure of the material that's use to make the tip so in this review, that new tip will be referred to as the felt-like tip


Here's a closer look at the tip of my SP4 pen. The felt tip is held within some black plastic and that part can get weaken when bent and chip off. Mine's the result after two months of usage. Heavy handed users should note this.


Thankfully, Microsoft has replacement nibs for the SP4 pens that come in this nice package called the Pen Kit.


The Pen Kit has 4 different replacement tip, namely: 2H, H, HB and B.

2H and H are the hard tips and they glide smoothly on glass. I can't really feel any difference between the two. HB and B have the felt-like tip and have more friction, and again I can't feel any difference between these two.


You can use the back of the Pen Kit to clip the old nib and pull it out.


Unfortunately, you cannot swap nibs between the pens. So those nibs from the Pen Kit are not compatible with the old S3 pen. Shown above are the exposed nibs for the S3 and SP4 pen.


Both pens still require an AAAA battery to power on.

The new SP4 pen has new way to replace the battery compared to the S3 pen which just involves unscrewing the back. For the SP4 Pen, you have to hold the back very tightly first, and then twist anti-clockwise for tiny amount, probably a few mm and you'll be able to sense a click. It's tight so you have to hold tightly.


When you assemble the SP4, you have to make sure the shiny metal connector part is aligned with the groove at the back to that they fit and then you can push the end back in.


One new feature of the SP4 pen is the back button now also doubles up as an eraser in some software. The eraser functionality depends on the software. For example, when you're using the eraser with MediBang Paint Pro, the strokes will be thin and you have to adjust them with the software. And in Mischief, the eraser will erase with thick stroke.

Drawing performance

The S3 and SP4 pens produce almost similar lines.

SP4 pen's 1024 levels of pressure sensitivity does not make it significantly more sensitive that S3 pen's 256 levels. Actually, I found that the old S3 pen to be slightly more sensitive when drawing strokes lightly on Mischief. When used with MediBang, the strokes from the two pens are indistinguishable. That's the same with other software. So perhaps it's actually Mischief that's more sensitive and not the pen.

The feeling of drawing on glass is different. There's more friction with the SP4 pen because of the felt-like tip and hence the pen does not glide as smoothly as the old S3 pen. This offers slightly better control. However, over the weeks of using them, I don't really find one that feels significantly better over the other. It really depends on what kind of feel you like. Both are good.

When it comes to note taking, using a hard tip feels more natural to me. When used with Microsoft OneNote, there's some lag where the strokes will trail behind the cursor. This lag is made more discernible when using with the felt-like top.

Customization

You can customize the pens with the app called Surface, which you get download from the Windows App Store.

On the Surface 3 tablet, you can only customize the pressure sensitivity curve through the Surface app. There's no way to customize the button. I find the side buttons useless and the back button is permanently mapped to opening Microsoft's note taking application OneNote.

On the Surface Pro 4 tablet, there are more customization software but those are only available for the SP4 pens. If you have Surface Pro 4, then you already have the pen and don't need to read this review.

If you know of any workaround to mapping the side buttons and changing functionality of the new and old pens, please let me know. The Surface app is quite useless.

Conclusion

The new SP4 pen certainly has more new features, such as the eraser on the back, and the ability to use different nibs with the Pen Kit. Pressure sensitivity levels may have increased to 1024 but there's really no discernible difference when compared with the old S3 pen for drawing.

If you're looking for a new pen for your Surface 3 for drawing, I'll recommend the new SP4 pen.

Availability

You can find the Surface Pro 4 pen at
Amazon.com | Amazon.ca | Amazon.co.uk | Amazon.de | Amazon.fr | Amazon.it | Amazon.es | Amazon.co.jp

And the Surface Pen Kit at
Amazon.com | Amazon.ca | Amazon.co.uk | Amazon.de | Amazon.fr | Amazon.it | Amazon.es

Tags: 

Artist Review: Surface Pro 4 as a Drawing Tablet

$
0
0

I've finally gotten myself a Surface Pro 4 after months of waiting. Yeah, just like the Surface 3 I reviewed weeks ago, I bought mine as a secondhand unit and saved a significant amount of money. I'm upgrading from the Surface 3 because I wanted a larger screen. I'll write a comparison review for these two tablets in the future, and also compare the Surface Pro 4 with the iPad Pro. For this article, I want to focus on the Surface Pro 4.

The Surface line of tablets from Microsoft is promising and with every new model, improvements were significant. Surface Pro 4 is a significant upgrade to the Surface Pro 3, especially as a tablet for drawing.


Mine's the model with 8GB RAM, 256GB of storage. i5 processor (2.4Ghz duo-core) with Intel HD graphics 520. If you're getting a computer to create art, I recommend at least 8GB of RAM and a good i5 processor. 128GB of storage is not a lot especially after installing Windows OS and the software which will take up around 20GB. Windows OS also uses RAM and recommends 2GB alone.

DIFFERENT CONFIGURATIONS

Here are the different configurations of Surface Pro 4 and their official retail price.

To me, performance difference between i5 and i7 processors are not that significant. However, the i7 models have significantly better graphics performance with the Intel Iris 540 versus Intel HD graphics 520 with the i5 models, like up to 55% better. If you are into 3D work, it makes more sense to get the i7 models. If you're just going for digital painting, sketching, the i5 is more than adequate.

BUILD QUALITY

The body is made of magnesium with a matte surface finishing that feels nice to touch. It weighs 786g which is a nice weight for a 12-3 inch tablet. But once you start adding the Type Cover, it becomes close to the weight of a 12-inch laptop.


Behind the tablet is the kickstand that helps prop itself up. You can use the stand in any position between the closed and maximum inclined position as shown in the photo on the right. The built in stand is incredibly convenient as you don't need to buy additional accessories to make the tablet stand.

Overall, the tablet just feels solid. I also like the inclined cutting on the sides that makes it easy to pick it up when it's laying flat on the table.


I bought the SP4 Type Cover as well and it's amazing. The front and back of the cover is made of some felt-like material. It's something akin to walking on luxury carpet. And it's also a place to clean off your finger oil. :-P

The keyboard buttons are nice with tactile response and good spacing between one another.

The cover latches on magnetically to the tablet with a very strong magnet. Once the cover is near the tablet, it will snap on automatically.

The annoying thing about the Type Cover is, if you're drawing, it's not comfortable to have the hand on top of the cover. So whenever I'm drawing, I always detach the cover. Microsoft should really make the cover wireless. That would be so cool.

If you type frequently, then it makes sense to get the Type Cover. If you draw more often than type, then you can save the money as the Type Cover is quite pricey. Or perhaps getting the Logitech K810 Bluetooth keyboard would be a better choice.

The screen has a resolution of 2736x1824 and has great viewing angles and rich colours. It has a glossy screen so it's best to use the tablet indoors, and without any lighting from behind.

PORTS


In the picture from left to right are the power port, USB 3 and mini-DisplayPort.

One USB port is better than no USB ports. This allows you to plug in all sorts of USB devices, like scanner or USB flash drive, or an external hard drive for backup. Very helpful.

The mini-DisplayPort enables you to work with an external monitor. No mini-DisplayPort cable is supplied though. I use this one by Accell. After you plug it into an external monitor, you can choose three ways to display:

  • Extend the desktop from your SP4 to the monitor
  • Mirror the SP4 to the monitor
  • Use the monitor as the main screen and turn off SP4's screen


At home, I like to use the SP4 plugged into my Dell 27-inch monitor, which actually has a lower resolution than SP4's at 2560 by 1440. There's absolutely no lag whatsoever when it comes to moving windows around, switching applications, or doing 3D work with Sketchup. As the resolution of the screen is so high, it's much more user friendly to work on a larger screen.

When plugged into an external monitor, you can choose to work on the tablet as if you're drawing on a Wacom tablet.

Hidden behind the stand is a microSD slot. You can get a 128GB microSD card for USD $50 for extra storage.

SURFACE PRO 4 PEN


This is the new Surface Pen designed for the SP4.


One side is cut flat and that's where there's a strong magnet that will latch on to the side of SP4. Surface Pro 4 Pen has a felt-like tip compared to the hard plastic tip of the Surface 3 Pen.

Surface 3 Pen already offers a nice drawing experience. The change to a felt tip really makes the drawing experience even better because it introduces just a bit of friction to make it less slippery on the glass screen. Since it's less slippery now, it's makes it easier to control. That's a really nice touch. As a new tip, it's still quite smooth and you need to use it for a while before you can feel the additional resistance kicking in.


The pen needs to be powered by an AAAA battery with life rated to be around a year.


Here's how the tip looks like after two months of use. It bent slightly. Also, the plastic that's holding the felt tip has cracked slightly. It still works. The tip is still firm and does not wobble.

The pen now supports 1024 levels of pressure sensitivity and you can adjust the pressure curve using the app called Surface. Default setting is fine, but I prefer to adjust it so that I've to press harder for a thicker stroke. However, I feel that the old Surface Pen with 256 pressure levels offers slightly better pressure sensitivity when it comes to drawing softer lines, at least on the drawing app Mischief.


Microsoft has also released Surface Pen Tip Kit with 4 tips with different amount of friction. There are two hard smooth tips and two felt-tips with more friction.

Unfortunately, SP4 Pen buttons only have limited customisability, e.g. clicking to screenshot, launch One Note or some desktop application. If you know of a workaround, let me know please.

Oh, the button at the back works as an eraser at times when the app supports it.

BATTERY LIFE

Battery life is around 5-6 hours when using it for drawing, sometimes even less depending on the software and also brightness of the screen. This is a bit disappointing because it still cannot compare with laptop's battery life. It's best to have the battery is fully charged before you head outdoors for drawing.

WINDOWS OS

Windows 10 a desktop OS but you can also install tablet apps on it. When it comes to productivity, I feel that desktop software is better compared to using tablet apps. It's great to have such a huge variety of software to choose from.

There are still some bugs with Windows 10 but none critical. Bugs are always annoying. E.g. The tablet showing black screen even when it's on, which forces you to restart, Windows Start button occasionally not working when it's being clicked.

DRAWING EXPERIENCE

When it comes to accuracy in tracking, latency and the feel of the tip on the screen, I'm more than satisfied with the SP4 and its Pen.

Tracking is accurate. The cursor is always under the tip regardless of the tilt of the pen. There's no parallax error as the screen isn't too big to begin with, and there's no noticeable gap between the display and the glass surface.

Here's the list of applications that I've tried:


Pressure sensitivity works wonderfully with most drawing software, with the exception of Photoshop at least on the Surface Pro 4 (more on that later). The sketch above is drawn and coloured with MediBang.

While the tracking is not instantaneous, it has never made me frustrated before. Sure the strokes may come out slower behind the pen tip but it's like some micro-second lag. For drawing, the lag is not significant, but for writing or taking notes the lag is not a pleasant experience.


The main downside to the drawing experience are the drawing apps whose user interface are not optimized for high resolution small screens. For example, in Photoshop and MediBang desktop software, their menus and buttons are just too small making it a challenge to accurately click on something you want, either with the cursor or finger. There's a workaround though, which is to use another app called Artist Pad to create bigger buttons.

Overall, the applications on SP4 runs fast and breezy.

Palm rejection as a feature is not found in many drawing apps that I've used, except for Sketchable. It's a good feature to have but not a deal breaker. This means you have to lift your hand off the screen when drawing. If you really want palm rejection, you can actually turn off the touch screen and have it register only the Surface Pen (via disabling the HID-compliant touch screen feature through Device Manager).

Oh, about Photoshop... I'm using Photoshop CS6 Windows and I cannot get the pressure sensitivity to work with the SP4 pen. CS6 doesn't have touch features and does not support pinch zoom or finger panning. It's really not an application I recommend to be drawing with on the SP4. I can't say anything about the Photoshop CC as I've not used that.


Some sample strokes from Mischief. Generally speaking, most digital stylus would have that problem of wobbly diagonal lines when drawing them slowly. That wobby line issue is present but it not so significant. The software or OS does correct the slow diagonal lines to make them straighter and smoother.


When I'm creating line art, the issue with wobbly line is not that big a problem and I usually don't notice it.

Overall drawing experience. It still feels like you're drawing with a digital stylus. Not sure if that's a good or bad thing. But the main thing is, the SP4 pen is very capable. Drawing experience is satisfactory.

COMPARED TO IPAD PRO

I'll put out a more detailed comparison to iPad Pro in the future. The short review is, iPad Pro's hardware is as powerful as Surface Pro 4. The only significant difference is the variety of apps in the app store of iOS and Windows Store. There should be no problem finding alternatives but the two apps I really miss on the iPad are Paper by FiftyThree and Procreate. However, there are also apps not available on the iPad, such as all the desktop apps.

Each platform has their own strength and weakness, and also their own must-use apps.

It really depends on what you want to do with your tablet. For me, the SP4 just has more functionality. For simple things like uploading files to a website, e.g. uploading a picture to DeviantArt, you can't even do that with the iPad because they have no file system. Many times I want to browse the desktop version of a webpage and on the iPad I find it difficult to do so at times because some websites will automatically direct you to their mobile site with no option to choose the desktop version.

iPad Pro weighs 713g so it's lighter.

I've used the Apple Pencil and I feel that it's provides slightly better drawing experience compared to SP4 pen. It really feels less like a digital stylus on the tablet and more like traditional. That I feel is because the way the Apple Pencil is designed which is longer and the firm tip mimics the firm tips of pen and pencil. However, the Apple Pencil tip is still real smooth on the glass surface.

The biggest thing for me with the SP4 is you don't have to transfer your tablet sketch to your main computer to work on it further. You're already working on computer running desktop software. I still prefer the SP4 because of the additional functionality which I find extremely useful, and really improves productivity.

COMPARED TO CINTIQ COMPANION

I've not used the Cintiq Companion 2 before so I can't really make an informed comparison. The only thing I can say is, the pressure sensitivity on the Surface Pro 4 works very well, but it certainly cannot match the sensitivity of Wacom Intuos tablets.

One thing I noticed is it's more challenging to creating lines of alternating thickness. If you look strokes from Mischief from above, you'll see that when I release the pressure, the lines tend to be a bit more jittery. But the thing is, when you're testing for such things, they will show up, but when you're actually drawing, at least for me, this is not something that I see in practice.

CONCLUSION

While I bought my Surface Pro 4 secondhand, I've to say that it's worth the money even at its original retail price.

This is a well designed tablet with specifications powerful enough to run demanding software. If you have the budget, you can even configure a more powerful machine additional storage, graphics, RAM.

For digital painting and sketching, I recommend the 8GB RAM, 256GB Storage, i5 model or better.

Overall, I'm generally impressed with the snappy performance and drawing experience. The only thing I don't like is the battery life which can be better.

If you're looking for a tablet for drawing digitally, the Surface Pro 4 is a good choice.

Pros
+ Sturdy build quality
+ Has USB 3 port for extra functionality
+ Has mini-DisplayPort to extend working space on external monitor
+ Has microSD slot for additional storage expansion
+ Nice weight for its size but too heavy for handheld drawing
+ Built in stand with many positions
+ Pressure sensitivity of Surface Pen is good
+ Surface Pen feels good to draw on the screen
+ High resolution of 2736 by 1824 on a 12.3-inch screen
+ Screen has good viewing angles and colours
+ A larger screen feels better to draw on, e.g. more canvas space
+ Good stereo speakers
+ Able to install desktop and tablet apps
+ Snappy performance
+ Surface Pen is included
+ Lots of different configurations available

Cons
- Battery life could be better
- Desktop apps not optimized for tablets usually have small menus and user interface
- Surface Pen buttons have limited customization
- Surface Pro 4 Pen is slightly less sensitive than old Surface Pen
- Windows OS is so customizable it can be confusing, or not easy to find what you need
- Windows 10 still slightly buggy

AVAILABILITY

You can check out more reviews on Amazon. Below are direct product links to various configurations of the Surface Pro 4.

128 GB, 4 GB RAM, Intel Core M3 (Dual 0.9Ghz)
Amazon (US | CA | UK | DE | FR | IT | ES | JP)

128 GB, 4 GB RAM, Intel Core i5 (Dual 2.4Ghz)
US | CA | UK | DE | FR | IT | ES | JP)

256 GB, 8 GB RAM, Intel Core i5 (Dual 2.4Ghz) - Recommended
US | CA | UK | DE | FR | IT | ES | JP)

256 GB, 8 GB RAM, Intel Core i7 (Dual 2.2Ghz)
US | CA | UK | DE | FR | IT | ES | JP)

256 GB, 16 GB RAM, Intel Core i7 (Dual 2.2Ghz)
US | CA | UK | DE | FR | IT | ES | JP)

512 GB, 16 GB RAM, Intel Core i7 (Dual 2.2Ghz)
US | CA | UK | DE | FR | IT | ES | JP)

Tags: 

Artist Review: Macbook 12-Inch for Graphic Design and Art? (2015 model)

$
0
0

This review is for artists and designers wondering if the Apple 12-inch Macbook is good enough for graphics work. The short answer is yes it's powerful enough but it has serious limitations. It's just not the right laptop to do the job. However, I was still interested enough to see how it actually fares so I borrowed a unit to test it out.

The unit that I have is the dual-core 1.1GHz, 8GB RAM, 128GB flash storage and Intel HD Graphics 5300.

Hardware


When I first hold it in hand, I'm really impressed by the size and weight. It's actually just slightly bigger than my old 9.7-inch iPad Air. It's also about the same thickness. It weighs just 920 grams.


It's actually smaller than the 12.9-inch iPad Pro that weighs 713 grams, and that's without the keyboard.

Here's a table comparing the Macbook and the Macbook Airs.

Macbook 12-inchMBA 11-inchMBA 13-inch
Weight920g1.08kg1.35kg
Screen size12-inch11.6-inch13.3-inch
Resolution2304 by 1440 1366 by 7681440 by 900
ProcessorDual 1.2Ghz (max)Dual 1.6GhzDual 1.6Ghz
GraphicsIntel HD Graphics 5300Intel HD Graphics 6000Intel HD Graphics 6000
Ports1x USB-C2x USB 3, Thunderbolt 2, MagSafe 2 power port2x USB 3, Thunderbolt 2, MagSafe 2 power port, SD card slot
Battery life9 hours9 hours12 hours
PriceCheck on AmazonCheck on AmazonCheck on Amazon

Macbook's screen is a LED-backlit IPS panel so colour reproduction and viewing angles are great. The only downside is its glossy screen, but that also makes the colours more vibrant. Personally, I prefer matte screens.


Speakers are just above the keyboard and they sound good.


The keyboard almost fills the whole of the bottom part and there's a large trackpad.

Unfortunately, the keyboard isn't comfortable to type on. Vertical space of the buttons is reduced. There's almost no feedback when pressing the buttons. It's almost light typing on a piece of paper. Go ahead, put a piece of paper on your table and pretend to type on it. It feels similar to that.

There's only one USB-C port


There's only one port on the Macbook and that's the USB-C port. Yup, nothing else. I personally find it quite limiting because having a normal USB port, that rectangular one, would have so much more useful.

This USB-C port also doubles as a charging port.

The people who won't be affected would be those who work in wireless mode all the time. When you want to transfer files, you either have to transfer it to the cloud, maybe to Dropbox or Google Drive first before you can sent it to someone else. If you want to transfer files from your Apple desktop, you can use the AirPlay function but I find that it does not work consistently and because of that it can be quite frustrating to even transfer a file to another computer.


If you need to use any USB devices, such as plugging in your iPhone or iPad, you'll have to buy a USB-C adapter. The Apple USB-C Digital AV Multiport Adapter sells for more than USD $70 on Amazon. USB-C technology is new so the accessories are more expensive, and Apple's official accessories even more expensive.


The Multiport Adapter is quite useful though as it has a USB-C port, standard USB 3 port and a HDMI port. So you can still charge the Macbook with the adapter and use the USB port at the same time.

Cheaper multiport adapter are available on Amazon too, thankfully.

As for the HDMI port in the adapter, that's only good enough to run a 1080P resolution. If you plug the HDMI into a monitor with higher resolution than 1080P, such as a 27-inch monitor with 2560 by 1440 resolution, everything will appear pixelated. Even though the Macbook technically is powerful enough to power a 4K screen, the thing is you'll need a DisplayPort adapter and that means you'll have to spend extra money again.


While the trackpad on the Macbook is awesome, I still prefer using a Bluetooth mouse (Logitech M557) I find more productive to use.

Running graphics software

IMPORTANT: Before you get this Macbook, or any of the laptops from Apple that has Retina screen, check whether or not your software has been updated to take advantage of the higher resolution.

This Macbook runs a resolution 2304 by 1440 which is just slightly lower than my Dell U2711 with 2560 by 1440. The user interface on the Mac appears to extremely sharp and the screen's a pleasure to surf the web or watch a video with.


However, if you're running older graphics software, you might have a problem. Deal breaker: Graphics software like those from Adobe CS5 and CS6 are not optimized for the Retina screen. As such, their user interface will appear pixelated. Not only that, the files, your graphics will appear pixelated too. It's a common complaint you'll see on the Apple forums, and it's common because many artists and designers did not realize that old Adobe software will not be supported in this new Macbook. Yes you can still use the software, but you won't feel like using them because of the pixelation. It has been years since Apple released laptops with Retina screens and Adobe has not released any updates for their CS5 and CS6 software to take advantage of the higher resolution screen.


This is a 100% crop from Adobe Illustrator CS5. Unacceptable.

In short, if you plan on using Adobe software on this 12-inch Macbook, you'll need to use Adobe CC. If you're running older Adobe CS, you have to factor in the extra cost of upgrading. And guess what, this only affects Mac users because on the Microsoft Surface Pro 4, the Adobe CS interface looks sharp and fine.

Thankfully, there are other graphics software out there. When it comes to drawing and painting, I recommend Mischief and MediBang Paint Pro both of which are free and a pleasure to draw on.


Adobe Lightroom 5.7 supports Retina screen. However, photo editing on this Mac is really slow. I tried to export ten 12MP photos and it took me 40 seconds. Macbook Air would have been much faster and the Macbook Pro significantly faster.


Sketchup runs fine but there's lag with a complicated high poly-count scene with texture.

Conclusion

Even though the 12-inch Macbook has a Intel Core M dual 1.2Ghz processor, it still runs snappy and has no problems working 2D graphics files, digital painting and some basic 3D modeling with Sketchup. Personally, I feel that the 12-inch screen is a bit small for creating graphics.

This Macbook is not the right laptop for processor intensive tasks, such as rendering photos or videos. I did not even try exporting any videos. A 15-minute export of a 1080P video with my Mac Pro would have taken 1 hour on this laptop.

Who's this Macbook for?

It could be for people who write a lot but the keyboard sucks. It's fast enough to run graphics software but the screen is small and the USB-C port is so limiting. So my guess is, it's for those who want to surf the web or occasionally need to write, like posting comments on websites. LOL. Basically, it's for those who want to use the laptop like the iPad but want a bit more functionality because of the desktop software available.

The main selling point for this Macbook is the portability. It's light (920g) and thin. Other than that, I feel other laptops are better value for money. In fact, I would recommend, for the price you pay for the 12-inch Macbook, it's better to get the 13-inch Macbook Air, Surface Pro 3 or Surface Pro 4 with their Type Cover.

If you're really into Mac, the 13-inch Macbook Air is a much better deal. It is still light and compact relatively speaking compared to other laptops. The lower resolution of the Macbook Air (1440 by 900) is not a downside. And the USB 3 ports extremely useful.

So my overall recommendation is to avoid the 12-inch Macbook is you're an artist or graphic designer. There are better choices out there.

Here are the pros and cons at a glance:

Pros

  • Solid build quality
  • Sharp 2304 x 1440 resolution screen
  • IPS screen has good colours and viewing angles
  • Lightweight at 920g
  • Compact
  • Battery life at 8-9 hours

Cons

  • Keyboard sucks
  • Only one port and it's a USB-C port
  • Expensive adapter required to use other USB devices
  • A huge compromise between portability and functionality

Availability

Check out more reviews on Amazon:
Amazon.com | Amazon.ca | Amazon.co.uk | Amazon.de | Amazon.fr | Amazon.it | Amazon.es | Amazon.co.jp

Tags: 

Artist Review: Dell Precision 15-inch 5000 Series (5510)

$
0
0

This review will be from the perspective of someone who uses this to create graphics, e.g. 3D work, graphic design, photo and video editing. The software I use for this review includes Photoshop and Illustrator CS6, Lightroom 5.7, Maya 2016, Medibang Paint Pro and Mischief.

I'm not into benchmarks and running numbers. Those tests don't mean much compared to using the laptop to do actual work. However, I will compare it to the Mac Pro 2013 (Xeon Quad 3.5Ghz) that's my main machine at home, and also my office computer, an Intel i7 Quad 2.93Ghz with Nvidia GT520 (oh yeah, it's old and creaking). Oh, I don't game.

Disclaimer: Dell loaned me a unit for two weeks for this review

The Precision series are the workstation grade laptops from Dell. They have top of the line specifications normally seen in desktop computers. As such, their prices are also higher than normal laptops. The Dell 5510 is also known as the M5510.

Are they suitable for digital artists? It depends on what you want to do on it.

Specifications

The model that I received has the following specifications:

  • Xeon E3-1505M v5 (Quad Core 2.80GHz)
  • Glossy IGZO 3840 by 2160 resolution screen
  • 1TB PCIe SSD
  • 16GB RAM
  • Nvidia Quadro M1000M 2GB
  • 6-cell (81Wh) battery

That adds up to USD $3134 not including tax.

The default configuration cost $1399 and comes with the following specs:

  • Intel i5-6300HQ (Quad 2.3Ghz)
  • 1920 by 1080 IPS panel with anti-glare coating
  • 500GB 7200RPM 2.5-inch SATA drive
  • 8GB RAM
  • Nvidia Quadro M1000M 2GB
  • 3-cell (56Wh) battery

My recommended specs

The laptop is incredibly customizable through Dell's website. You can customize almost everything except the ports and graphics card.

Do not under any circumstances get the default 7200RPM drive. Storage drives have always been the bottleneck of any system. I recommend getting a SSD which will make any system so much more responsive.

The options for storage drives are determined by their connection. There are the PCIe (small) and 2.5-inch SATA (bigger). If you go for the smaller PCIe SSD drive, you will have the extra space inside the laptop to get the better battery...

Battery life for the 6-cell (81Wh) battery is between 5 to 6 hours. Using the smaller capacity 3-cell (56Wh) means you have to be near a power socket all the time. Spend the extra $49 and get the better battery. On the good side, the battery charges extremely fast, like close to a full charge under 1.5 hours.

It's best to get 16GB RAM. That's worth the money also.

The default model needs to be configured to get what I call the real workstation.

Design


When I first took the laptop out of the box, I was surprised by the size. It's not much bigger than ordinary 15-inch laptops. I was expecting something really thick. The 5510 measures at 1.1cm thick, not including the screen.


The screen is quite thick by itself at 5mm.


The build quality is fantastic, sturdy. Metal is used for the exterior and the palm rest uses carbon fiber which feels so nice to touch. However, from what I've read, the downside is they are prone to collecting grease from the hand and difficult to clean. I've not used the laptop enough for it to collect hand grease yet.


Underneath the laptop are two long stripes of rubber to prevent slipping. There are also grills for ventilation (more like getting air in). The fan blows out hot air from below the screen. Those two grills at the bottom left and right at the speakers. They are pointed downwards so you need to put the laptop on the tablet for the sound to reflect towards you. If you're using it on your lap, the sound will sound muffled.

As I was swinging the laptop in the air, I felt the weight. It's not light. My bathroom scale says it weighs 2.1kg. When you consider the specifications, it's considered light.


The keyboard is great for typing. Well spaced with good vertical distance.


Keys will light up when the surrounding is dim.

Screen


The screen on this unit has the IGZO 3840 by 2160 (4K) glossy screen which is quite thick to me. The bezel is really thin so the screen feels really expansive.


I don't like that it's glossy as I've always found glossy screens to be distracting.

The default configuration is an IPS panel at 1920 by 1080 resolution with NTSC 72% color gamut.

The IGZO panel is marketed with 100% Adobe color gamut and cost an additional USD $299. When I look at the 4K screen, the colours are really good, deep and vibrant. The 4K resolution makes almost everything look sharp. Almost.

Important
The deciding factor to choose either the 1080P or 4K screen depends on what software you'll be using. Not all software have their user interface updated for use on such high resolution screens.

For example, older software like Adobe CS5 and CS6 have incredibly tiny menus and tool buttons that are so frustrating to use that you'll feel like tearing your hair out. The alternative is to upgrade to the latest Adobe CC which means you'll have to fork out additional cash, monthly. Maya 2016's menus and buttons look small, but not as tiny as Adobe CS5 & CS6. Lightroom 5.7 has UI at satisfactory sizes.


Above's a screenshot of the tiny user interface from Photoshop CS6. Click for a 100% view. Or better, download it to your computer and scale it down to 15-inch diagonal with your ruler to get a sense of what you will be looking at.


You can apply a hack to scale up the resolution however everything, e.g. Photoshop images or Illustrator vector art, will look pixelated because in essence you're upscaling a low res interface for a high res screen. Again, click the above for a 100% view.

I recommend you research at the respective forums to see if your software supports such high resolution or Retina screens.

Oh, the IGZO screen is a touchscreen by the way. It's convenient to use at times but if your fingers are oily, be prepared to see lots of finger prints. The touchscreen works well with fingers and badly with stylus.

Ports

These are the ports included.

  • 1 Thunderbolt 3
  • 2 USB 3.0
  • 1 HDMI
  • 1 SD card reader
  • 1 Headphone and microphone combo jack


These are the ports on the left and right. They actually have the new Thunderbolt 3 port which doubles up as a USB 3 Type-C port.

Those ports blazing fast when it comes to transferring large files. I can plug in the USB 3 thumb drive, drag the files to the desktop and it will start copying instantly, at few hundreds MB per second. Just for comparison, my Mac Pro has to wait for the drive to mount, and when I copy, it will pause for a while before copying and copying speed doesn't feel anywhere near this Dell laptop. Very impressive!

Performance

The default configuration has an Intel i5-6300HQ (Quad 2.3Ghz). The unit I have has the Xeon E3-1505M v5 (Quad Core 2.80GHz). The other option is the Intel i7-6820HQ (Quad Core 2.70GHz). From benchmarks I've read from other technical reviews, the Xeon processor is faster than the i7 and is probably worth the extra $70 over the i7.

Regardless of the processor speed you choose, you'll have no problem running 2D software like Photoshop, Illustrator, Indesign or any other digital painting software. Opening a 500MB file will take around 3-4 seconds.


Whether you want to upgrade the processor from the i5 to the Xeon will depend on what kind of work you frequently do and whether your software supports multi-core processing. In short, if you're into video editing or 3D rendering and use a software the takes advantage of multi-core processors, go for the upgrade. It's worth the money. Skip the i7.

This is the part where I can't be very specific about how fast the Xeon technically is.


I tried to render a busy cityscape scene with occlusion preset at 2K resolution and here's how long each computer took:

  • Dell 5510 Quad 2.8Ghz with Maya 2016: 2min 20s
  • Mac Pro 2013 Quad 3.5Ghz: 2m
  • Office Quad 2.93Ghz with Maya 8.5: 13+ min

Obviously Maya 8.5 is not using all the cores for rendering. Maya 2016 has written to handle multi-core rendering so the advantage is there.

Main point to take away here is the Dell 5510 took just 10% more time to render that scene compared to the Mac Pro. Impressive.

I usually render 3D work for newspaper infographics. To render a 2K resolution scene at production quality using 2 minutes is considered very fast to me.

If you're into animation and have to render frames at 1080P, you can render 30 seconds of 24fps footage in a day. It depends on the complexity of your scene yes, but with the multi-core and Maya 2016, it makes producing homemade independent animation more accessible now.

Next up, I compared the Dell and my Mac Pro when it comes to exporting a bunch of RAW photos. The Dell is slightly slower but not significantly so.

Once it starts rendering 3D or exporting photos, the fan revs up. I'm not sure how well the ventilation works but the fan does a good job getting the hot air out. It does get hot when it's rendering.

Unfortunately, I don't have any video editing software for Windows so I can't speculate how fast it is. But if I were to make a guess, it should perform close to my Mac Pro, and that is very satisfactory. Since this laptop has the option for a 4K screen, you'll be able to edit 4K videos.

So who is the 5510 for?

If you're buying this computer just for graphic design, 2D digital painting, photo editing, the Dell 5510 is a serious overkill. You can save your money by getting something cheaper but handle your work just as well. Mainly because you don't really need that good a graphics card in order to create 2D graphics.

The Dell 5510 is for people whose work requires a lot of processing power, such as rendering 3D models, animation or encoding videos. For videographers who have to work on location, I think this is a fantastic workstation. You can shoot a whole day's worth of wedding footage and churn out a video compilation at the end of the day without much stress because you know your laptop can do it.

Best laptop for Maya or 3ds Max? It's a good contender.

Lastly, I want to warn you about getting the 4K screen. Make sure your apps user interface are optimized for high resolution screens. If not, using those applications will be daily hell, that is unless you spend money to upgrade to the latest software.

The matte 1080P screen will work well with all applications but you have to compromise on the smaller colour gamut. I haven't seen that screen so I can't comment exactly on the quality.

Overall, if you value time, then yeah, this is worth the money.

Avoid those without SSD storage.

Pros and Cons at a glance

+ Good build quality
+ Looks good
+ Carbon fiber palm rest feels good
+ USB 3, SD card reader, Thunderbolt 3 ports are extremely fast
+ IGZO 4K screen is sharp and colour reproduction is wonderful, vibrant
+ Thin bezel makes the screen look expansive
+ Lots of configuration options
+ Once you add a SSD option, it's becomes a decent performer
+ Keyboard good for typing
+ Good stereo speakers
+ Decent weight considering the specifications
- Inclusion of a 7200RPM bottleneck drive as a workstation option
- Average battery life of 5-6 hours with the 6-cell (81Wh) battery
- Apps not optimized for 4K screens will have tiny frustrating user interface
- 4K screen probably use up a lot of battery power
- IGZO screen is thick
- You cannot upgrade battery if you choose the 2.5-inch SSD
- Windows 10 still has some bugs (not related to Dell)

Availability

To customize the laptop, just go to Dell's website. That's where you can also choose the different type of support or extend your warranty.

If you want to get pre-configured units, you can check out Amazon:
Amazon.com | Amazon.ca | Amazon.co.uk | Amazon.de | Amazon.fr | Amazon.it | Amazon.es | Amazon.co.jp

Tags: 

Viewing all 160 articles
Browse latest View live